
In this tutorial we will port the entire template to work on mobile devices. While it is true that it will compile and deploy without issues, there are still some things that require changes, for example make a touch screen do things other than just moving the camera around.
So let’s start from the beginning, first click HERE and install the Android SDK, then find USB drivers (ADB) for your device and install them, lastly enable Developer Mode on your device.
Now let’s move on to the template:
- Create a new Retro Game Starter Kit project, give it any name you want.
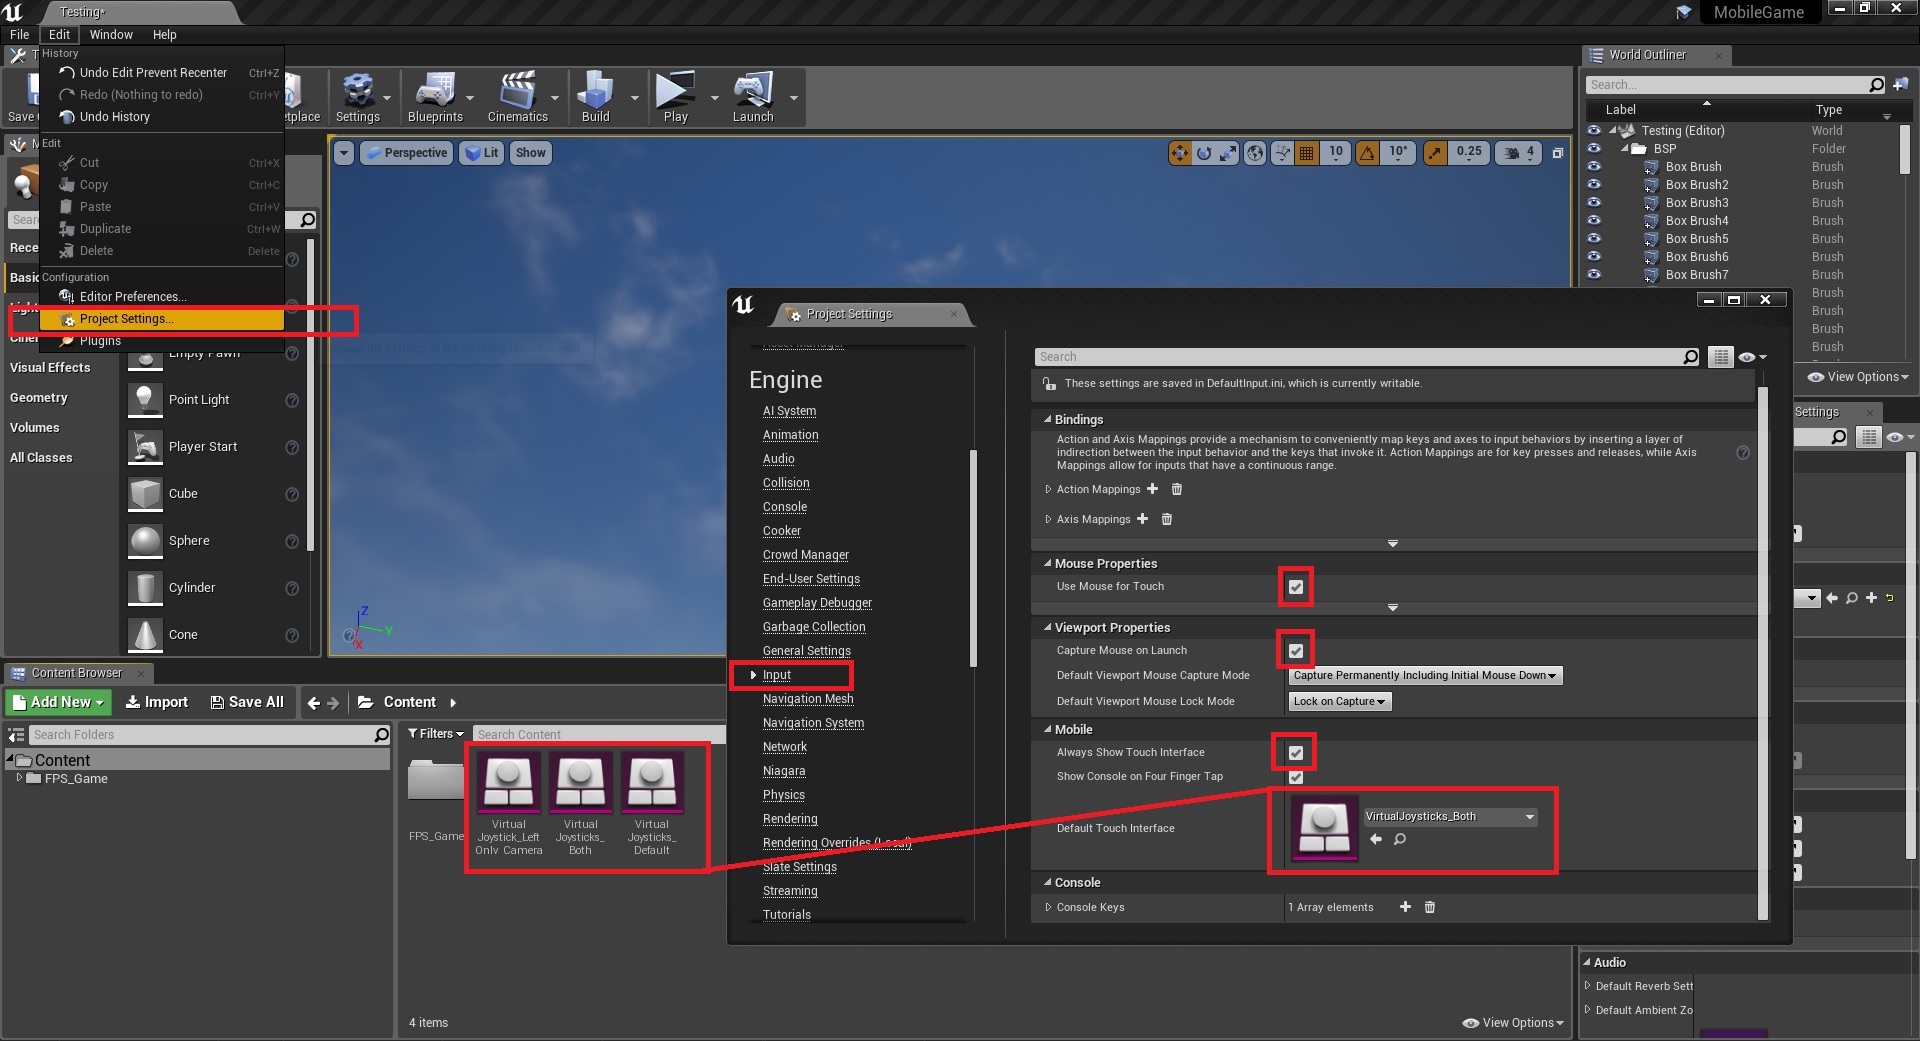
- Go to Project Settings > Input and enable”Always Show Touch Interface” and as the Virtual Joystick you can either use the default one from UE4 or create a new one with custom settings and image.
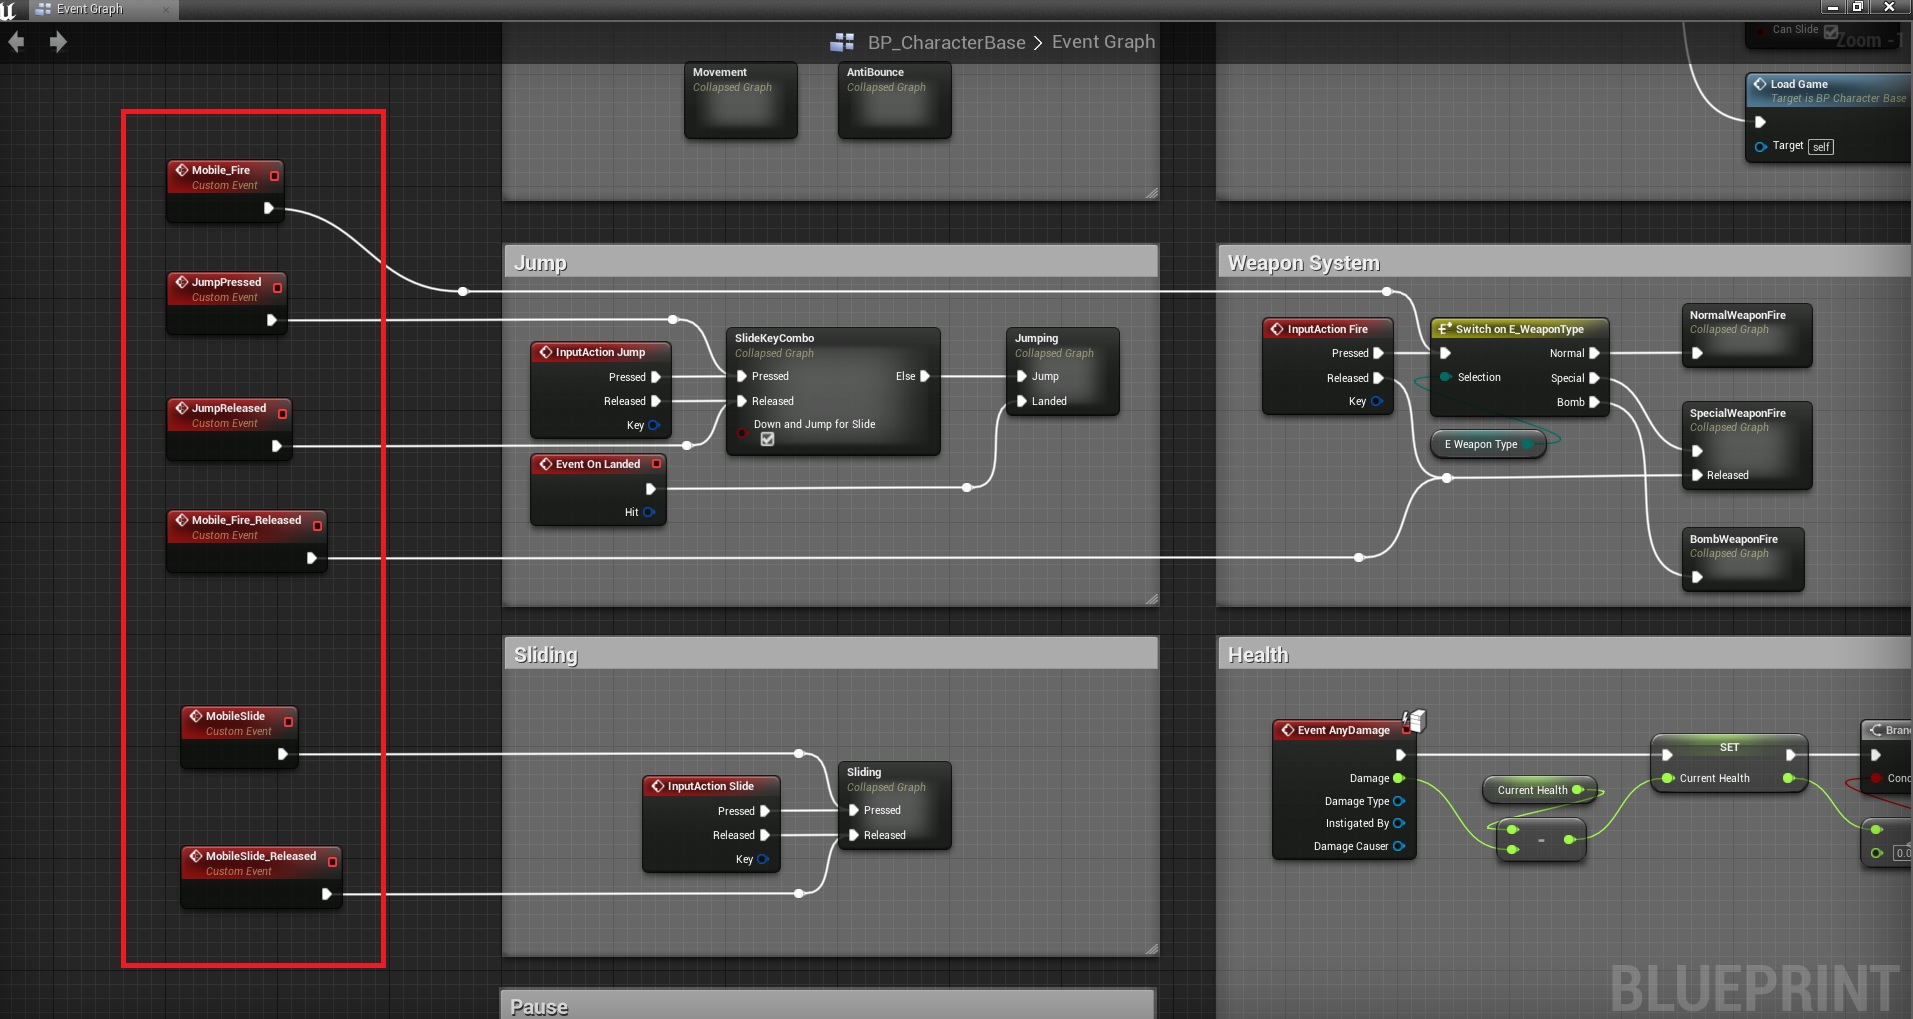
3. Open BP_CharacterBase and add Custom Events to whatever action you want the character to do on a mobile device. This is important because it’s the only way to call those events from a touch screen (without the use of external plugins or gestures).
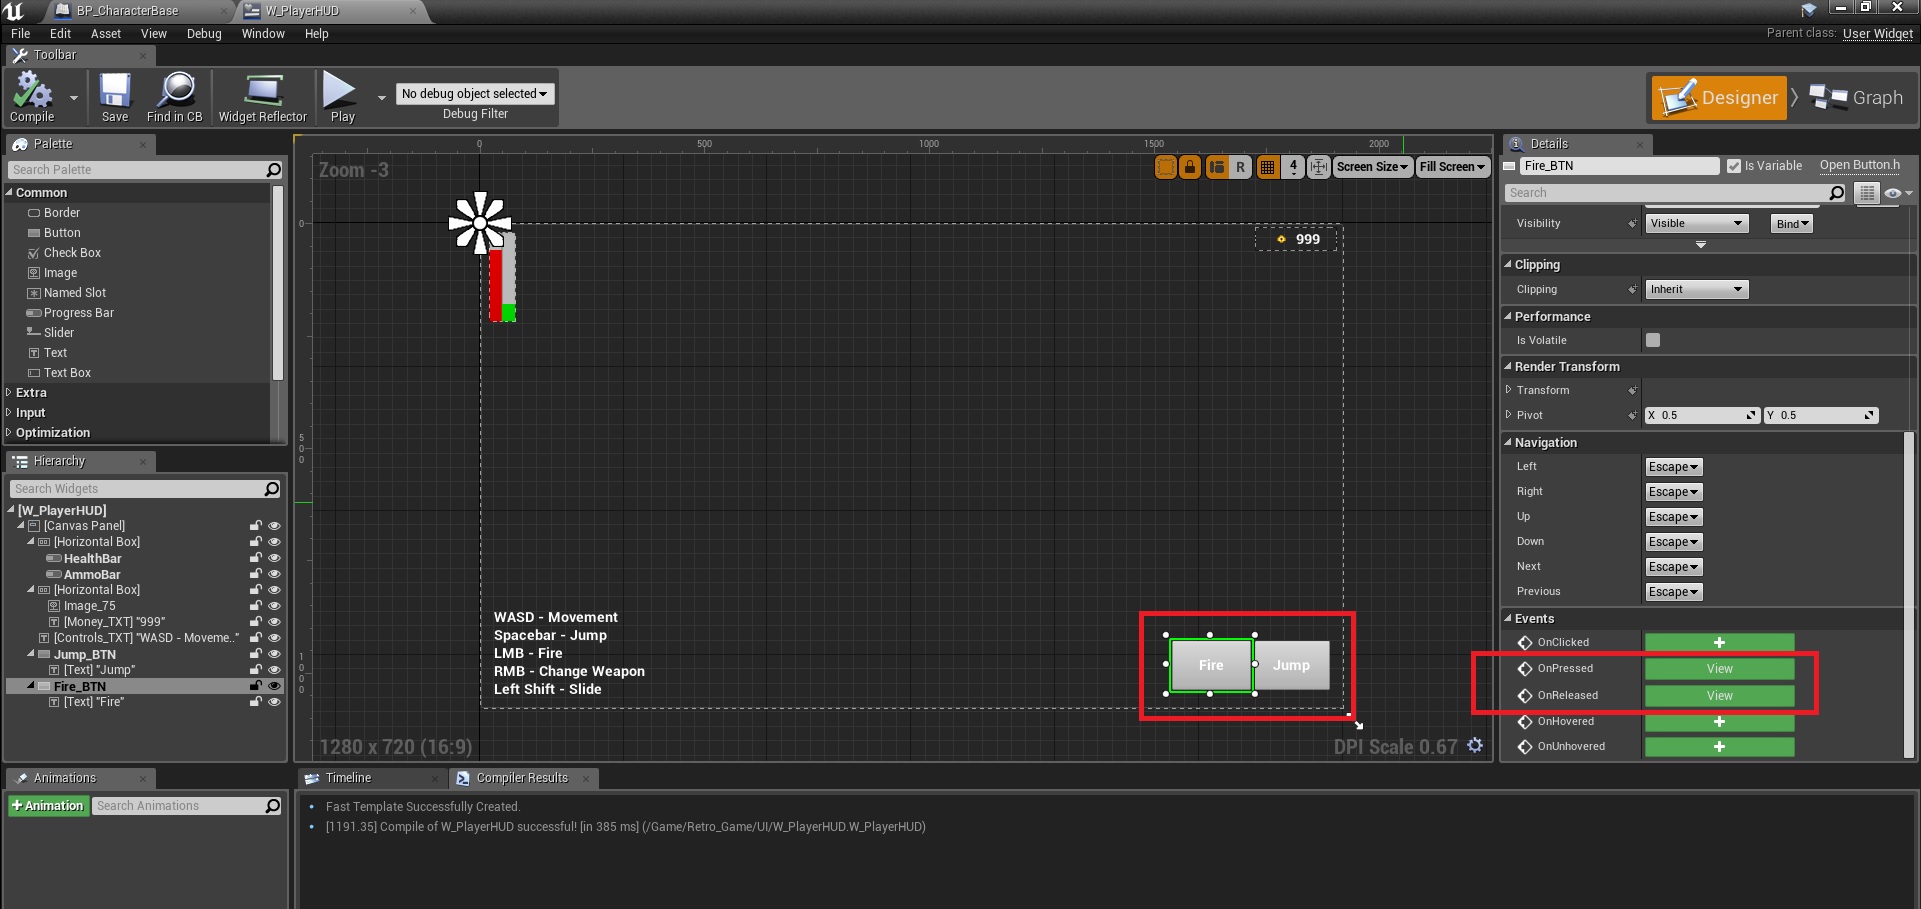
4. Now open W_PlayerHUD and add buttons anywhere you want, I put them inside a vertical box and placed it in the corner, but it’s up to you.
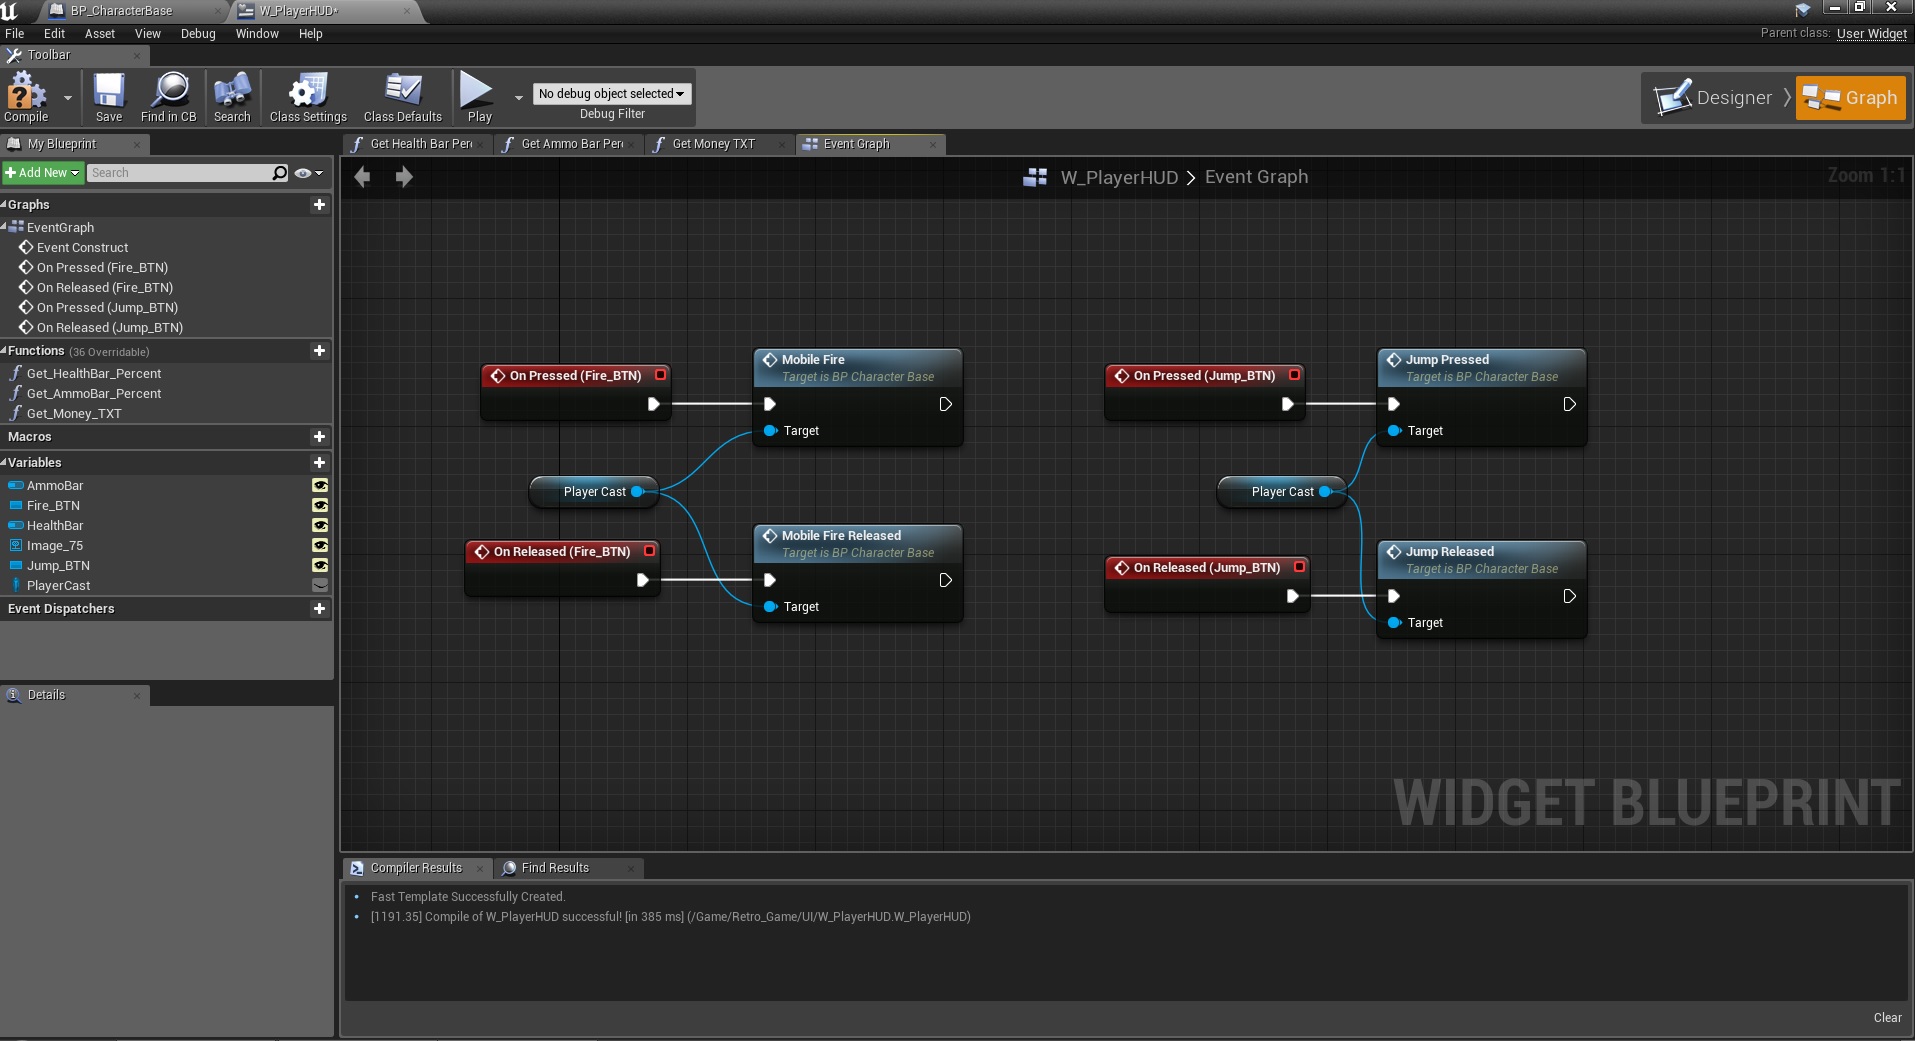
5. In the widget blueprint graph, connect the new custom events thta we created on the character earlier.
That’s it, when the game gets deployed on a mobile device, the buttons will be on screen and do the assigned actions. Basically the idea is to make a custom event on the character, a button on the widget, tell the button to call the event when pressed.
PS: be sure to check out the optimization guidelines from here.
