In this tutorial we will add a short cutscene to the level, Sequencer has a lot of options and you should watch Epic’s streams on how to use it to make some advanced stuff, but in this tutorial a simple camera movement will be used.
1. Add a new Cine Camera where you want this cutscene to start

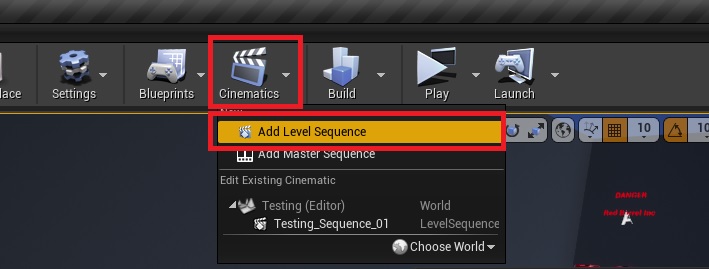
2. Create a new Level Sequence and give it any name you want
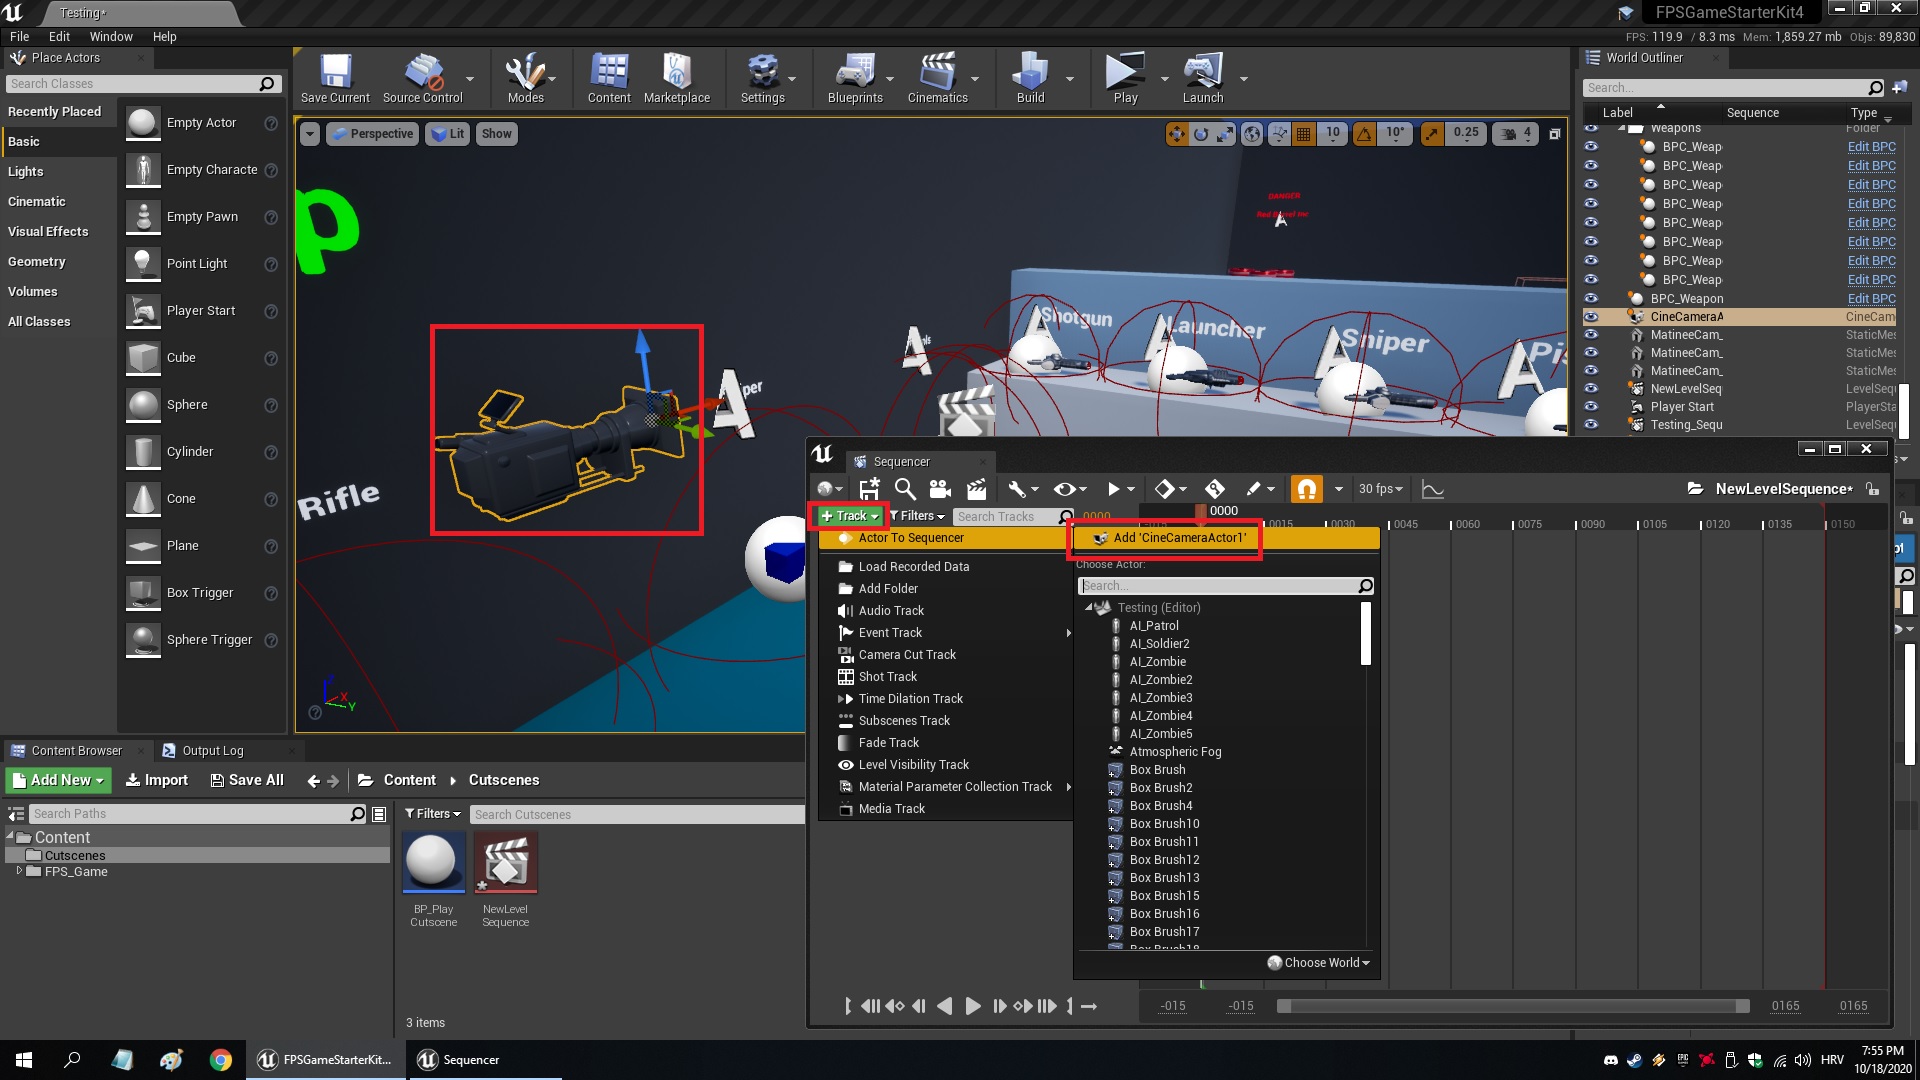
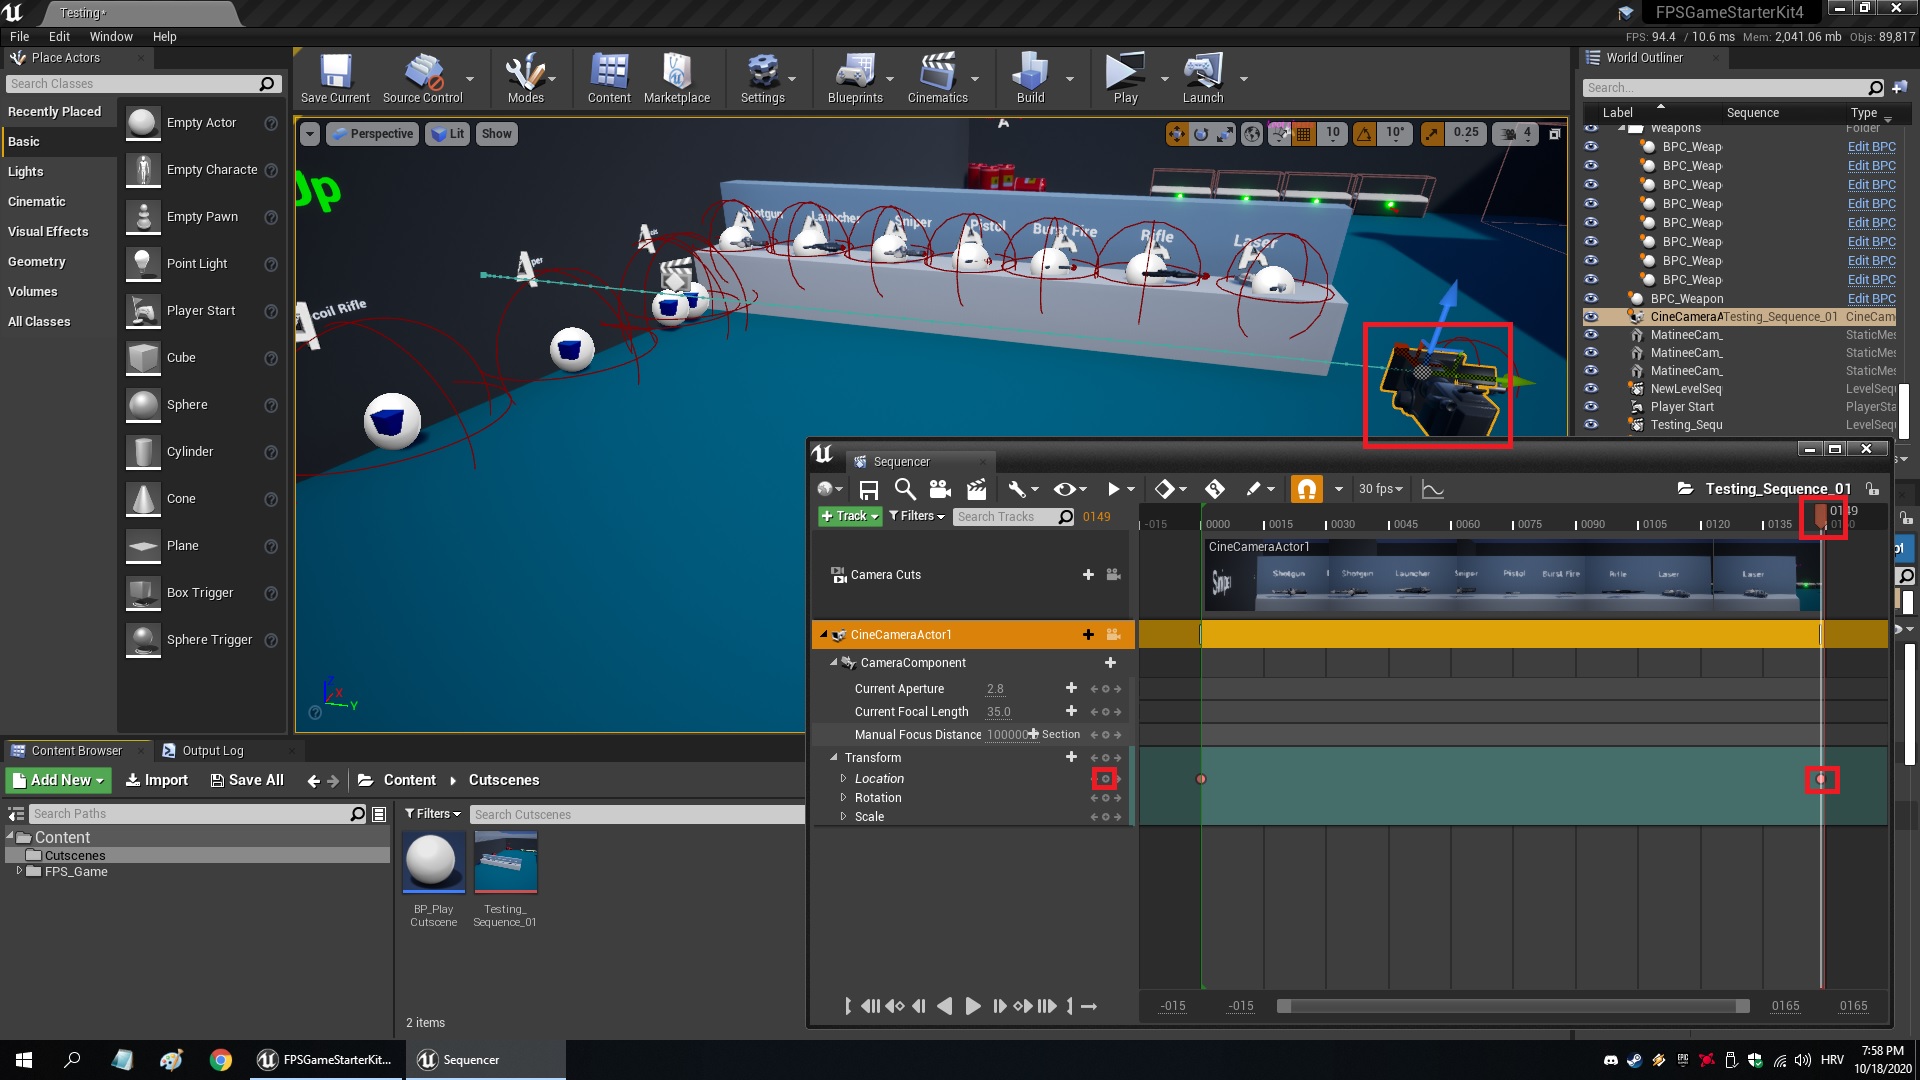
3. Open the Level Sequence, click on the Cine Camera, and add a new Track for that specific one, note that it needs to be selected or else you’ll have to browse for it manually.
4. Once the Track has been added, put the timeline thingy at the beginning and add a new keyframe, in this case we’ll use Location, but you can add a lot more if you want. You can even add some animations under the map somewhere, and put them in position using keyframes, then after it plays out put them back under the map or destroy them.
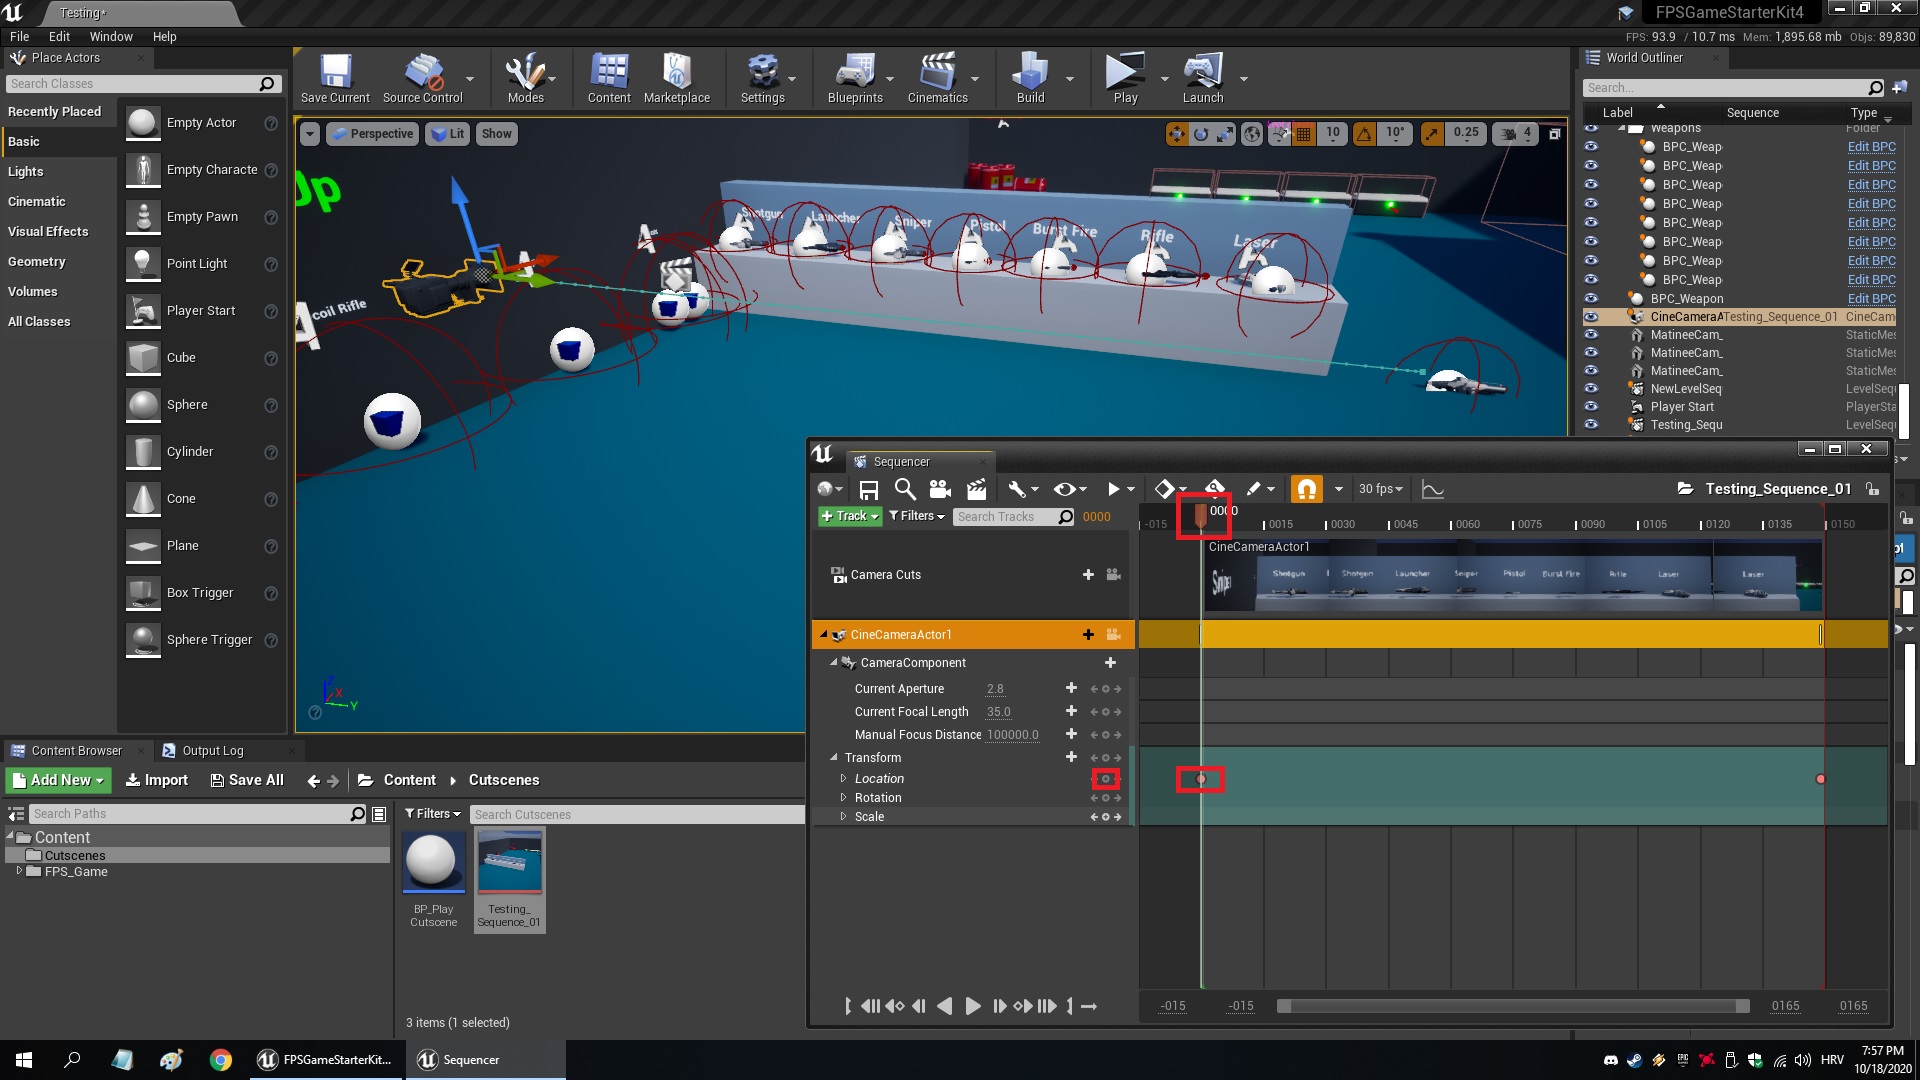
5. Now move the Cine Camera anywhere you want, then move the timeline thingy to the end and add another key, this is the end location of the camera, the reason for this specific order is because it will use the current location of the camera.
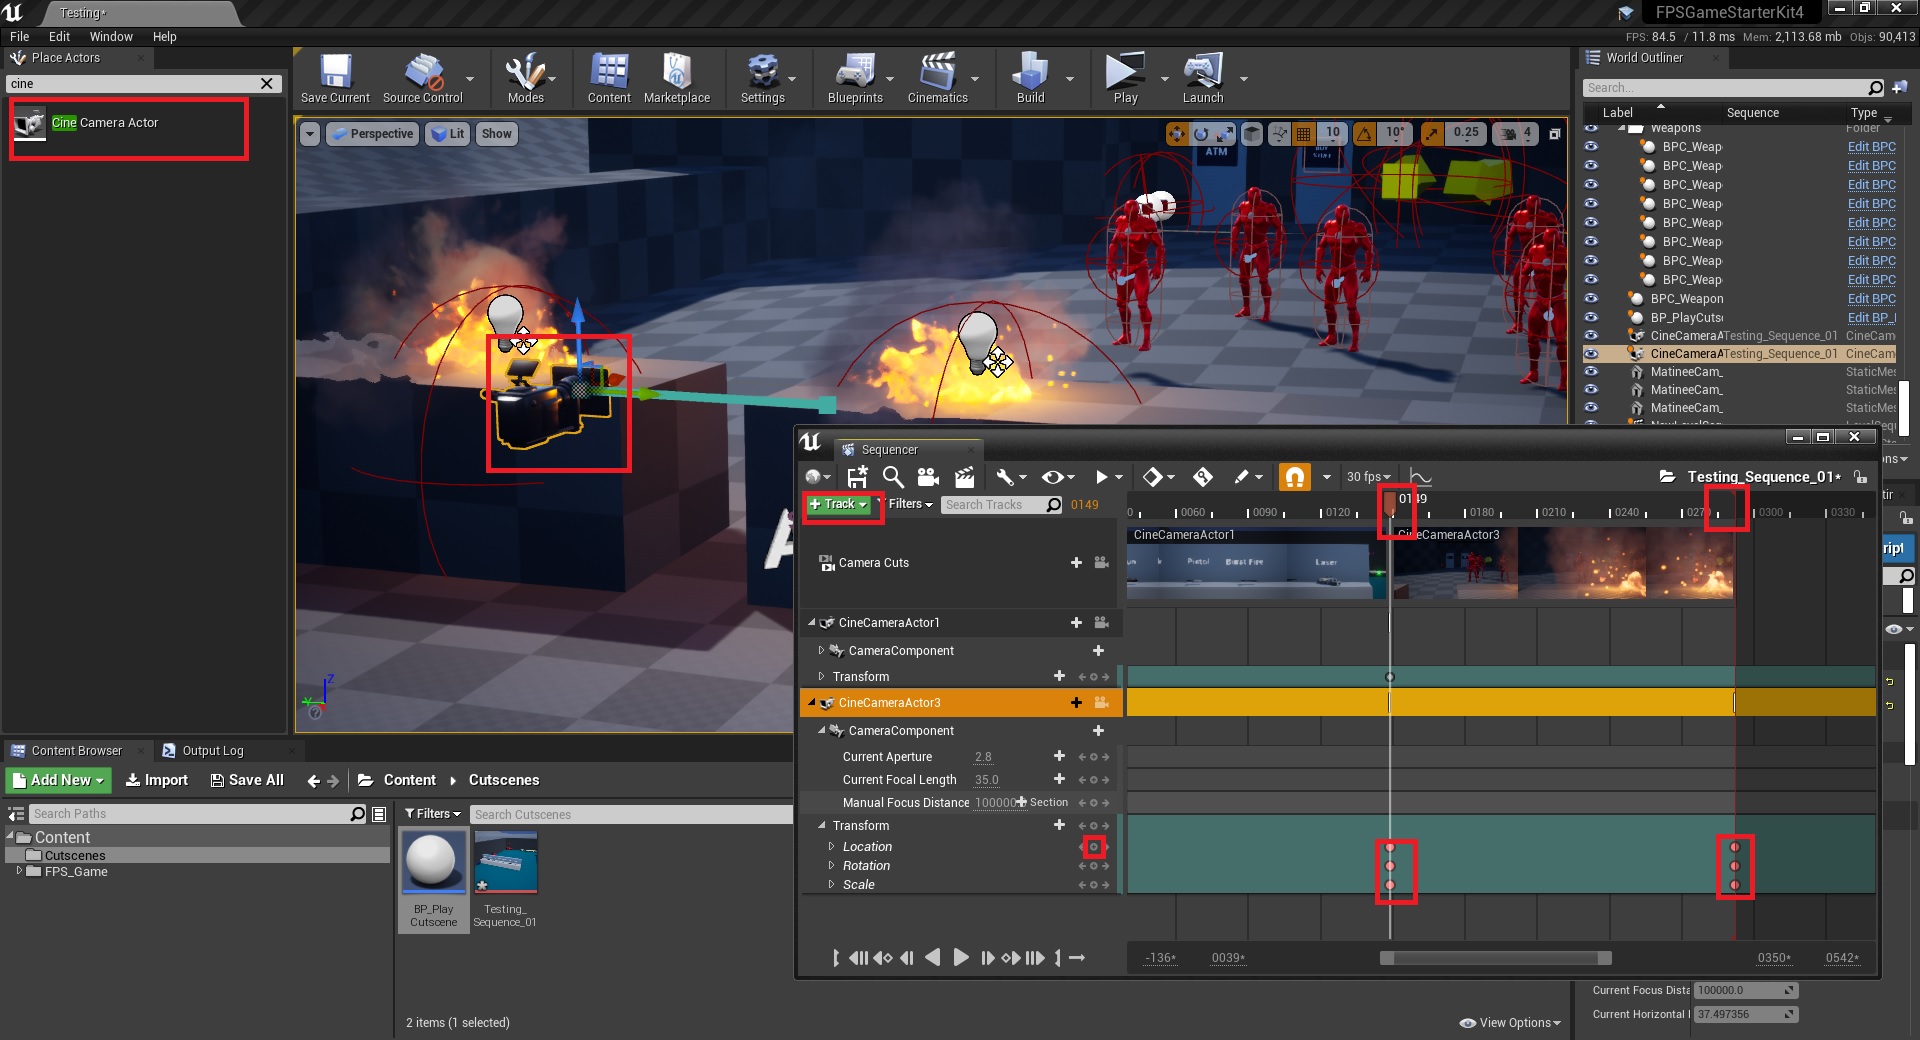
6. For the sake of “why not” let’s do the same for another camera, repeat the same steps (add camera, open sequence, select 2nd camera, add track, put the first keyframe where the previous one ended, extend the timeline and add an end location key for that camera at the end)
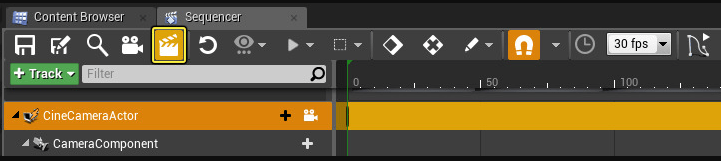
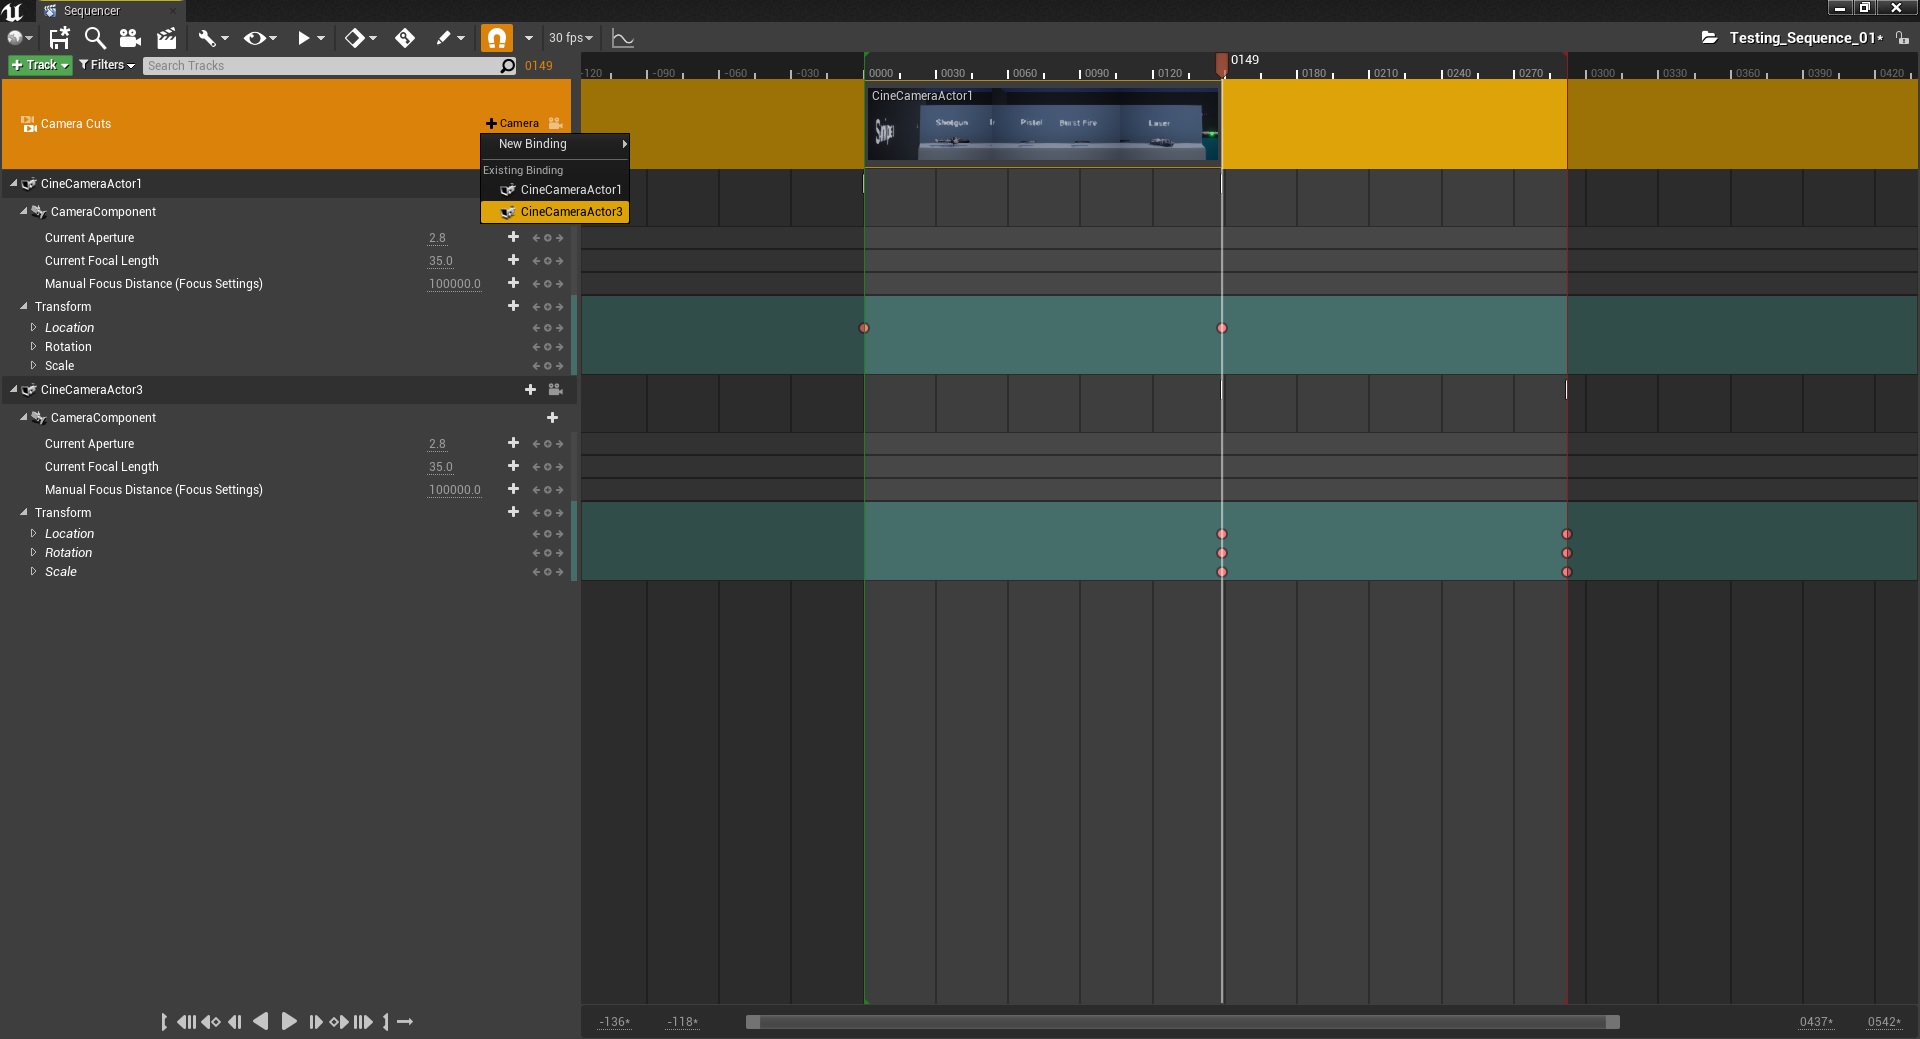
7. To add a “cut” and switch to the other camera, you need to add it here
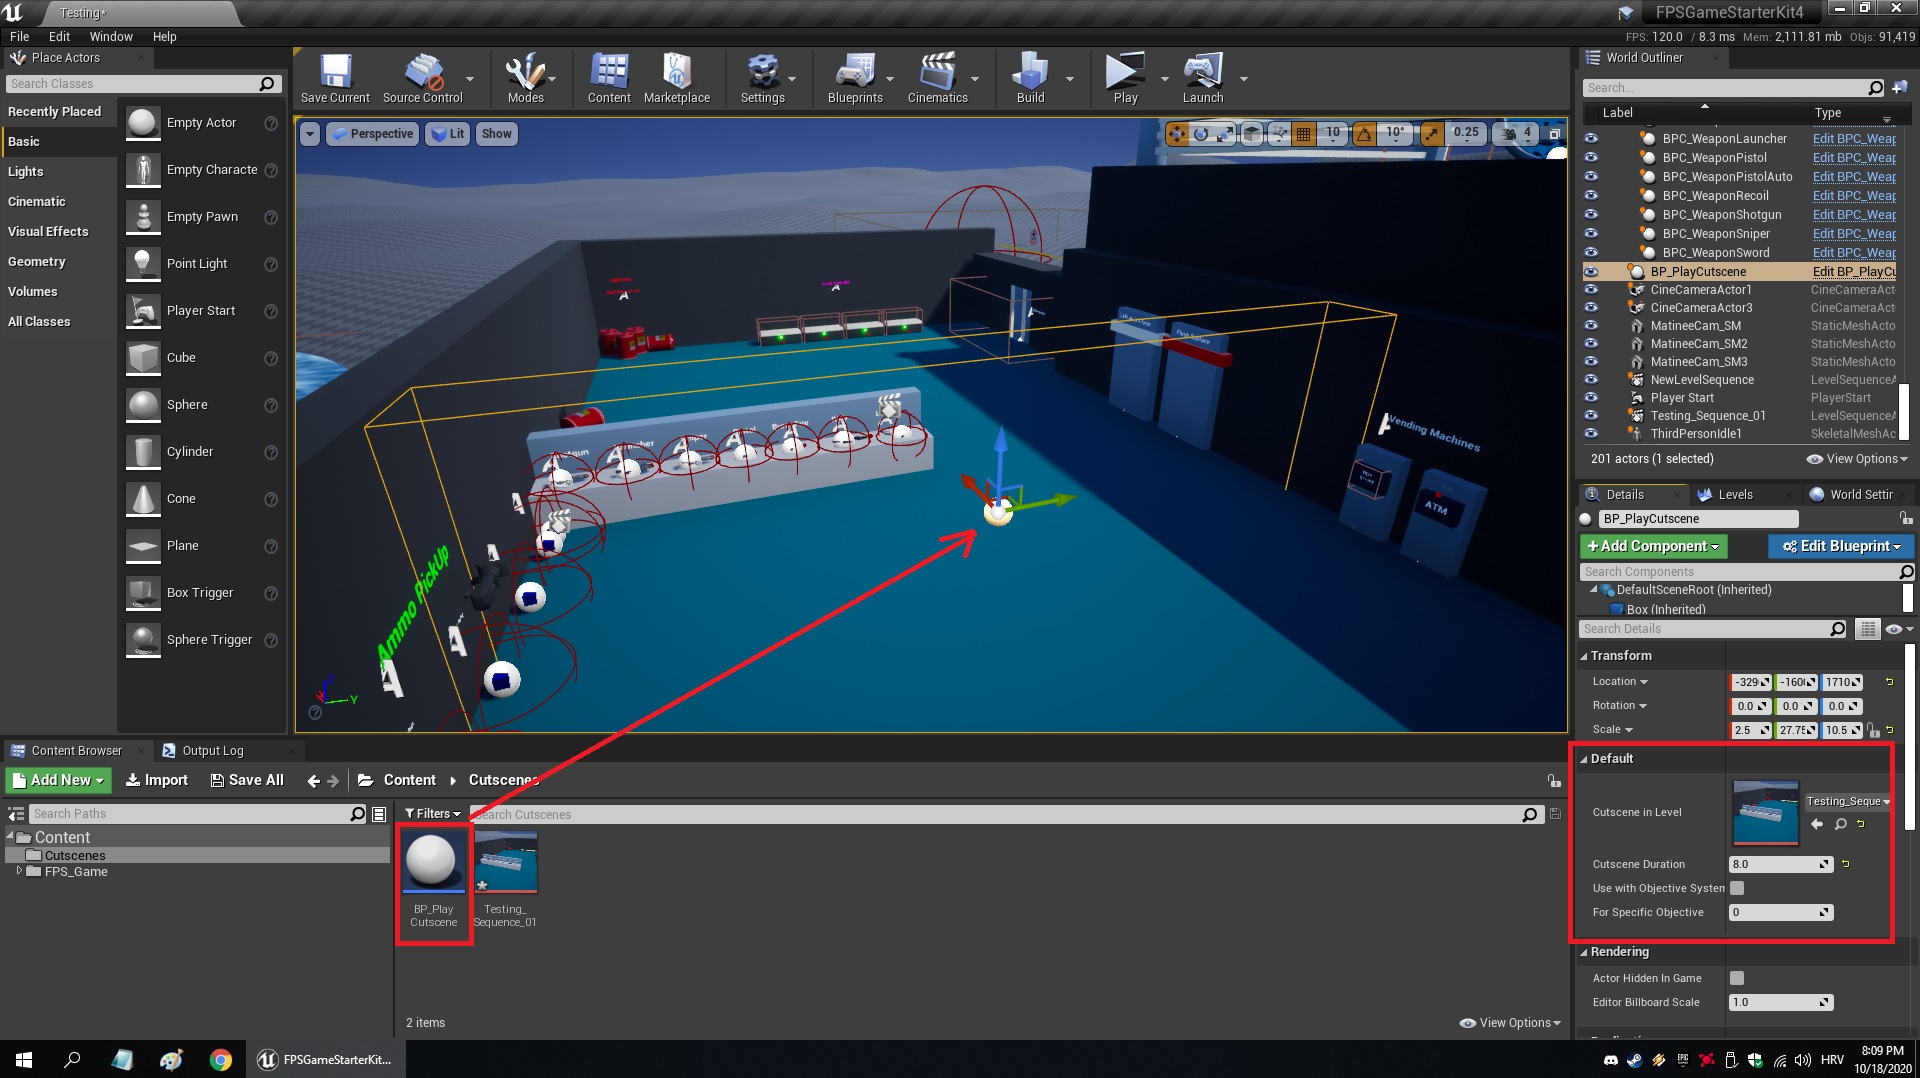
8. Download BP_PlayCutscene, extract it anywhere, and put the actor into the level, this is used for activating a specific cut scene when overlapping with the volume. Simply place it anywhere, drag it out based on your level design, and select what cutscene it should play on overlap.
With this you can add as many cutscenes as you want, tweak if they should play only if a specific objective is active, duration for HUD visibility and player input.
That’s it!
NOTE: if you just wish to render a video and export it: