
Before we begin, keep in mind that this will be a somewhat long tutorial, so before we begin let me explain what we’re even making.
You know how in games like Fallout there is like a “main” map that’s outside, but you can enter buildings, bunkers, caves and whatnot and that loads as a separate map?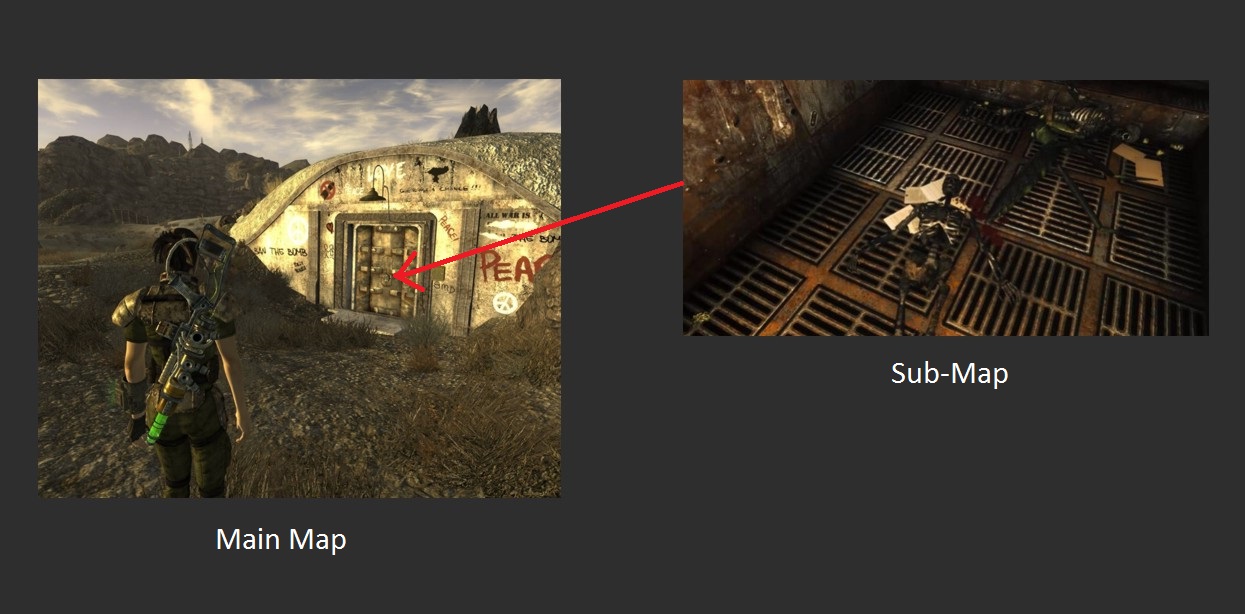
Well, we’re gonna try to recreate more or less just that.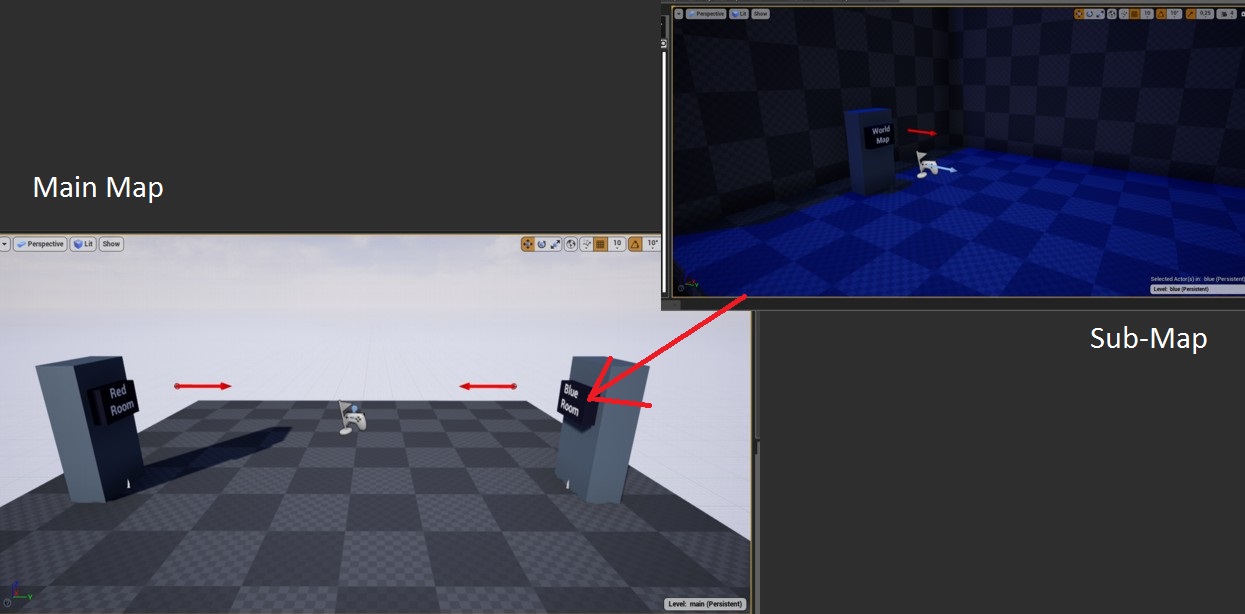
This will be the end result:
Important to know:
In UE4 it is recommended to use level streaming and/or world composition to accomplish such things, but many people seem to dislike that approach due to things getting too complex after a while. If you are interested in that way you can watch THIS and THIS stream from Epic Games.
With all that said, let’s begin. Create a new FPS Game Starter Kit project and open it.
PREPARATIONS
1. Open the BP_GameInstance blueprint, located in Content\FPS_Game\Blueprints\GameInstanceSettings
and create a new custom event that looks like this: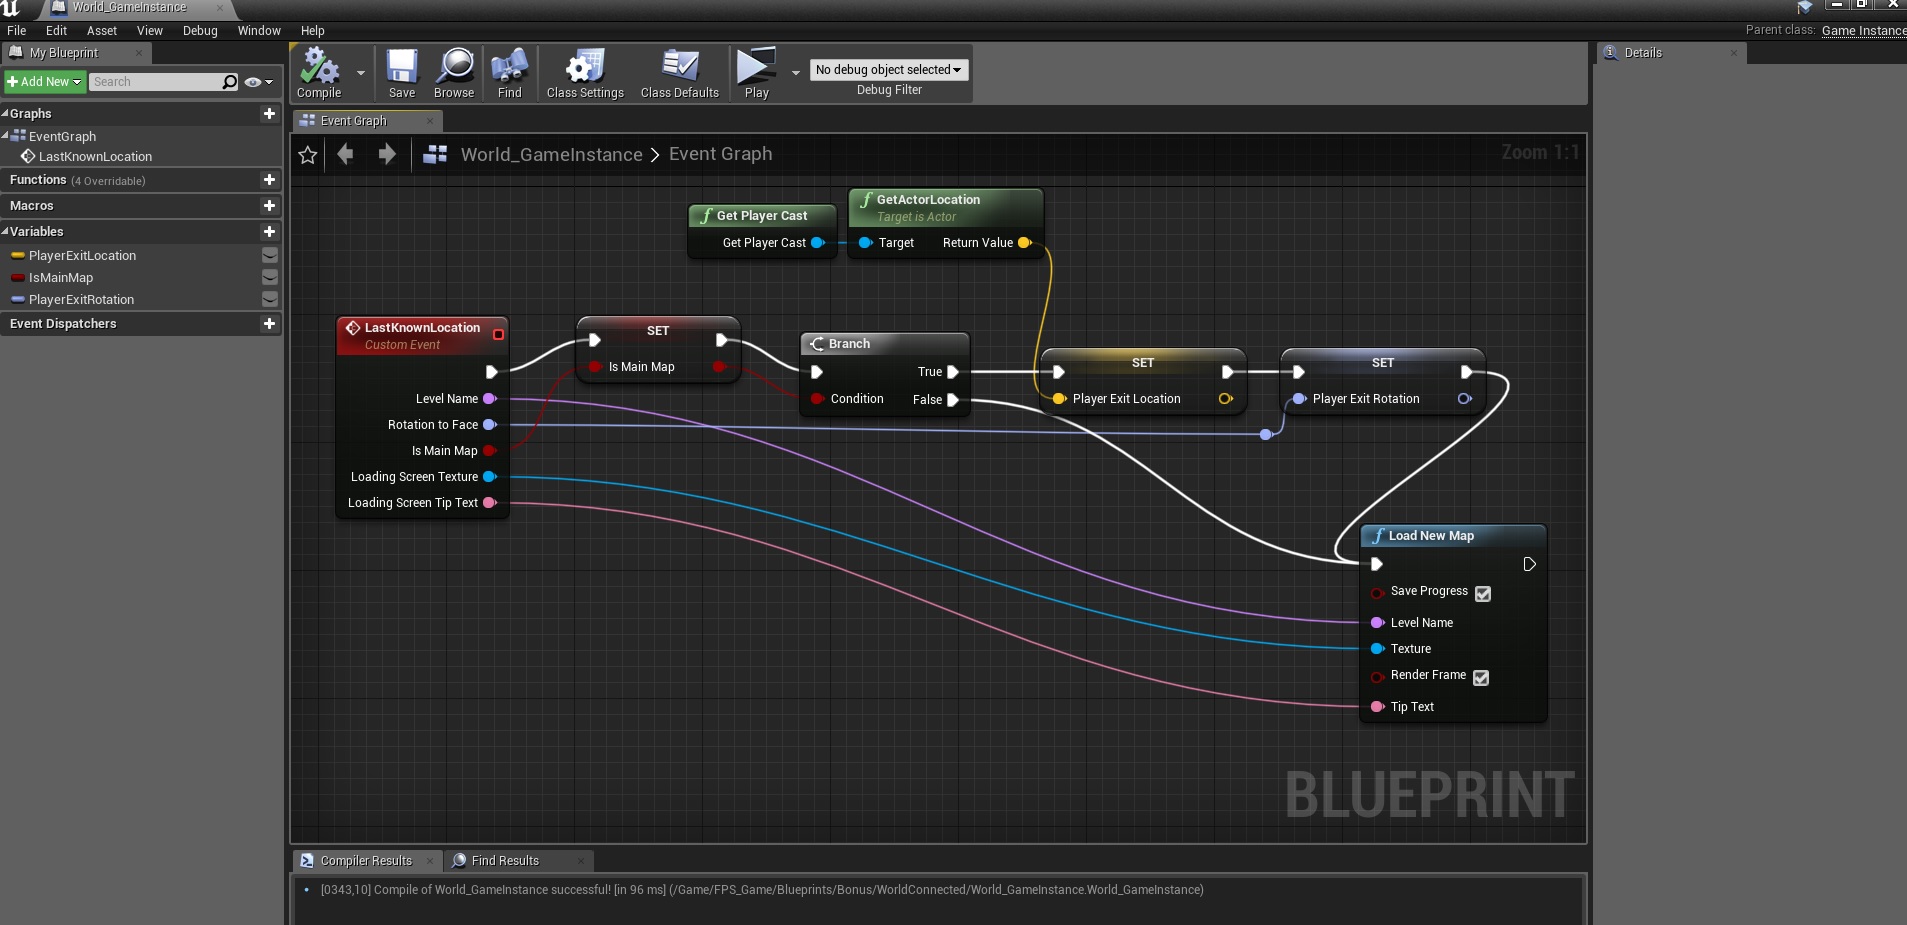
2. Create a new interactive actor (tutorial) <- or just duplicate the ATM vending machine and rename it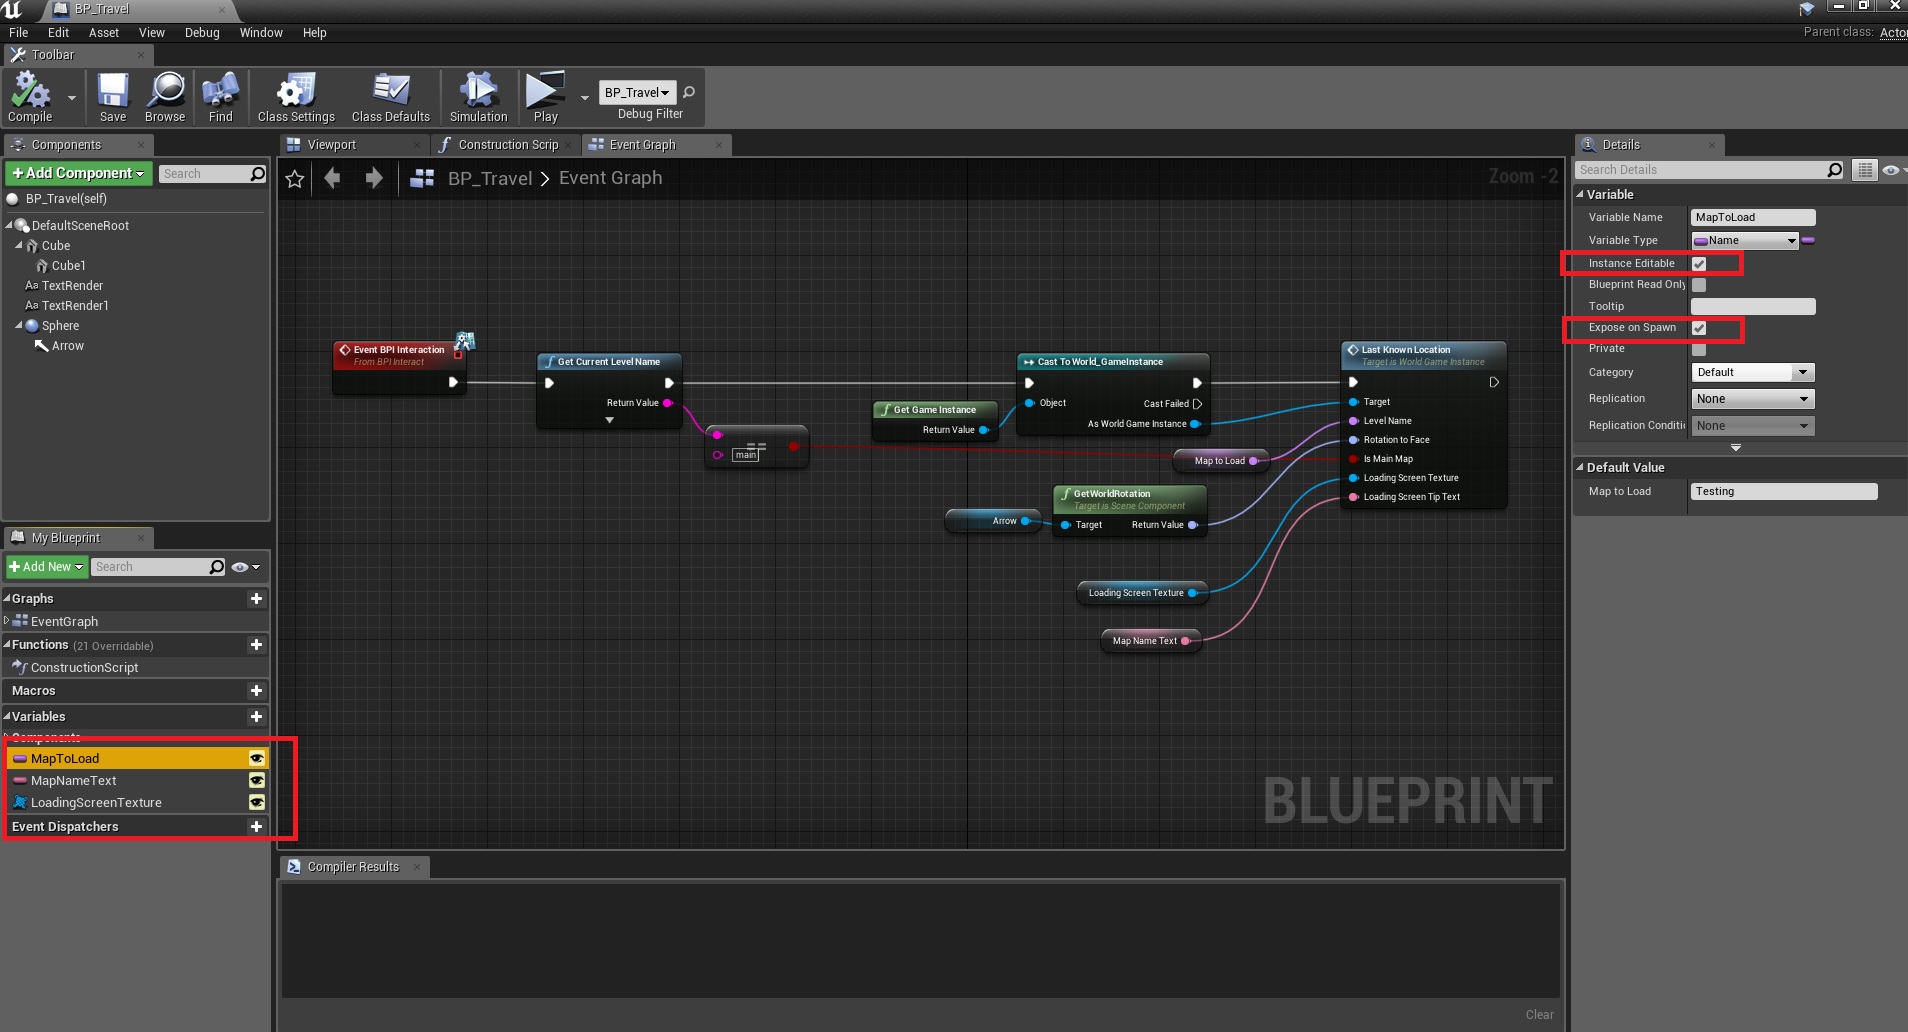
NOTE: the promoted variables need to be set to editable and expose on spawn.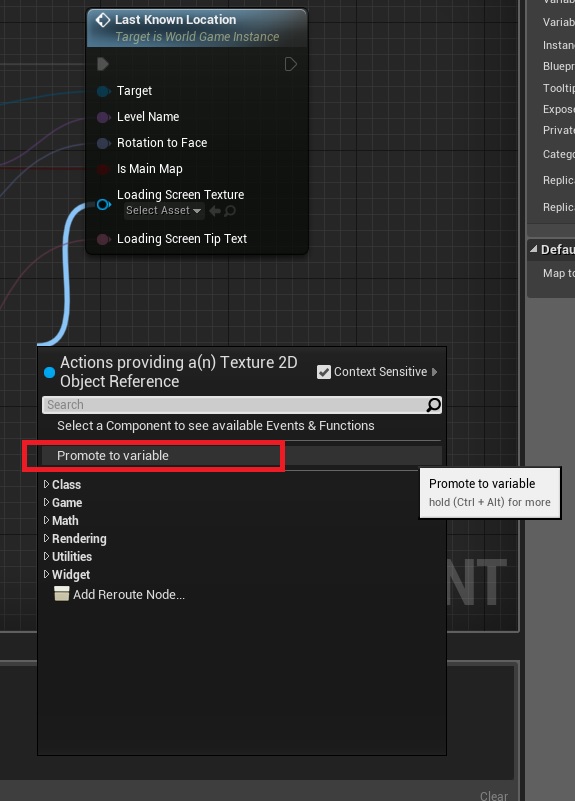
3. Create a minimum of 2 new maps, one of which MUST be called “main” (uses string equal to compare the name of the current map, to check if it’s called main)
main, red and blue are 3 new maps that I created for the video example in the beginning
4. I always forget this, but go to project settings and set the new main map and game instance that we created.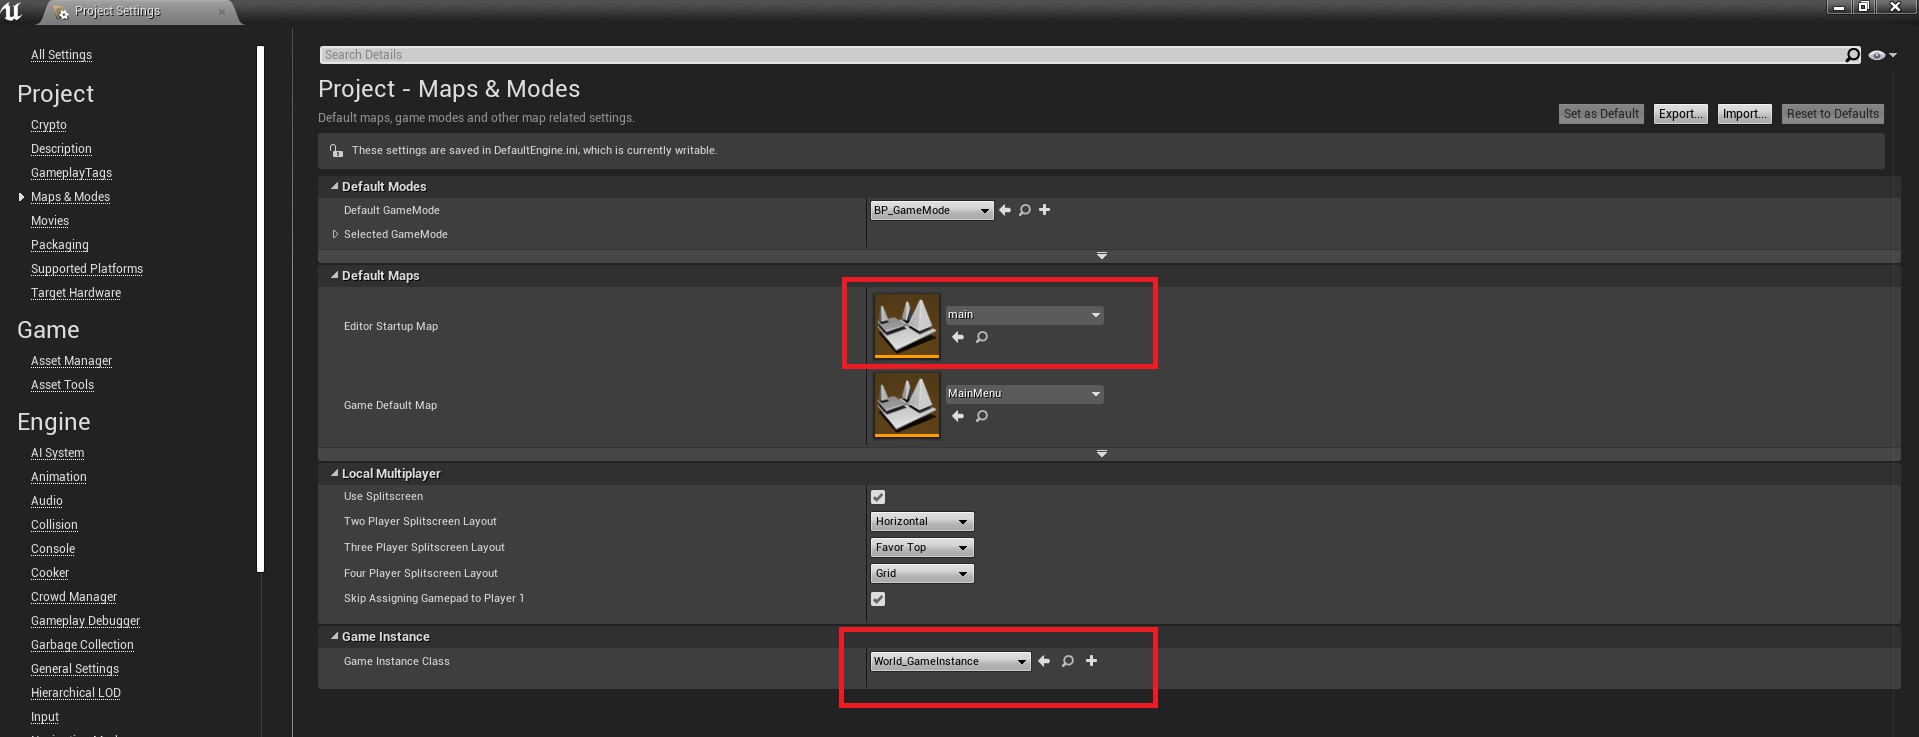
SAVE FILE
5. Open BP_Save and add 2 new variables to it.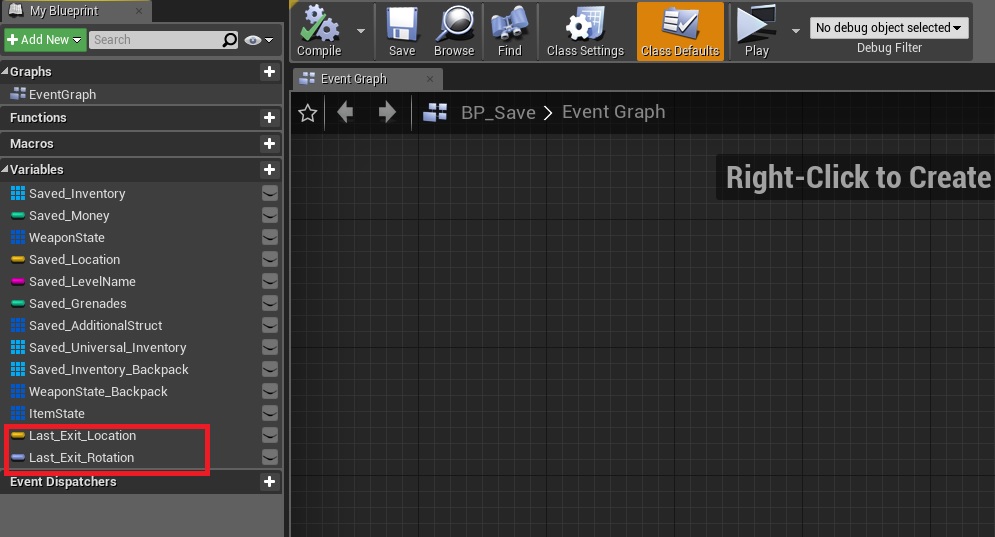
CHARACTER
6. Open BP_CharacterBase and in the SaveGame function add the following:
NOTE: You can right click on the Cast to World_GameInstance and at the bottom is “convert to pure cast”
7. Still on the character, but now go to Begin Play and add the following to it:
(BP_GameInstance)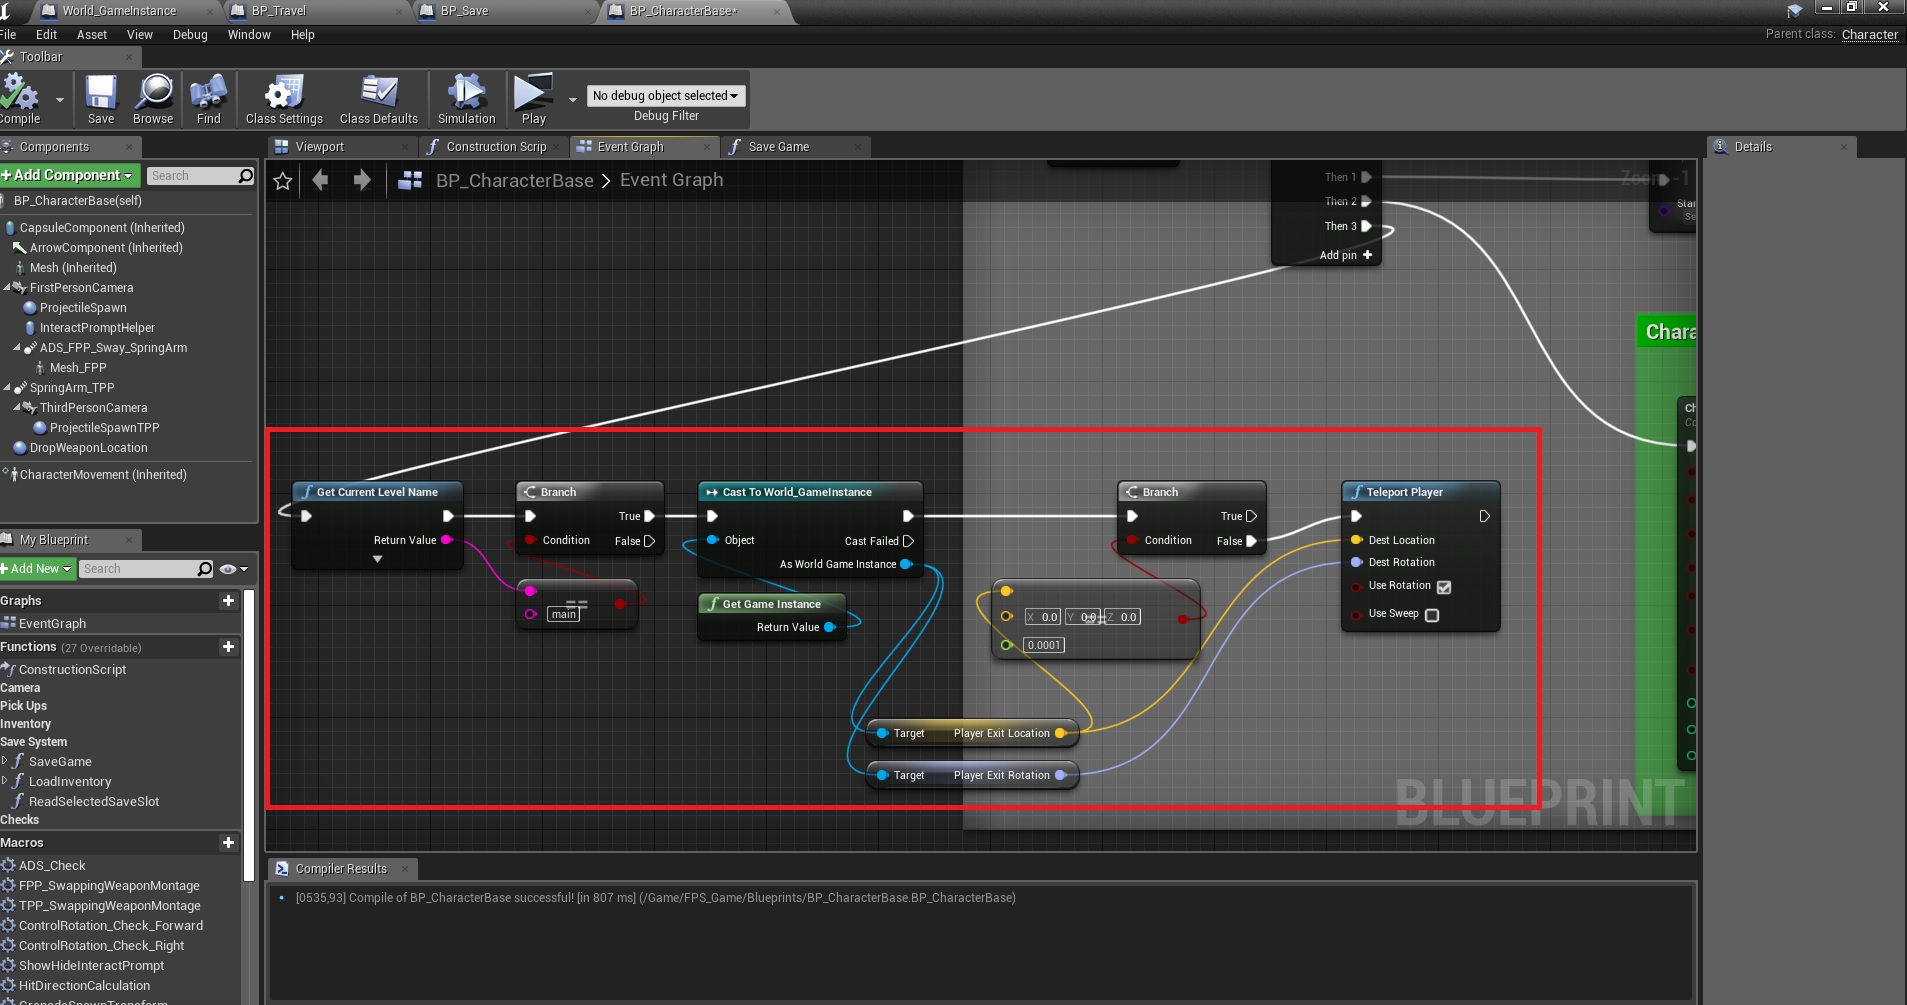
8. …and this too but on the other side (where load money and grenades are)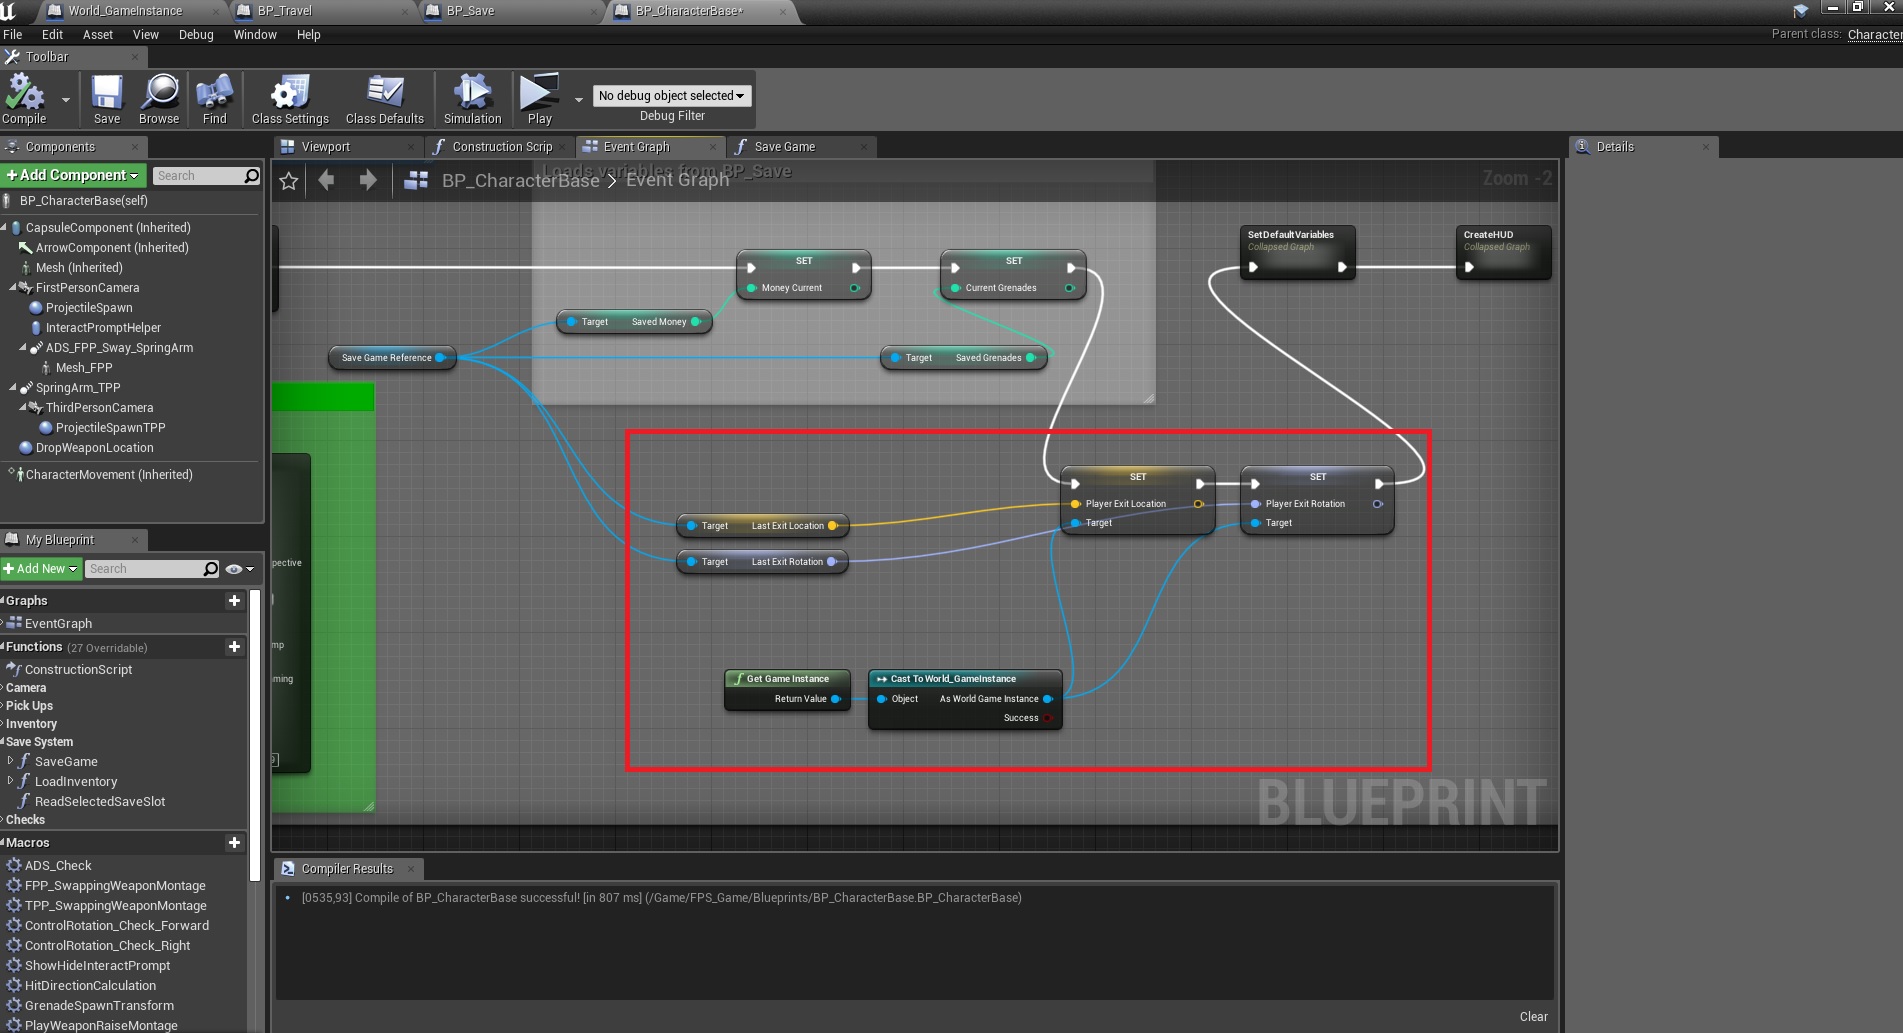
WIDGETS
9. Not much here, just open W_SaveMainMenu and change the default map from “Testing” to “main”
HOW TO USE
10. On your main map, add a player start (can be wherever your game starts) and the BP_Travel blueprint (interactive actor)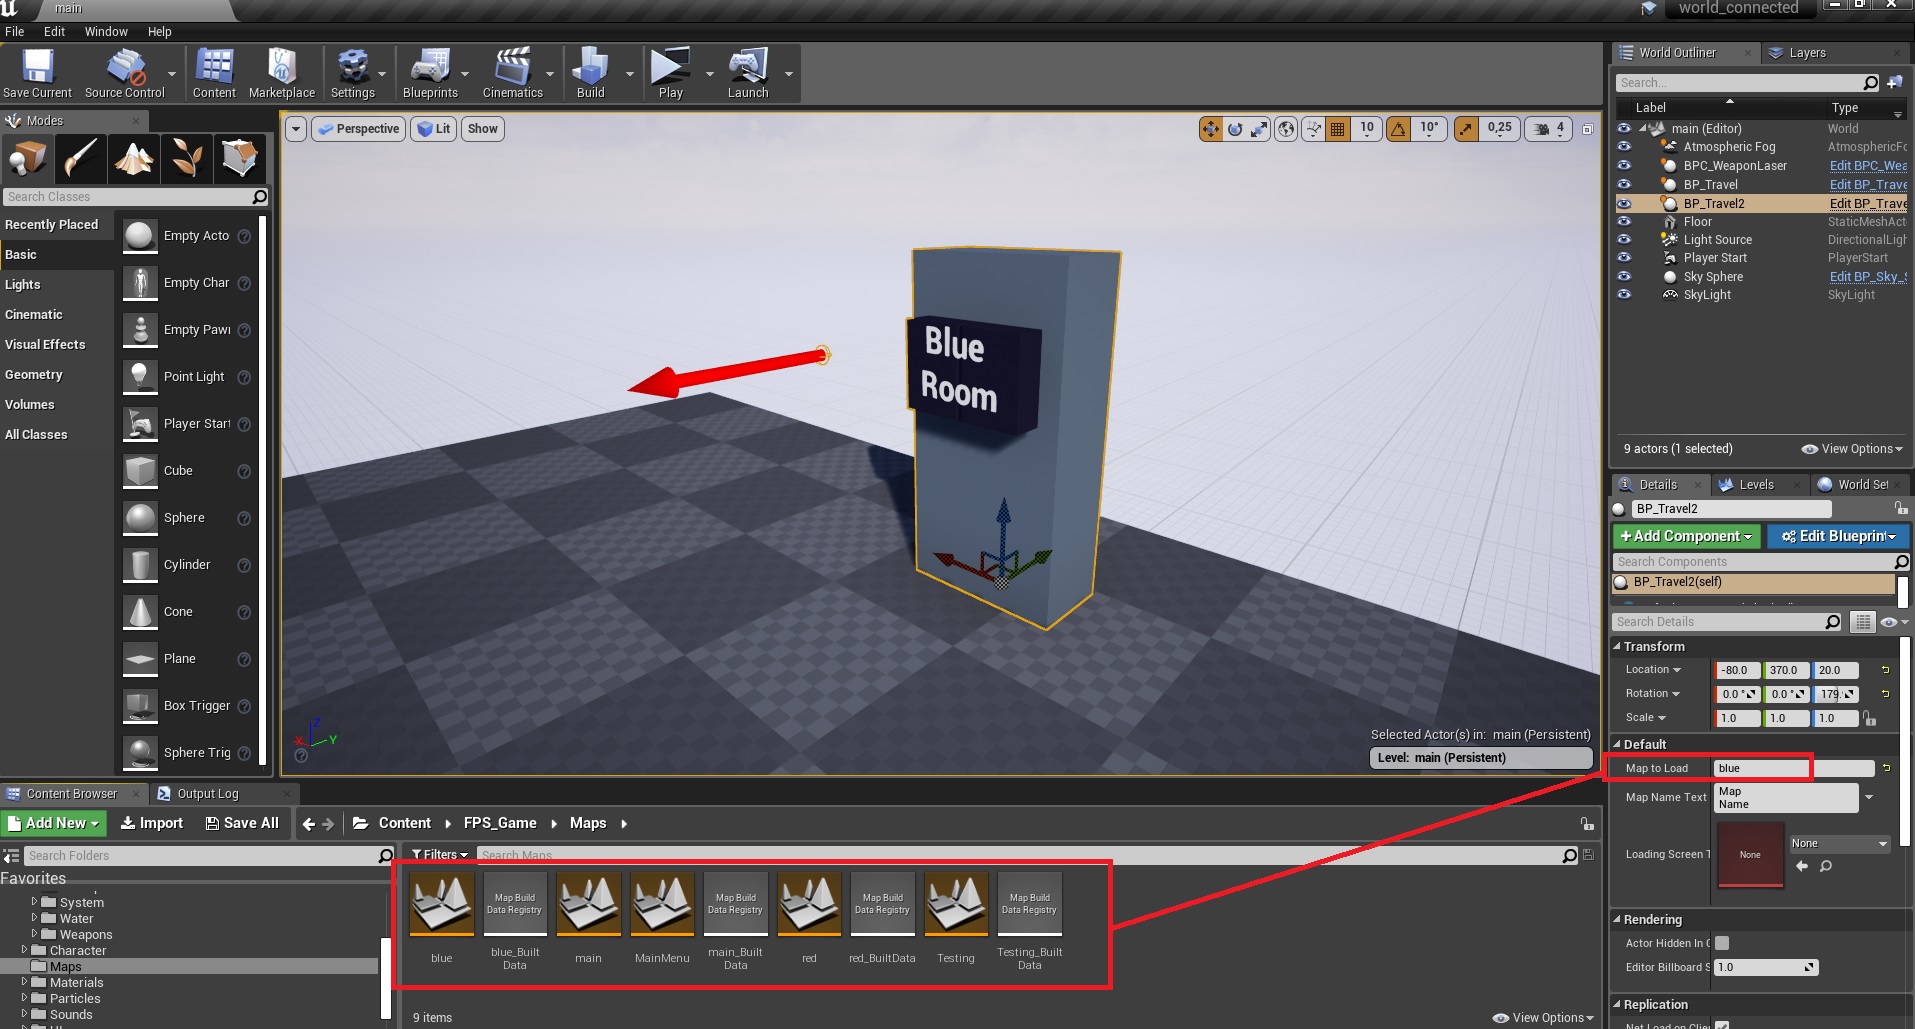
As you can see, on the right side, because the variables are exposed and editable on spawn, we can specify what map it should load when the player interacts with it, in this example it’s gonna load the map called “blue” (without quotes).
11. On the blue map, also place the interactive actor and a player start, but this time put the player start in front of it, because the player entered a bunker (or something), so this is the door from where the player will be spawned.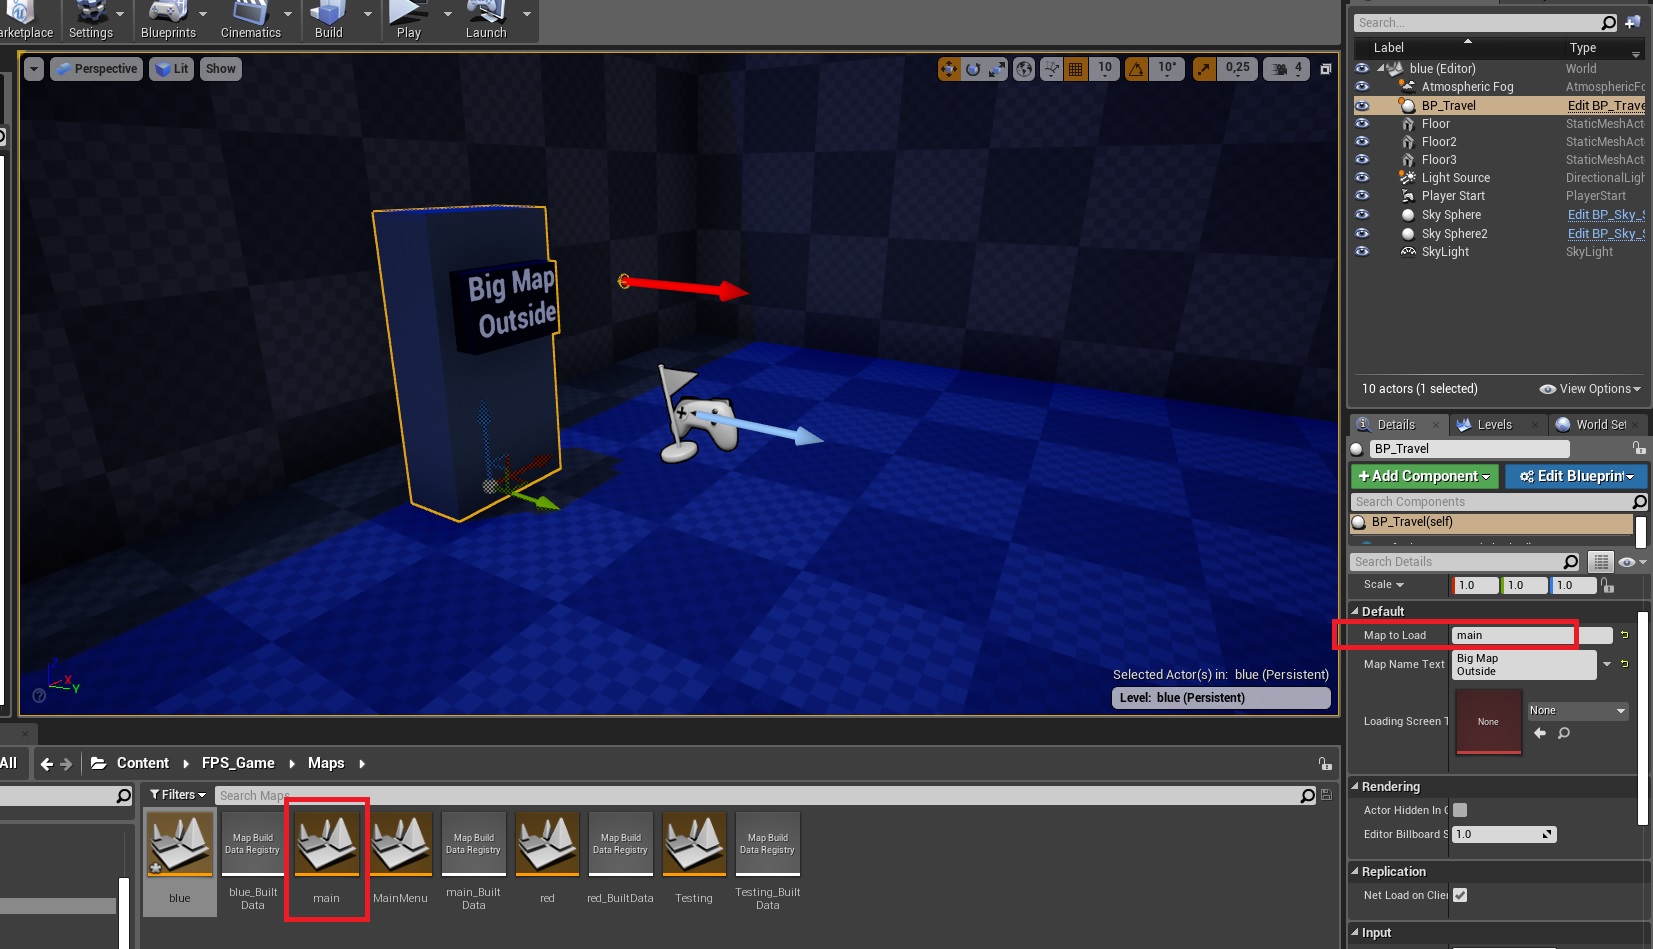
And again we specify what map it should take us to, obviously “main” (without quotes) to return back to the main world map.
12. Optional, but if you don’t want certain weapons to respawn each time you reload the map, I added a checkbox for that inside the weapons and pickups.
That’s it!
PS – don’t forget to call the Save Game function before loading a new map, to make your inventory transfer over.
