This tutorial is based on this YouTube video here.
In this tutorial we will add a leveling system to the character and fully integrate it into the kit (character, HUD, save system, BP library, how to use). So let’s begin:
Character
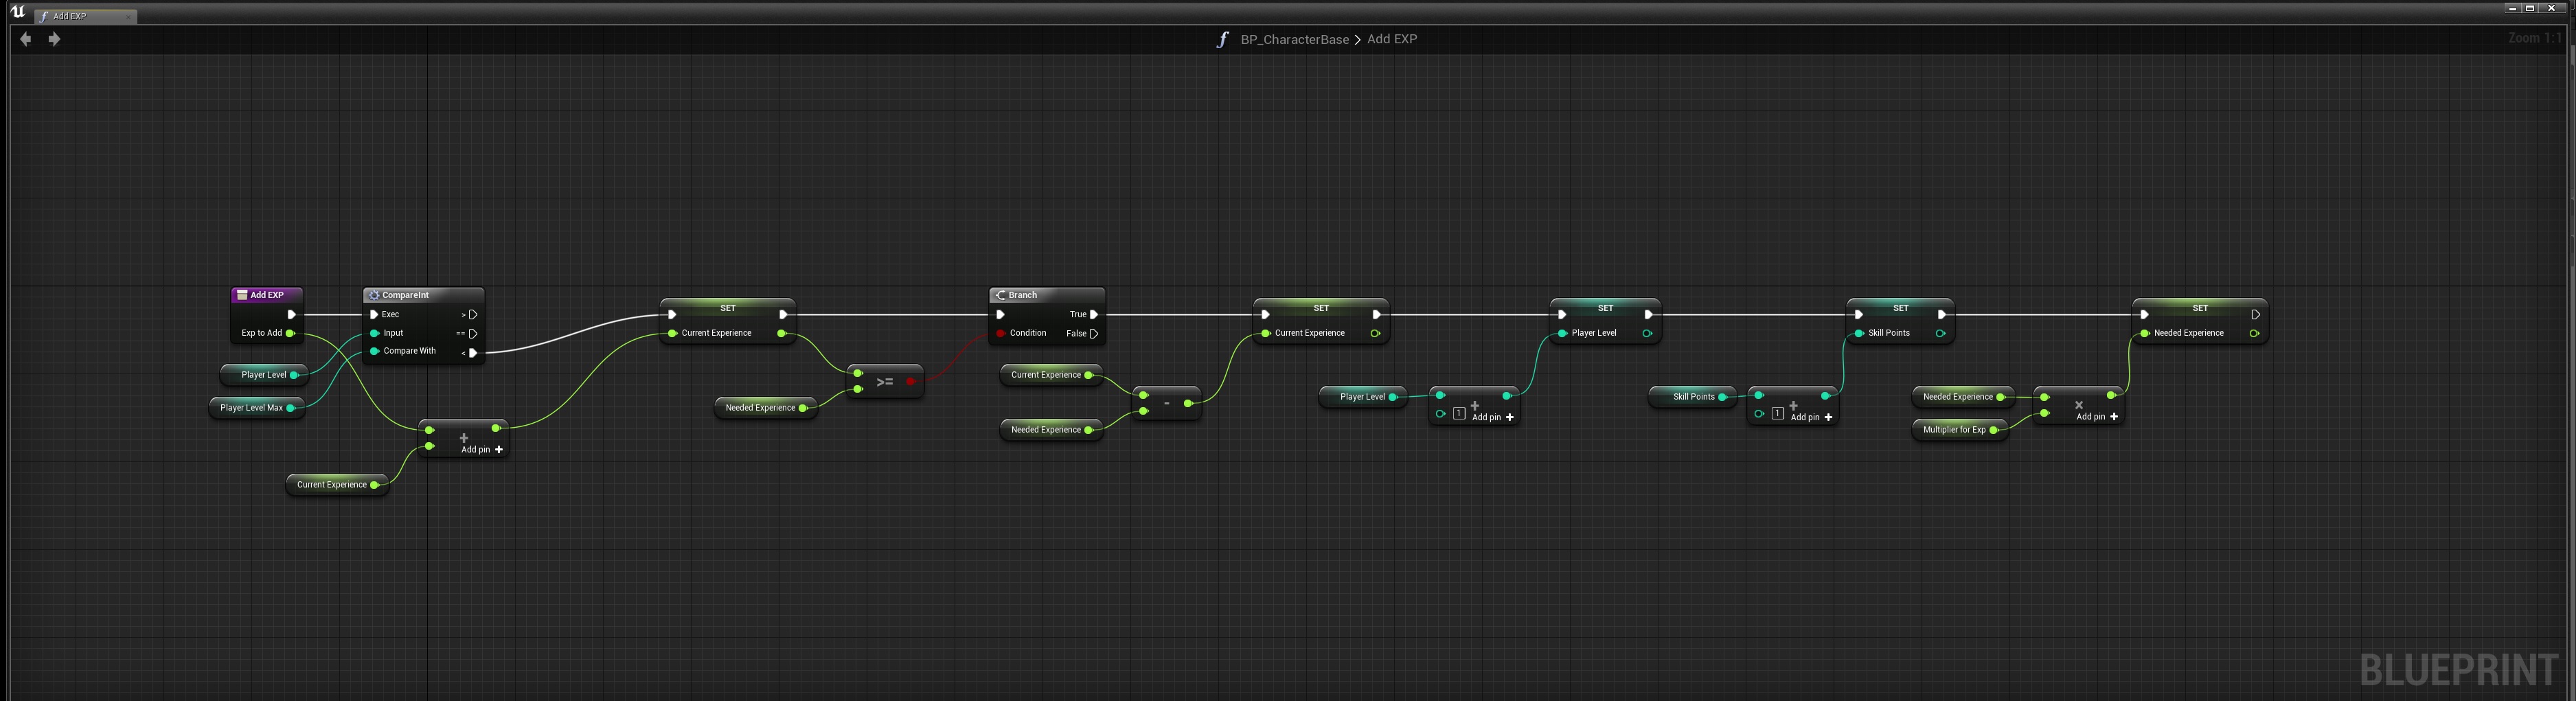
1. Create a new function and few new variables inside BP_CharacterBase
Int – PlayerLevel: 0
Int – PlayerLevel_Max: 5 (this is the level cap)
Int – SkillPoints: 0 (not used at the moment)
Float – CurrentExperience: 0.0
Float – NeededExperience: 100.0
Float – MultiplyerExp: 1.5
Function – AddEXP (with one float input)
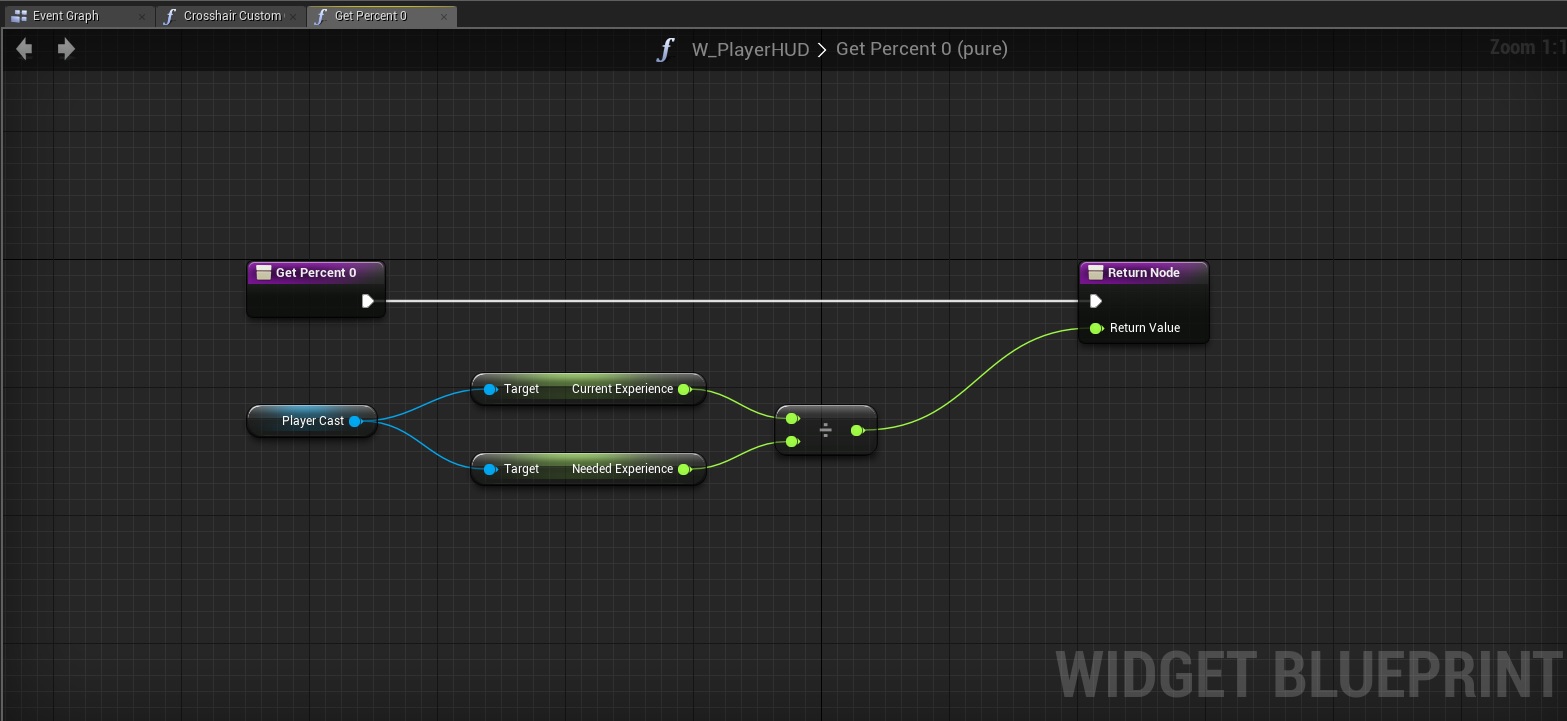
HUD
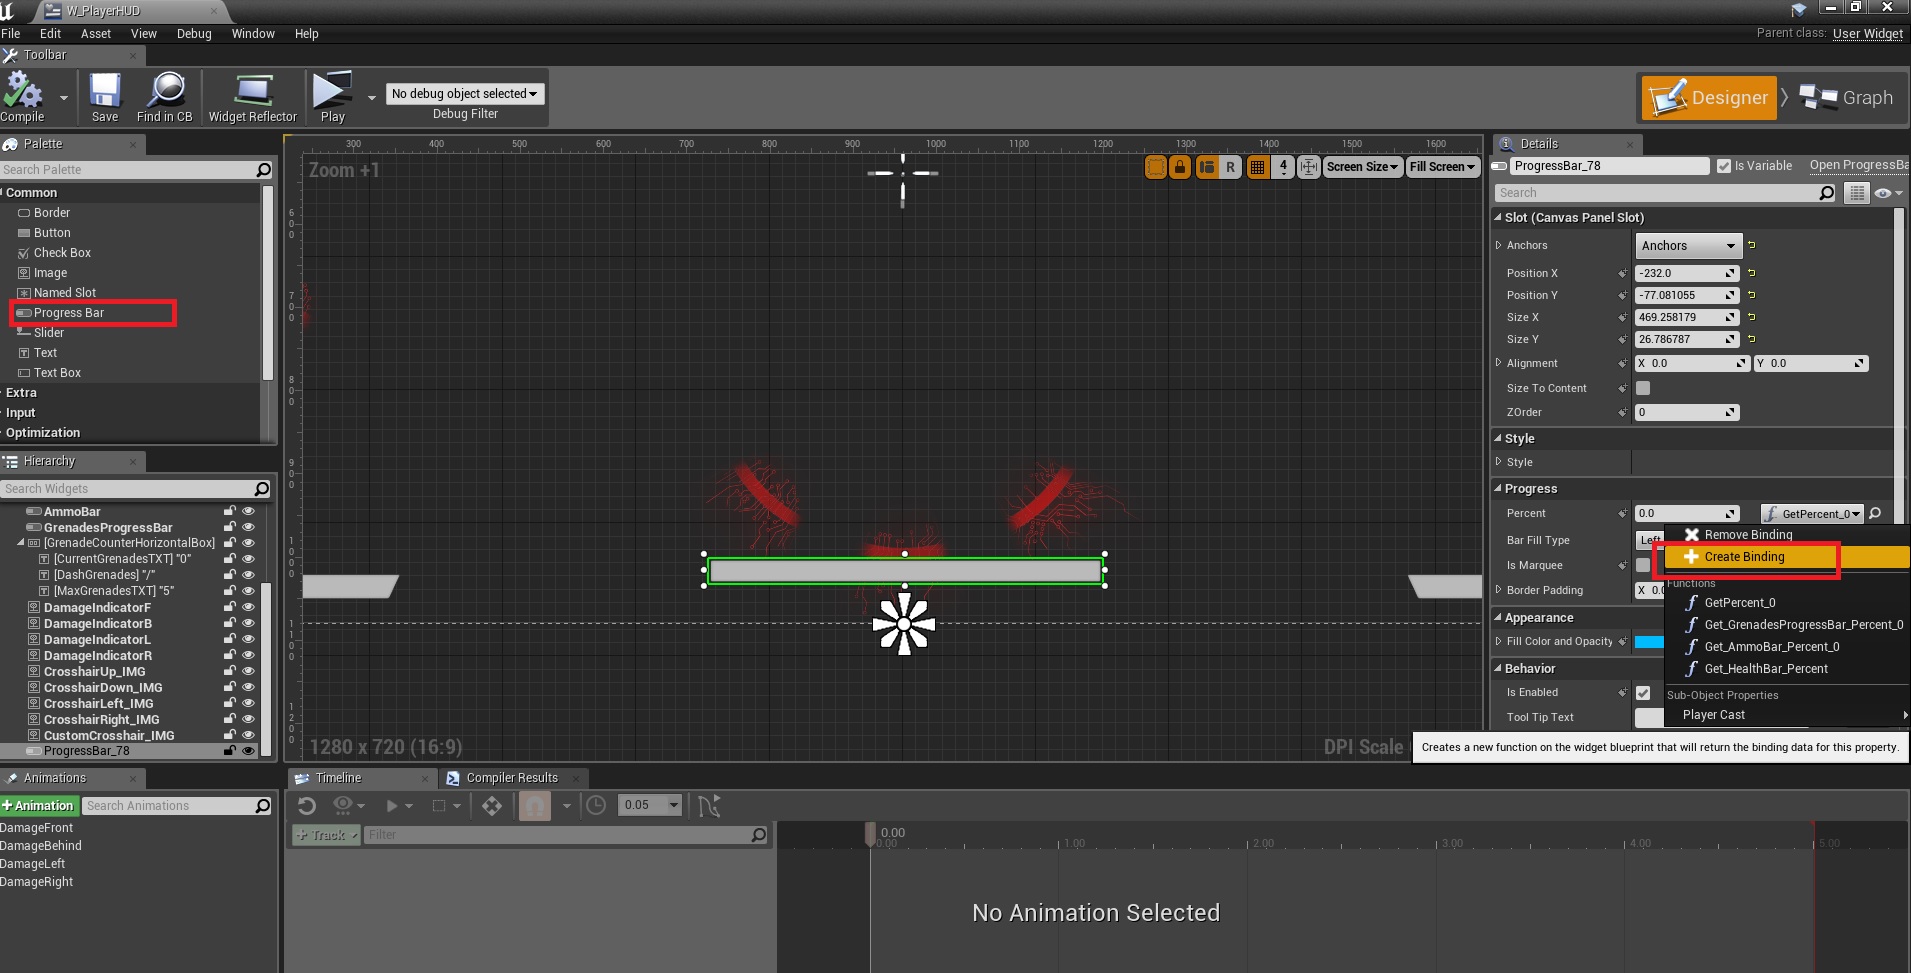
2. Open the W_PlayerHUD widget and add a progress bar to it and create a new binding.
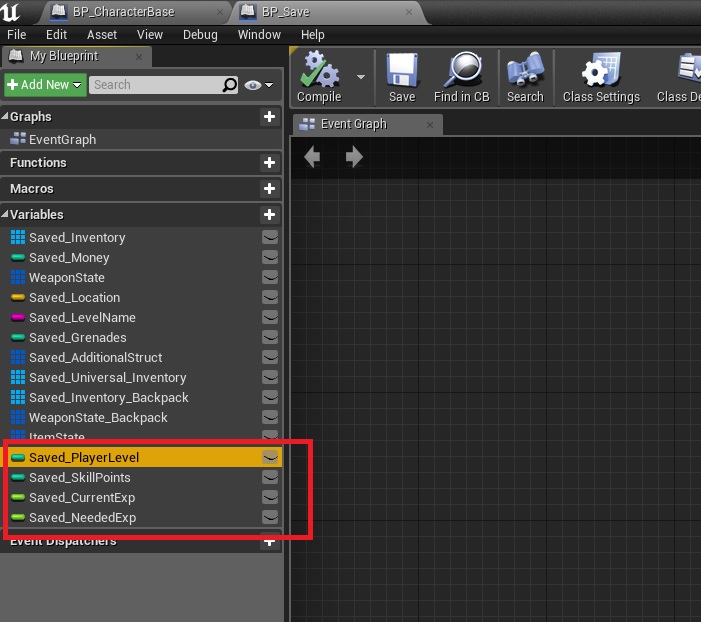
Save System
3. Open BP_Save and add the following variables to it:
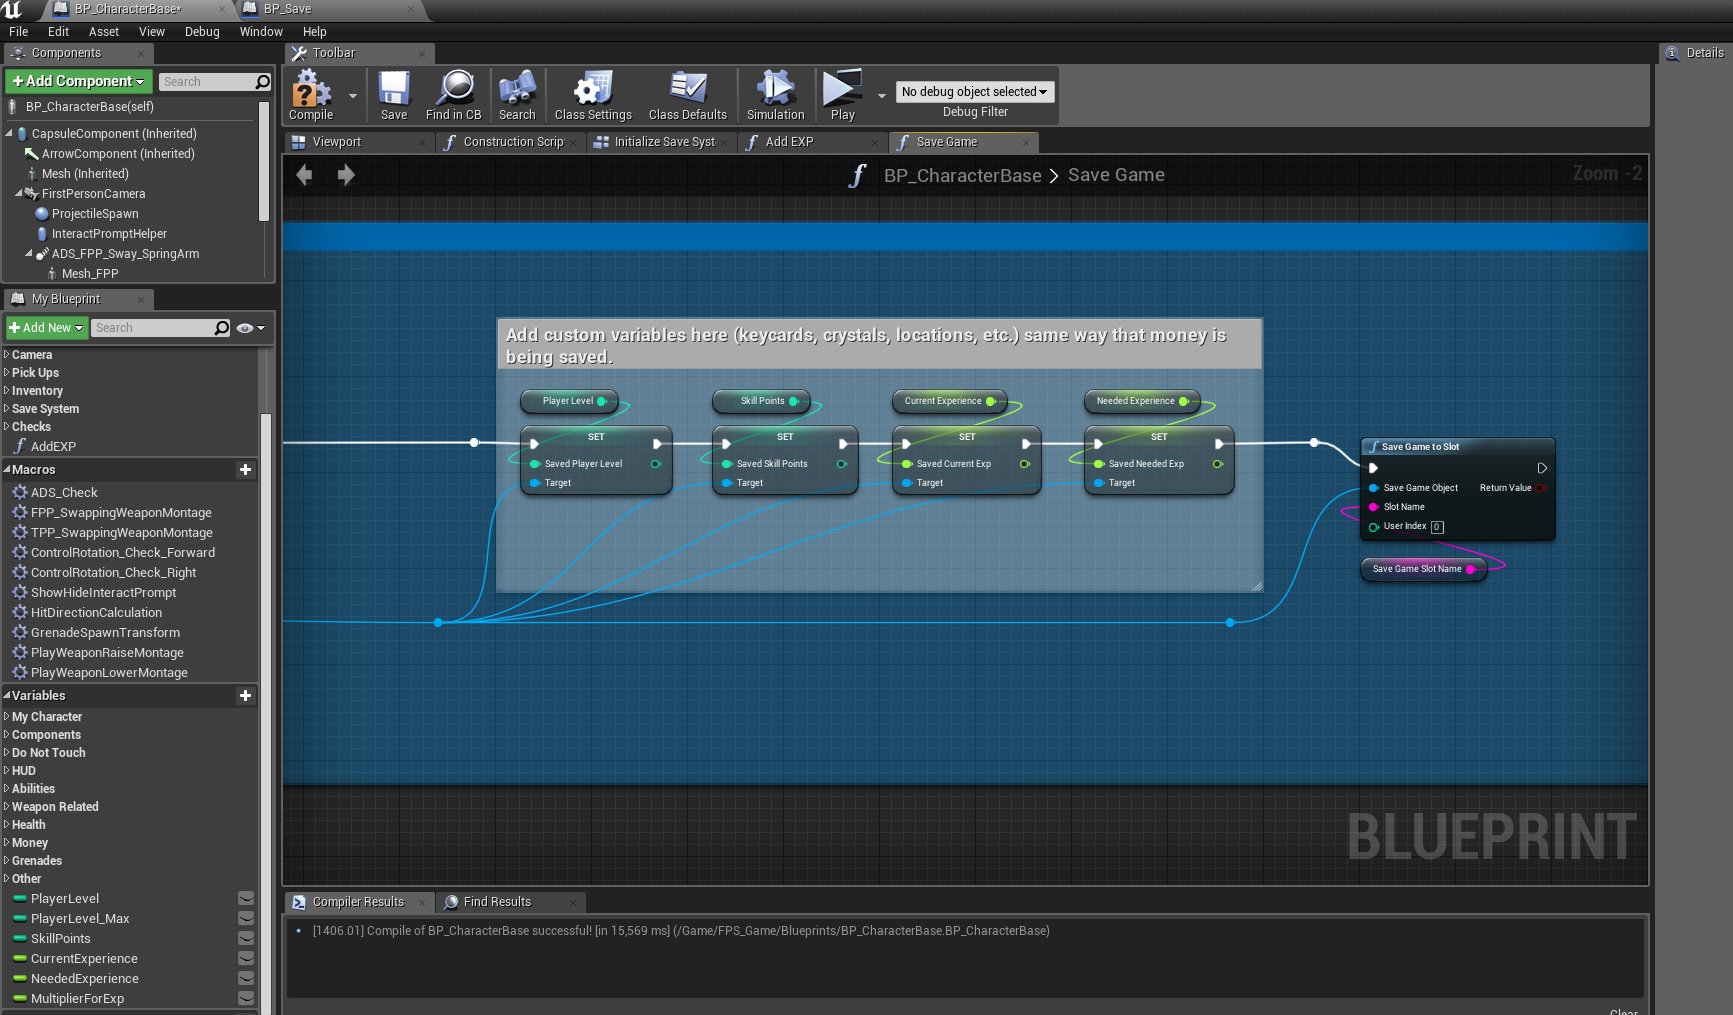
4. Go back to BP_CharacterBase and in the SaveGame function near the end add the new variables as shown in the picture bellow:
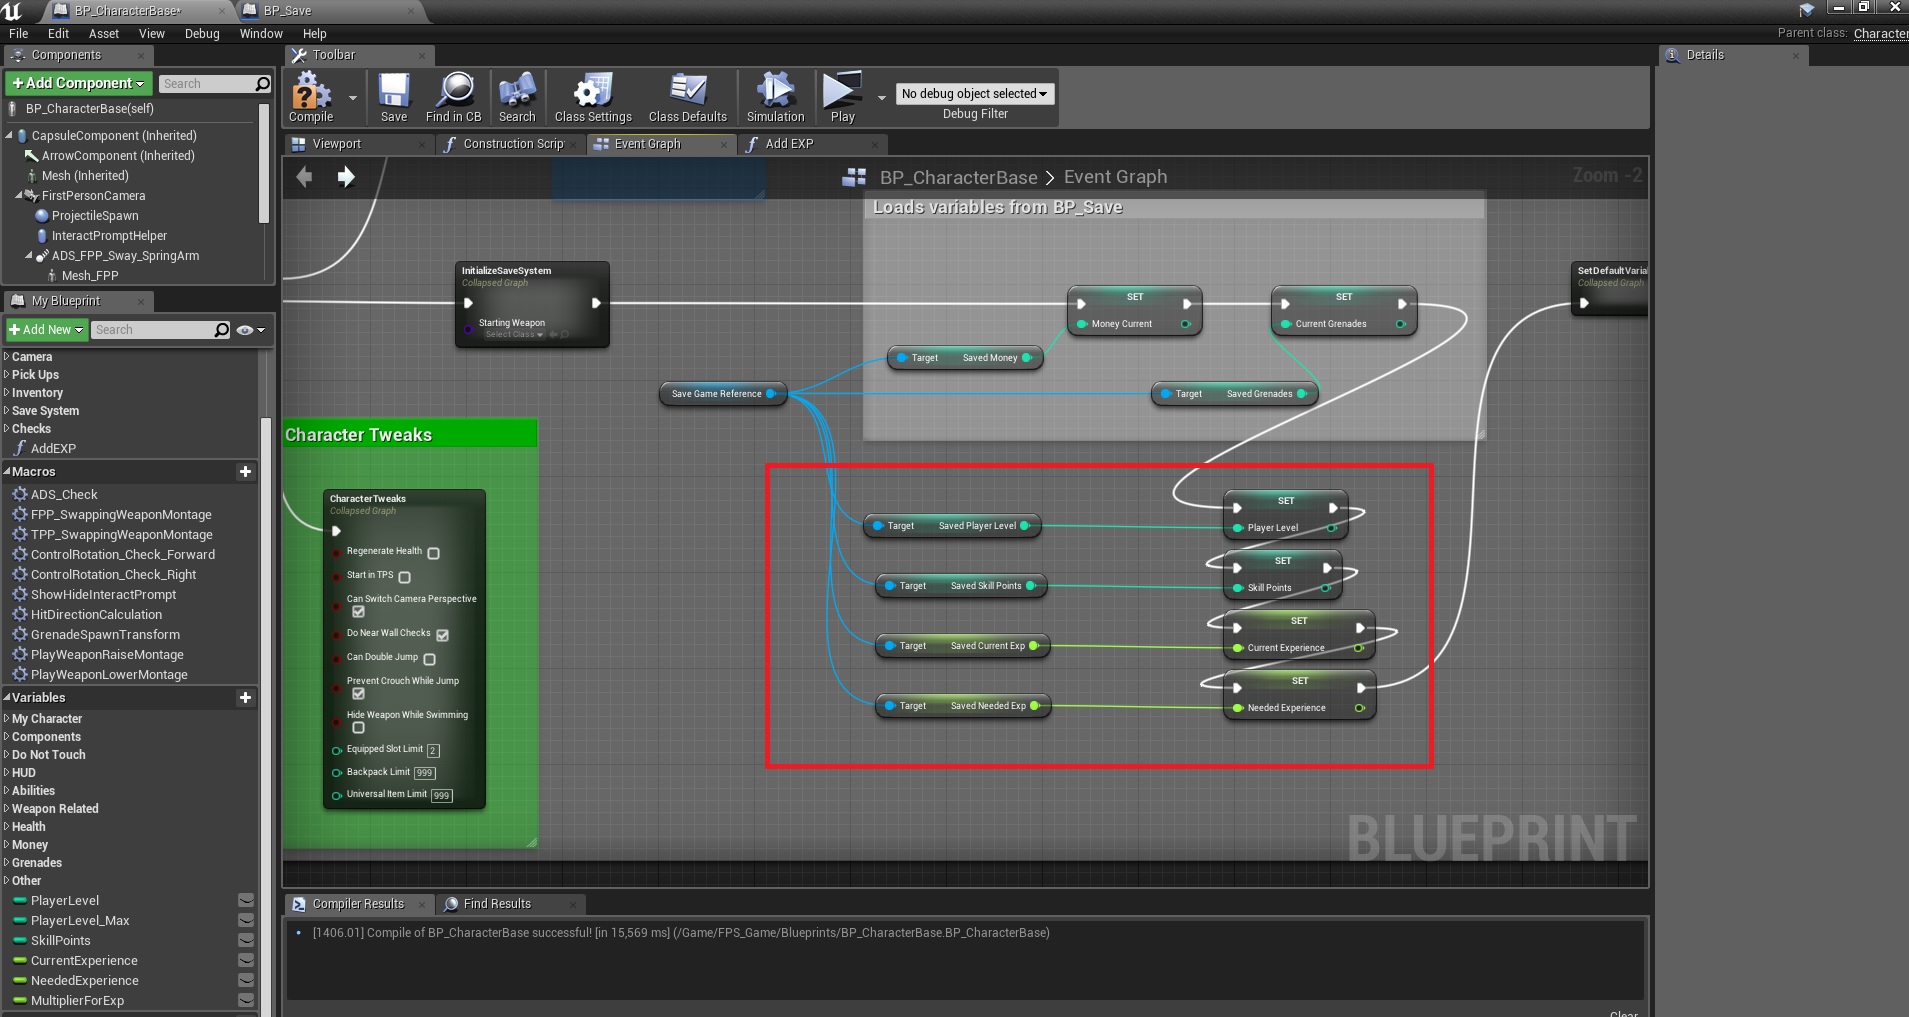
5. Still on the character, on begin play read the new variables from the save file and set them:
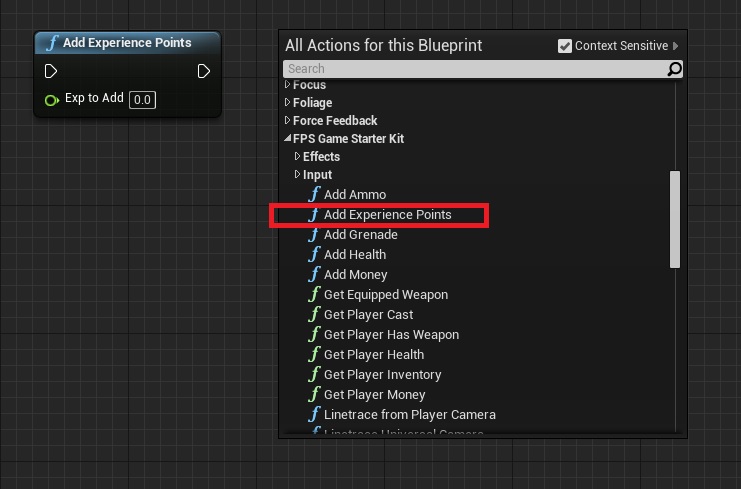
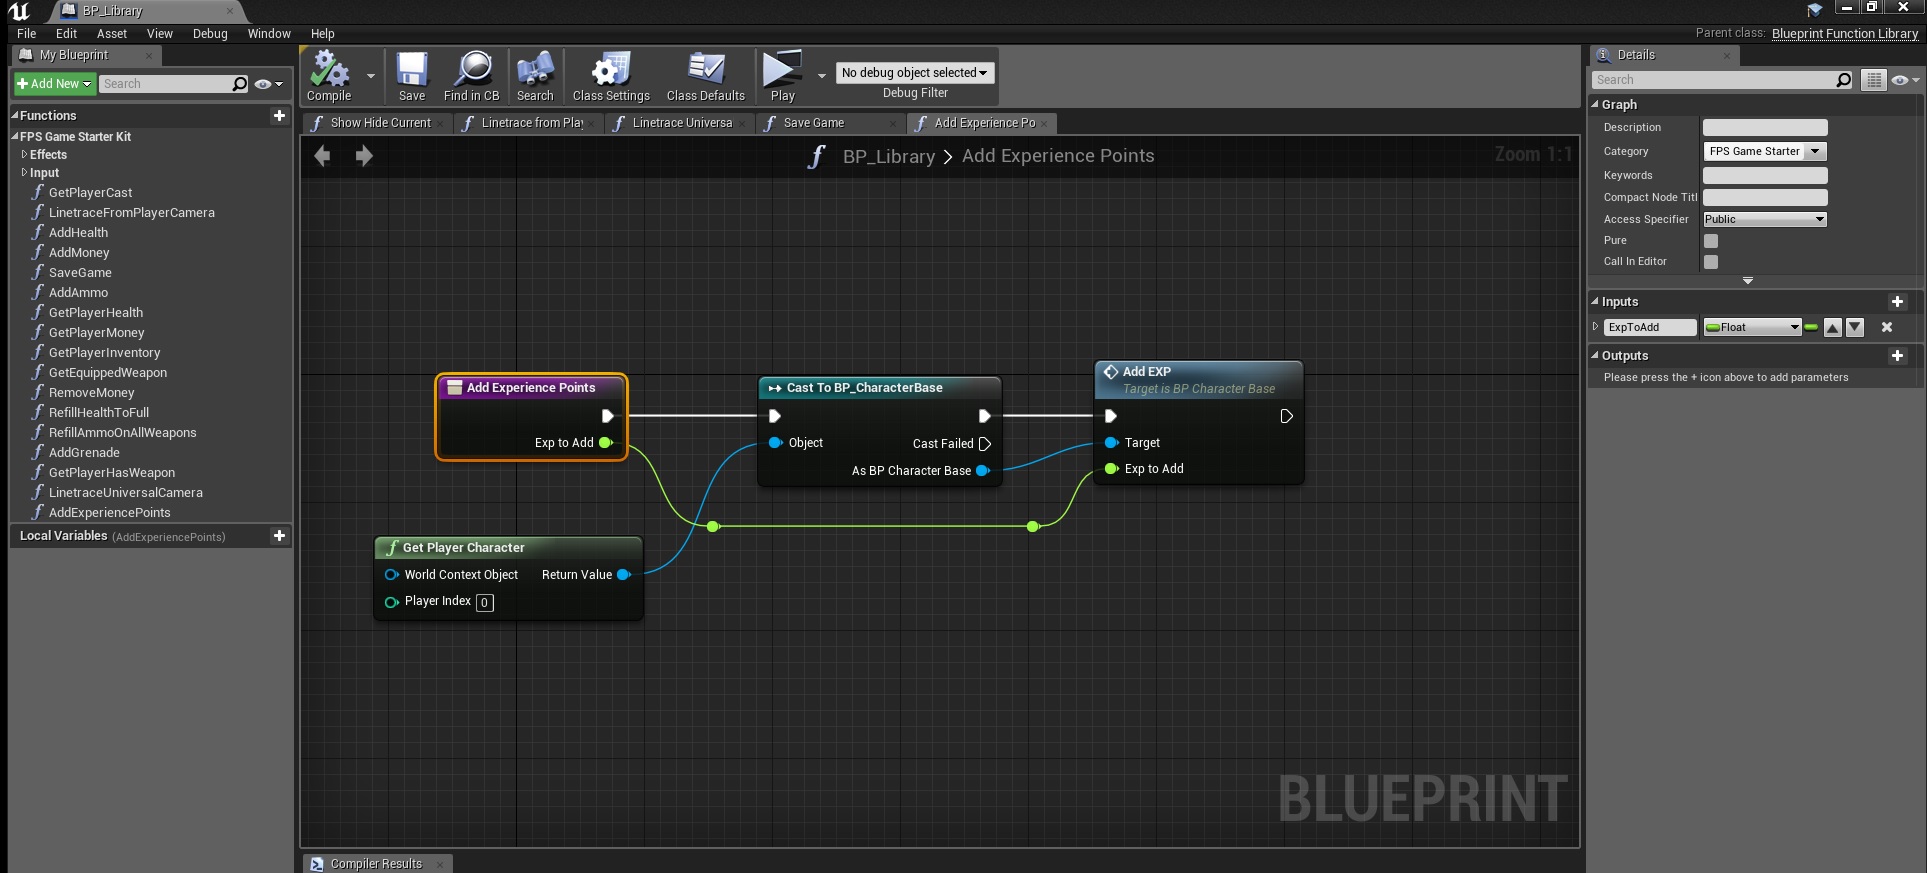
Updating the BP Function Library
6. Open BP_Library and create a new function AddExperiencePoints:
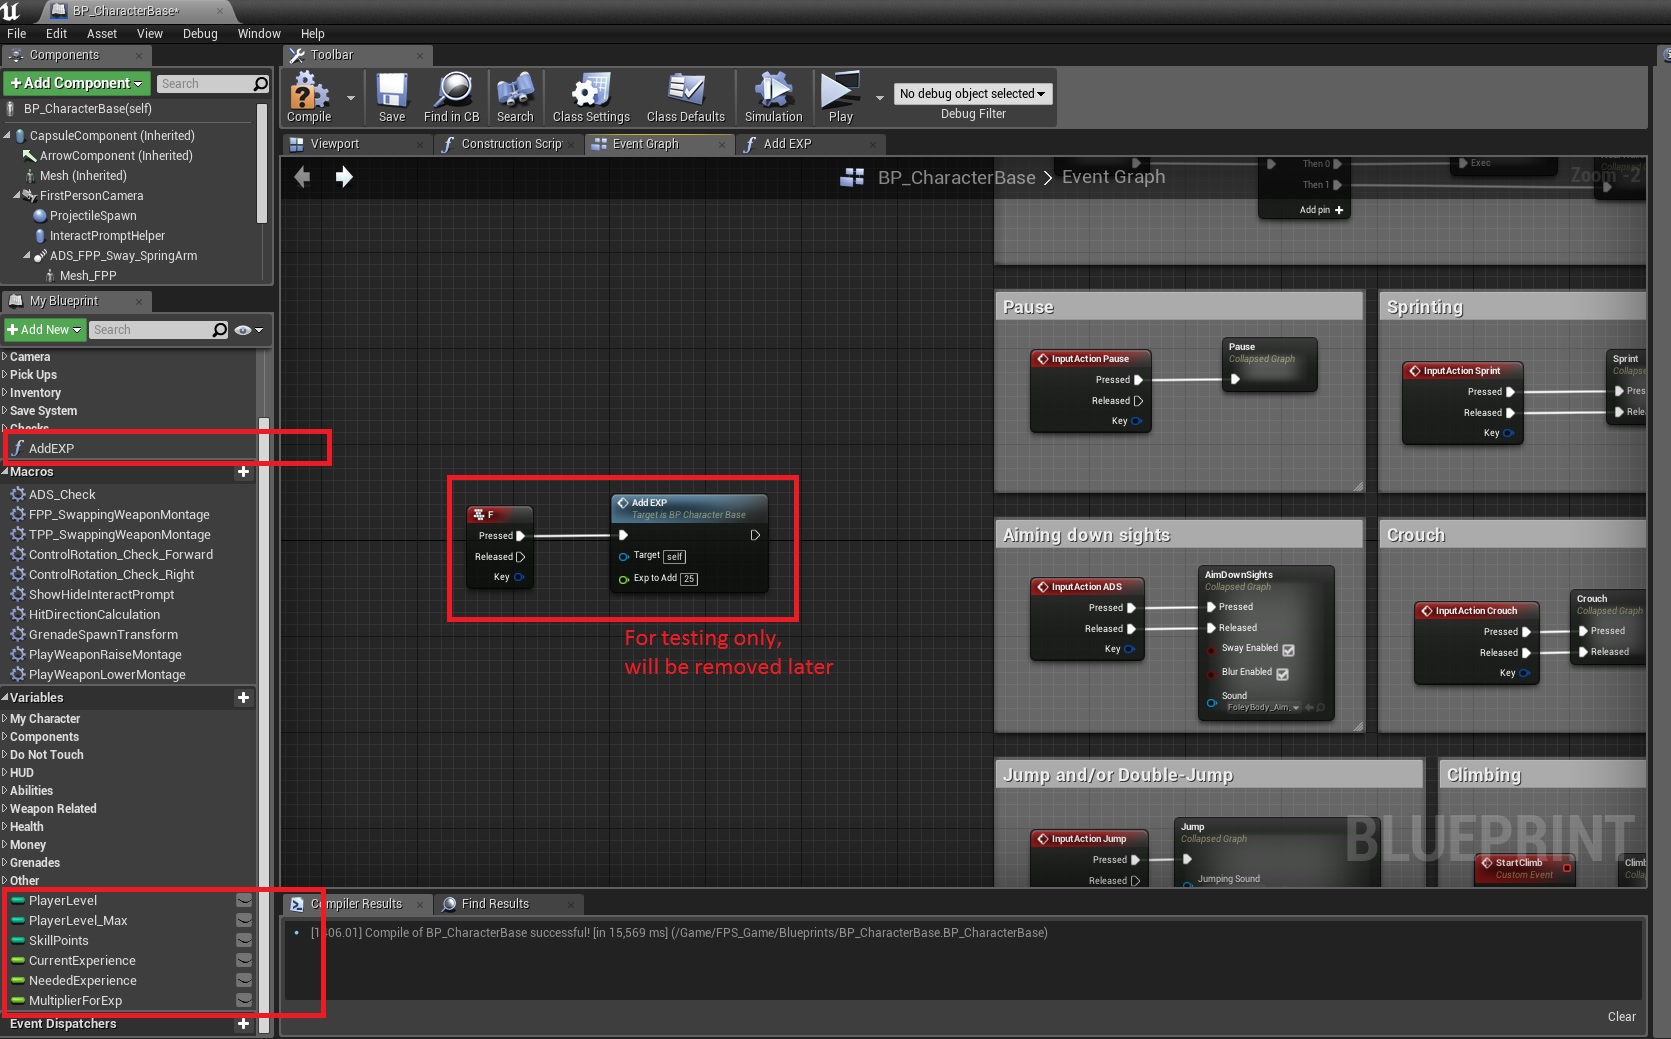
How to use it
7. Basically just call the “Add Experience Points” function from any blueprint graph, in this example I’ll add it to the enemy right before it gets destroyed:
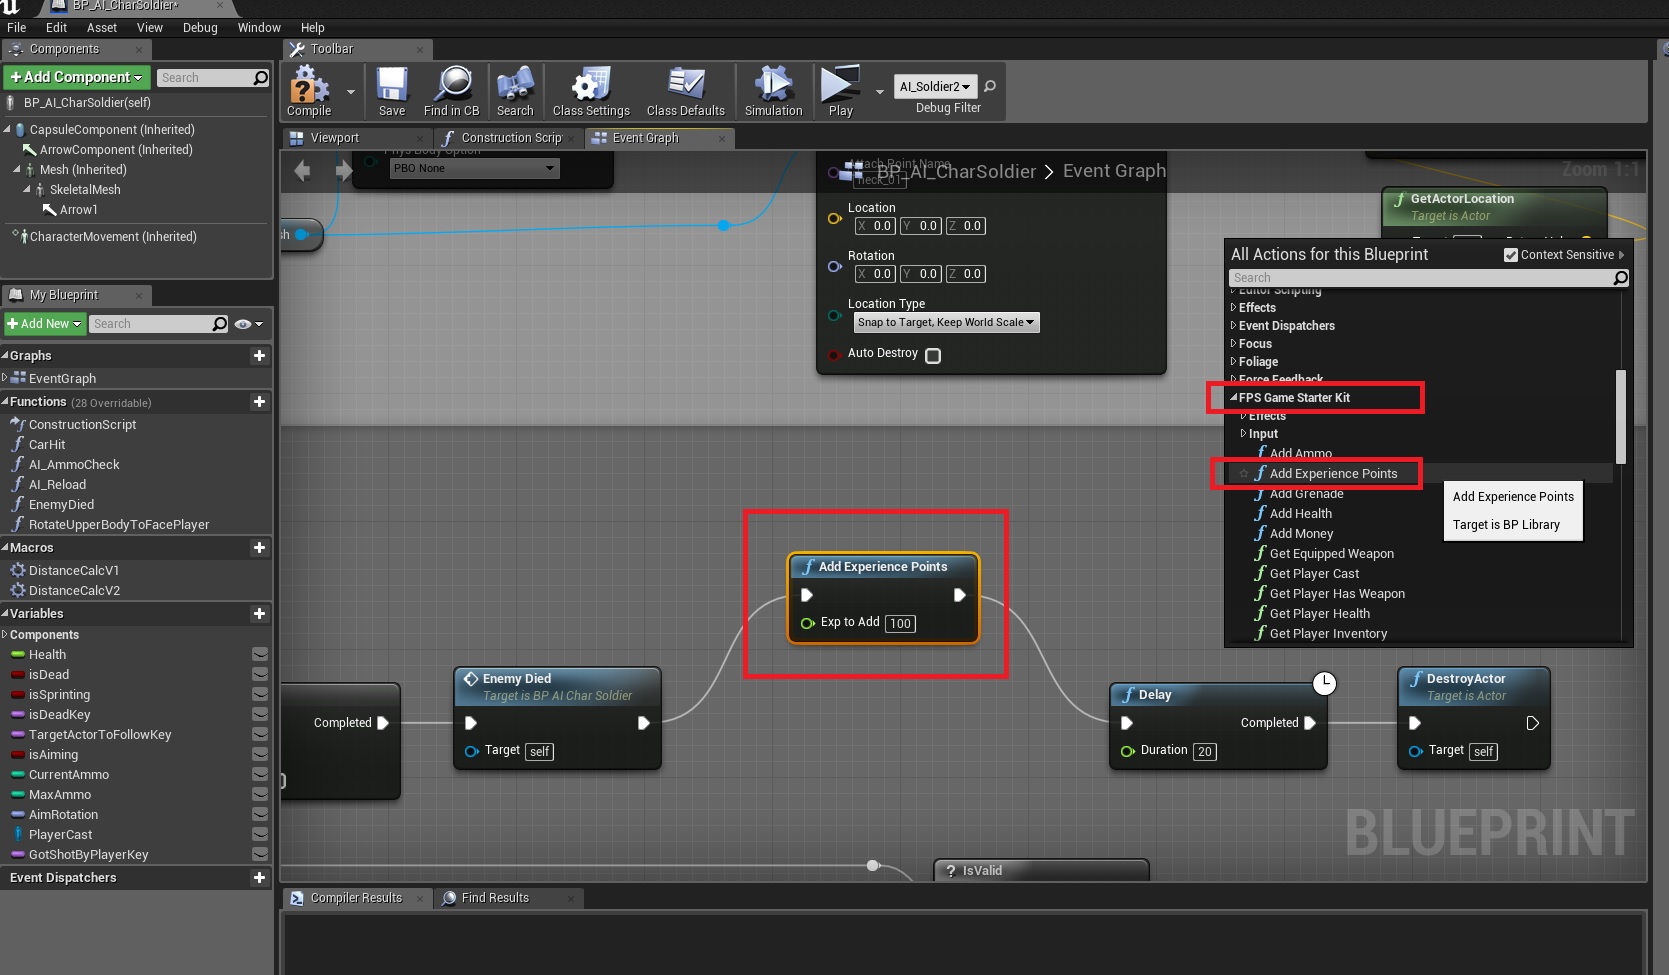
But like I said, you can call it from anywhere you want (overlap, enter a room, pickup some item, finish a quest, killing an enemy, etc.