This will be a longer tutorial, so let’s first see what the end result will be, basically a sequence of objectives that you need to do, this can be per level, or in a large map, both ways are supported.
Let’s recreate that from the beginning..
MAP
1. Create a new map, call it however you want, but in this tutorial I called it MyMap

2. On your new map, set the game mode to be BP_GameModeObjectives

GAME MODE
3. Now open that game mode, in there is an array variable, you can add as many objectives inside as you need, for the sake of simplicity I added just a few
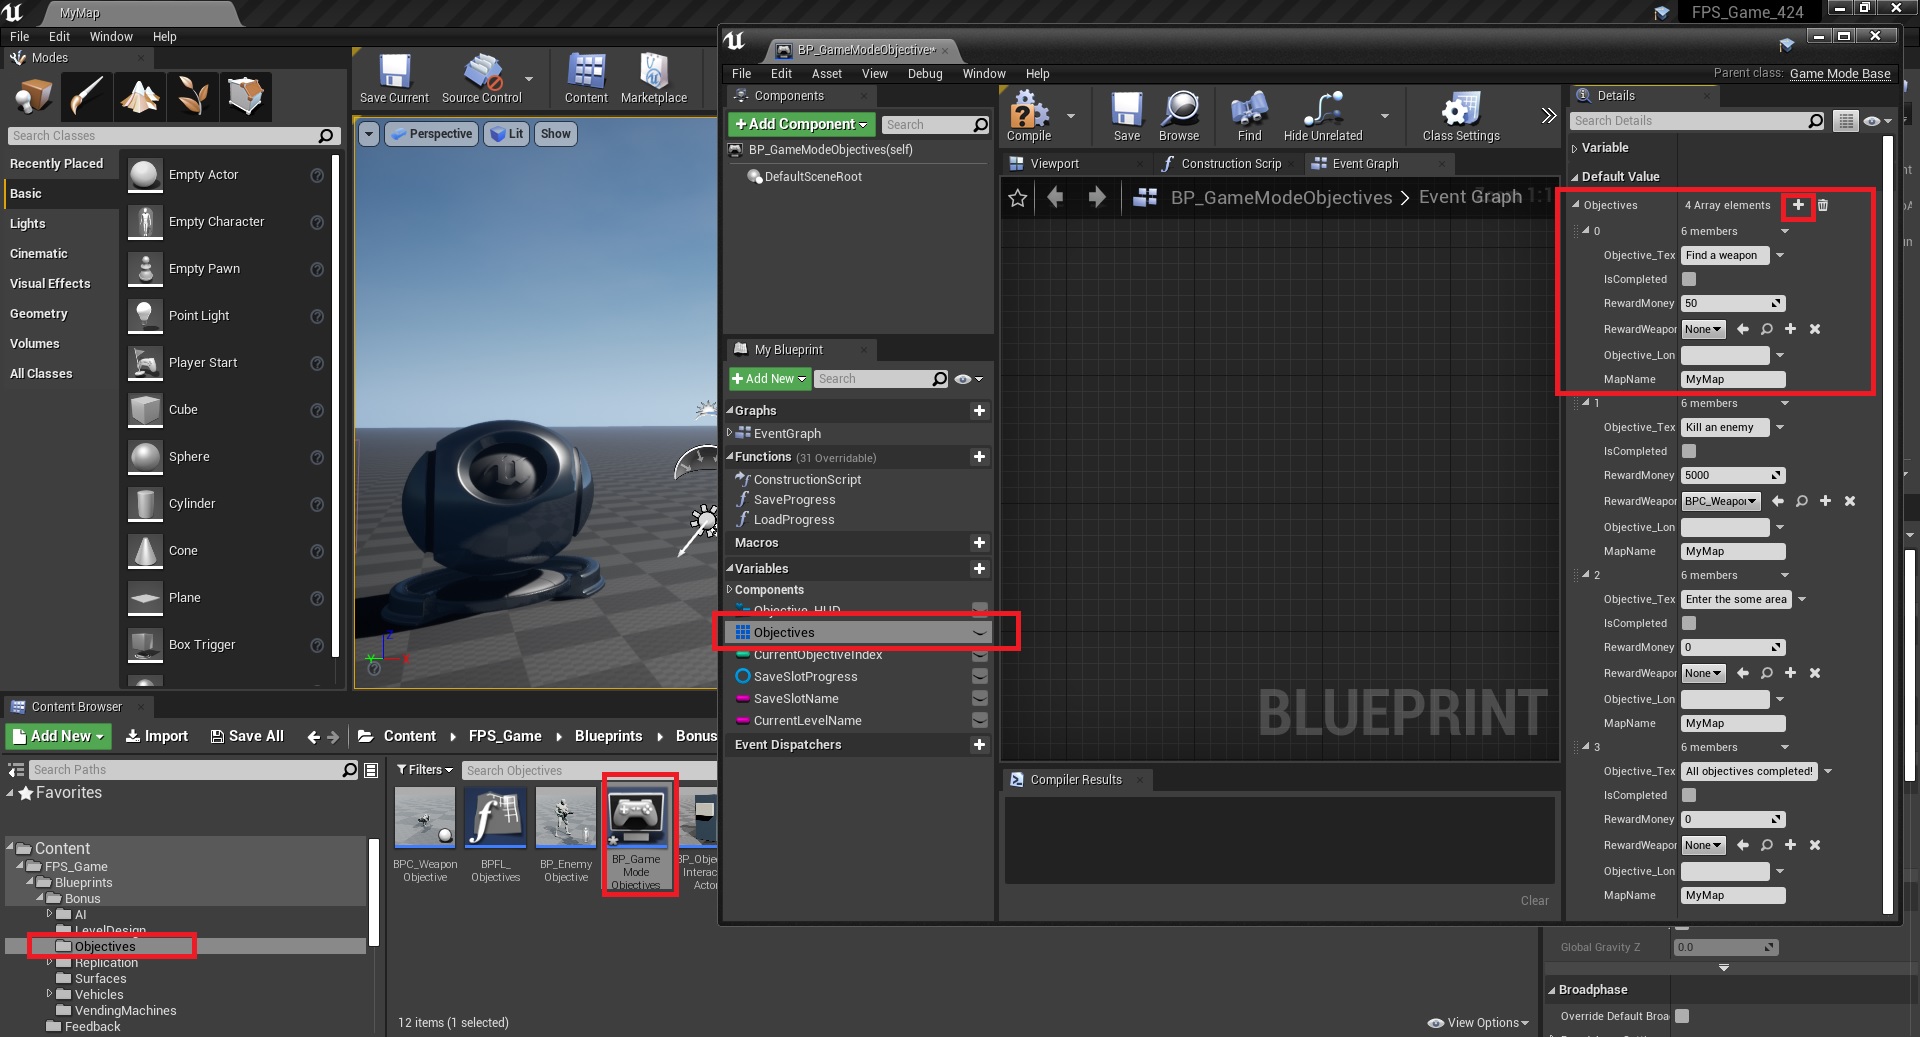
NOTE: you can set a reward weapon or reward money there too, it’s not required tho
WAYPOINT
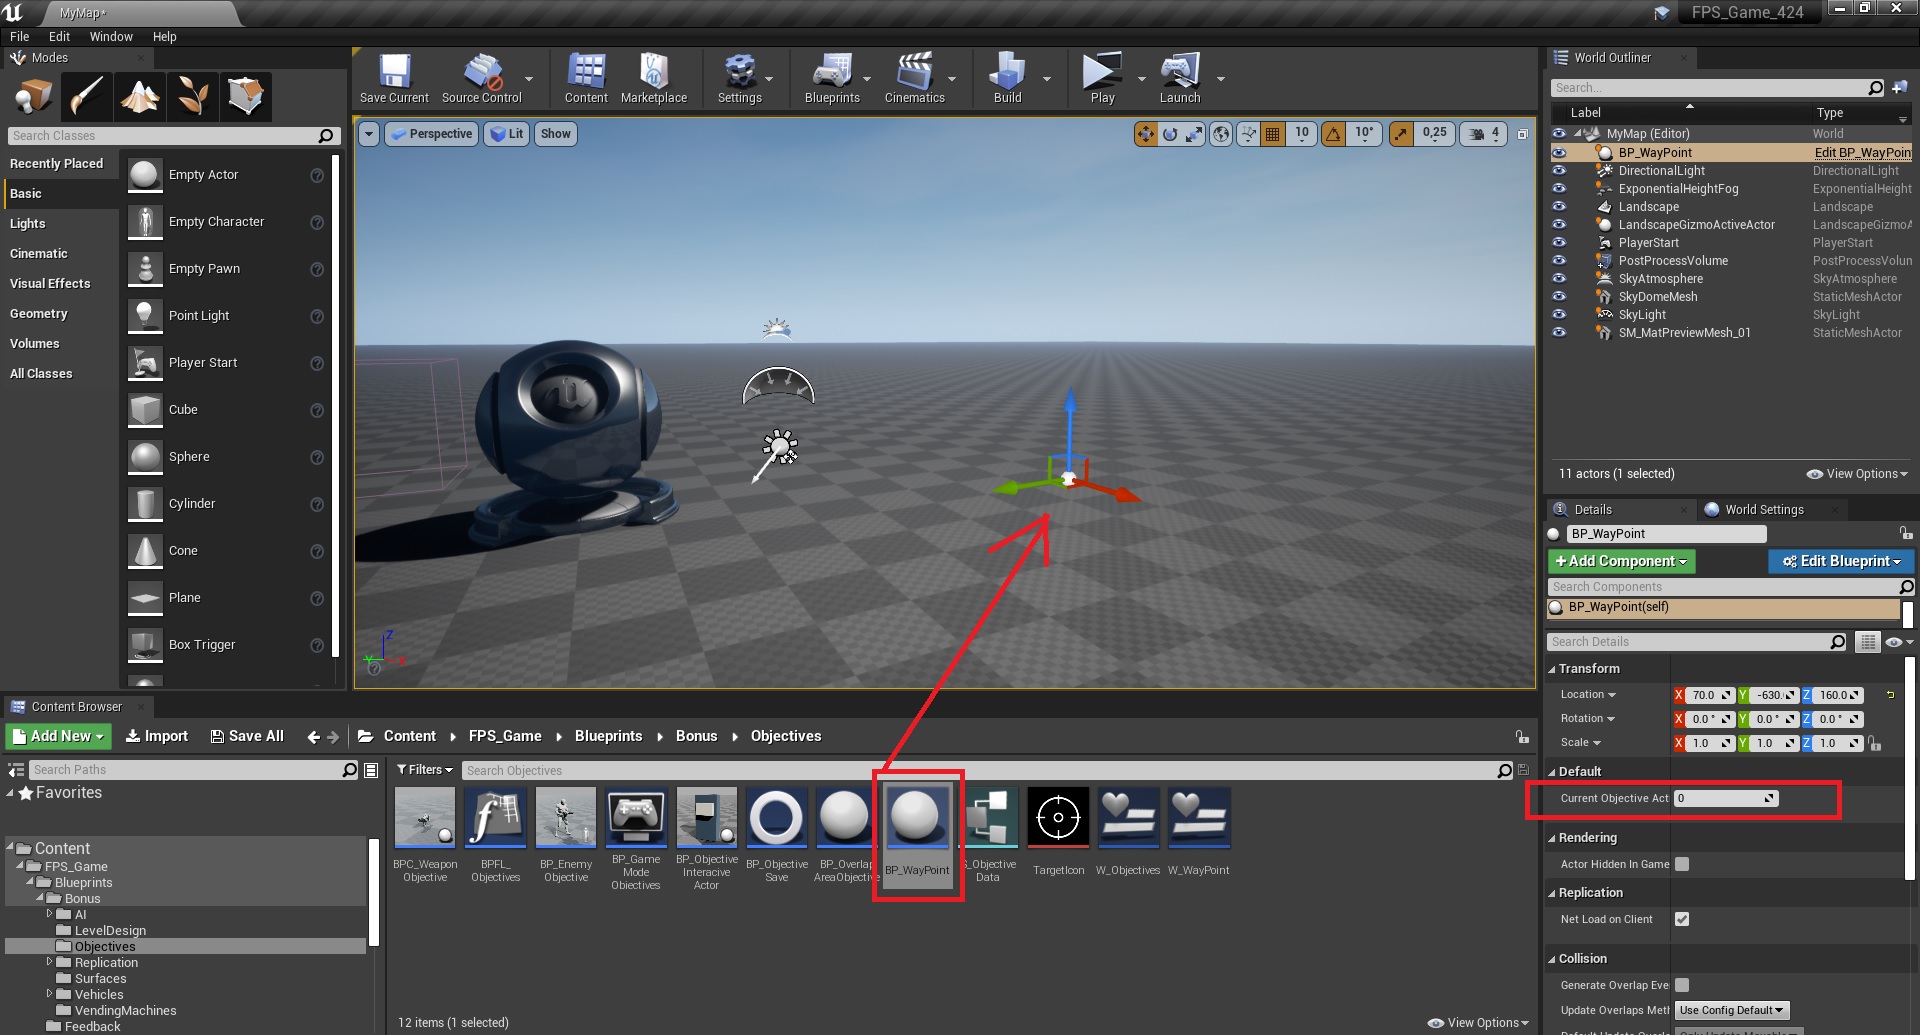
4. Now put a waypoint into your level, notice the exposed variable, that should be the same number that this objective is in the array, so in this case “Find a Weapon” is index 0 in the array in the game mode, so in this waypoint it will also be 0
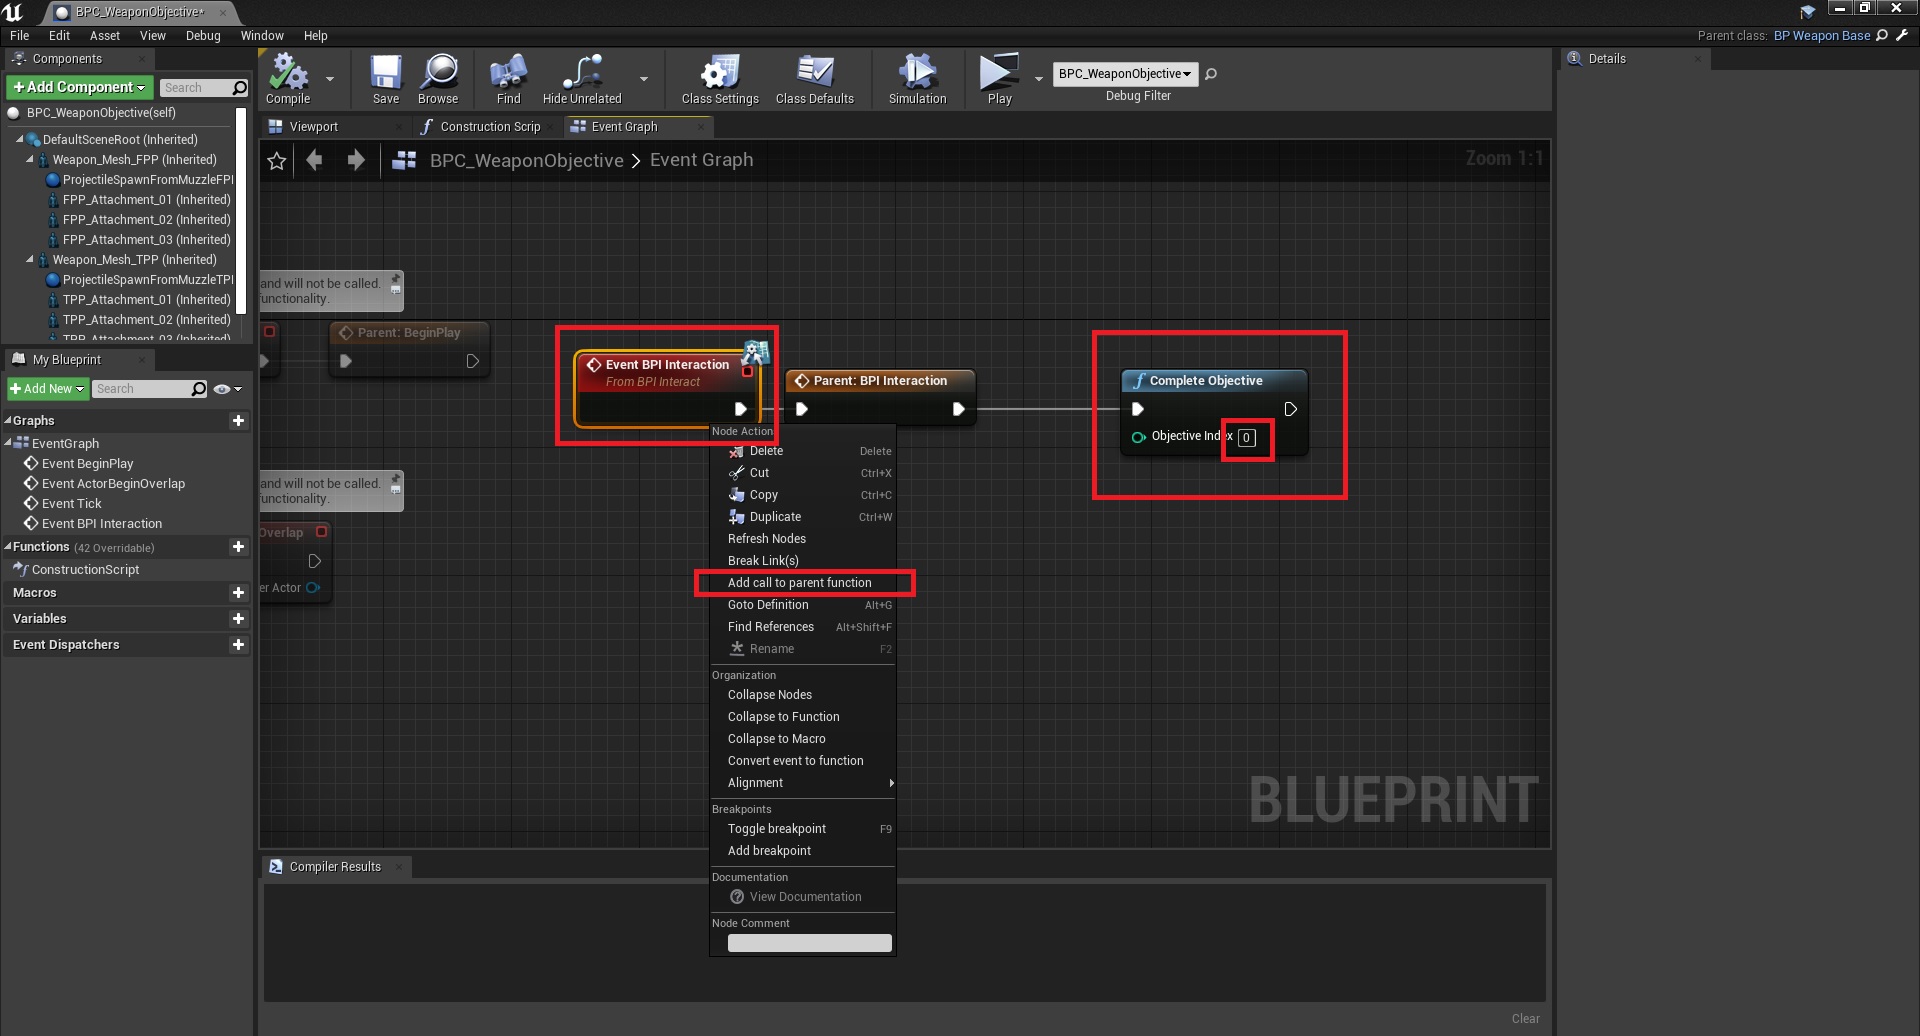
WEAPON EXAMPLE (Interact with something)
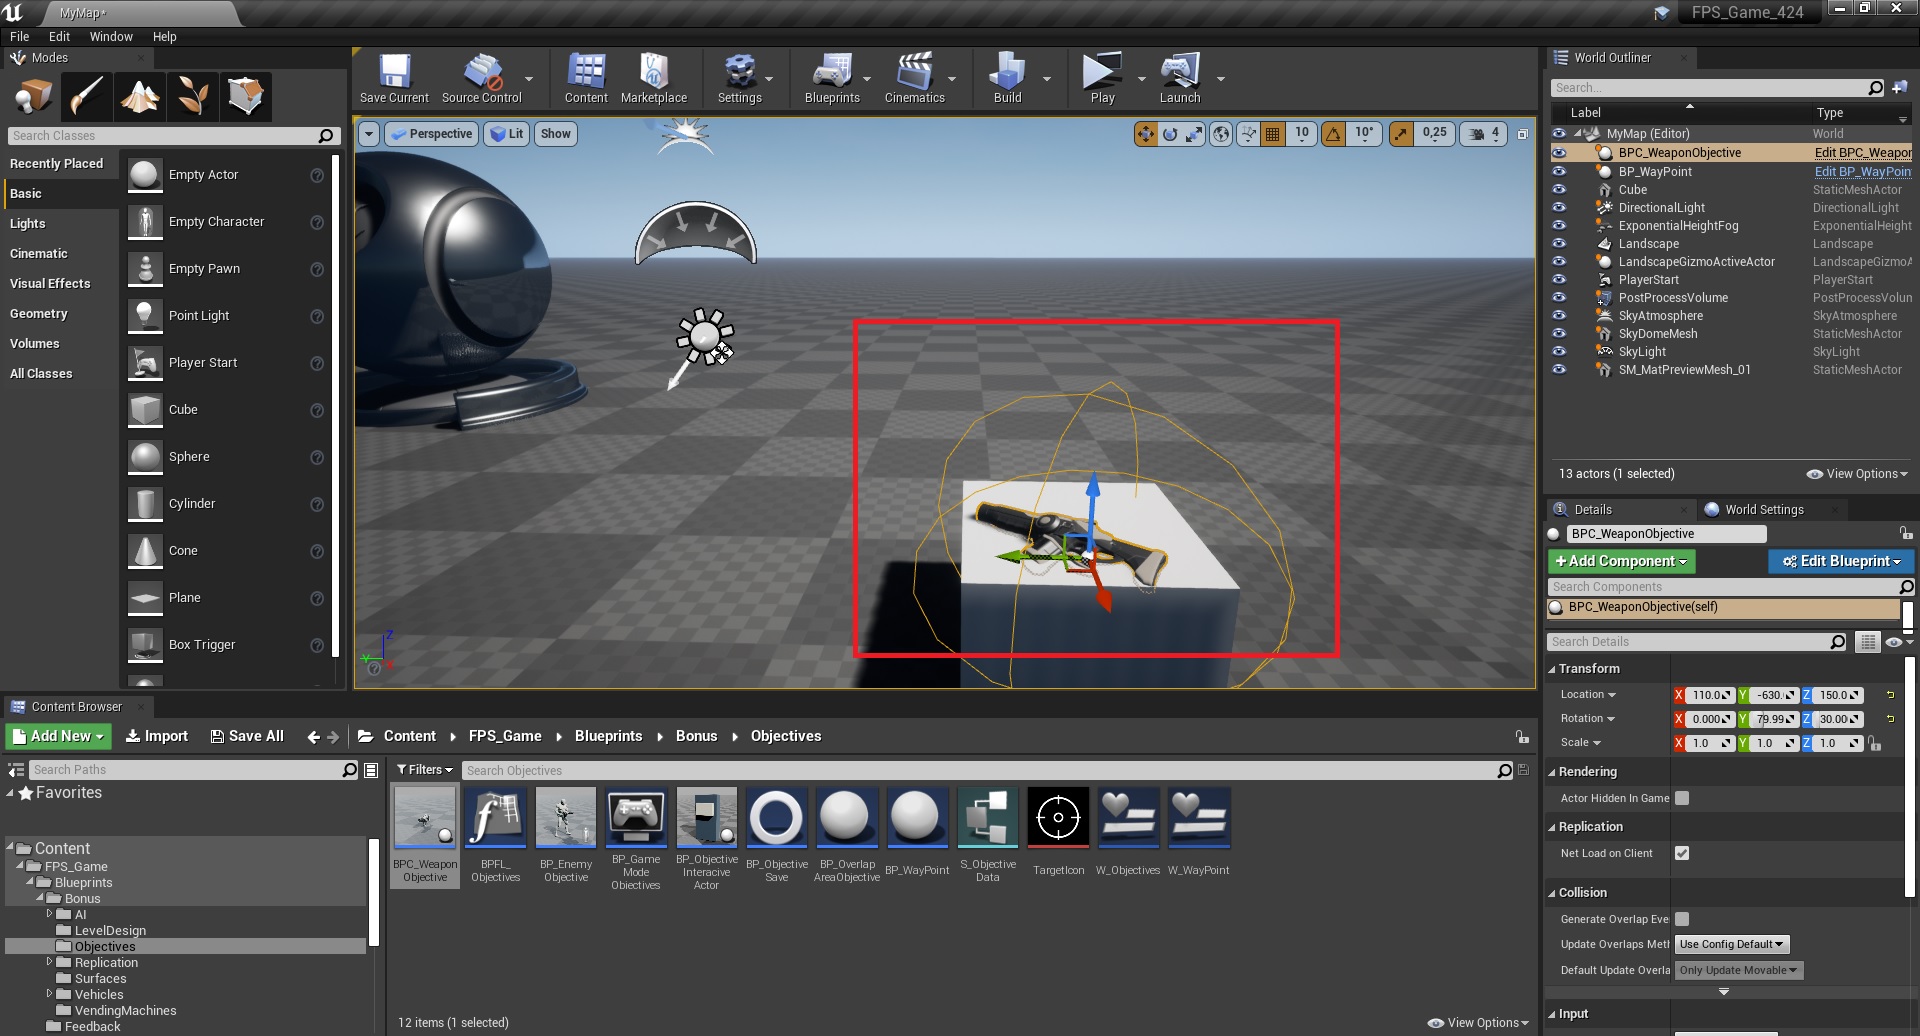
5. Now on that same location place a weapon (doesn’t matter which one)
6. Now open your weapon child class and in its blueprint graph add this. What’s happening here is basically it tell the game mode that this index in the objectives array is now finished and switch to the next one.
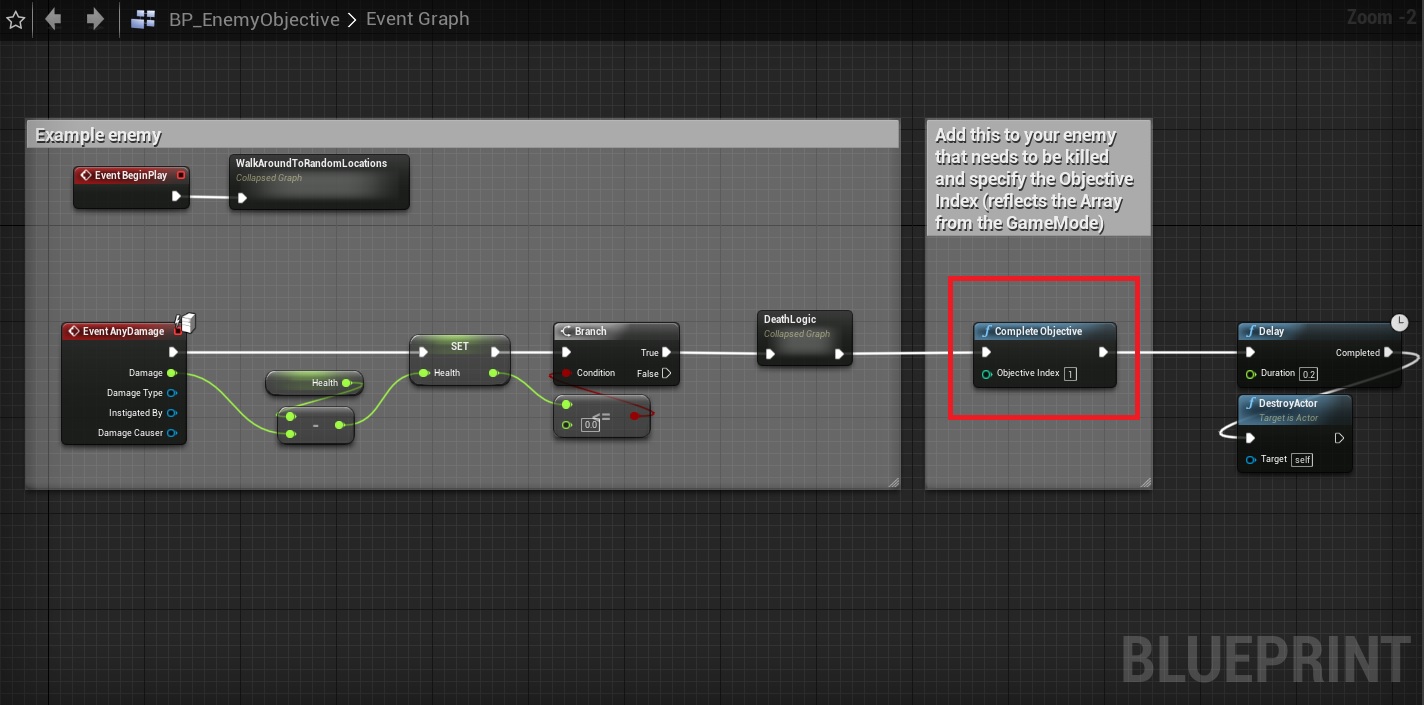
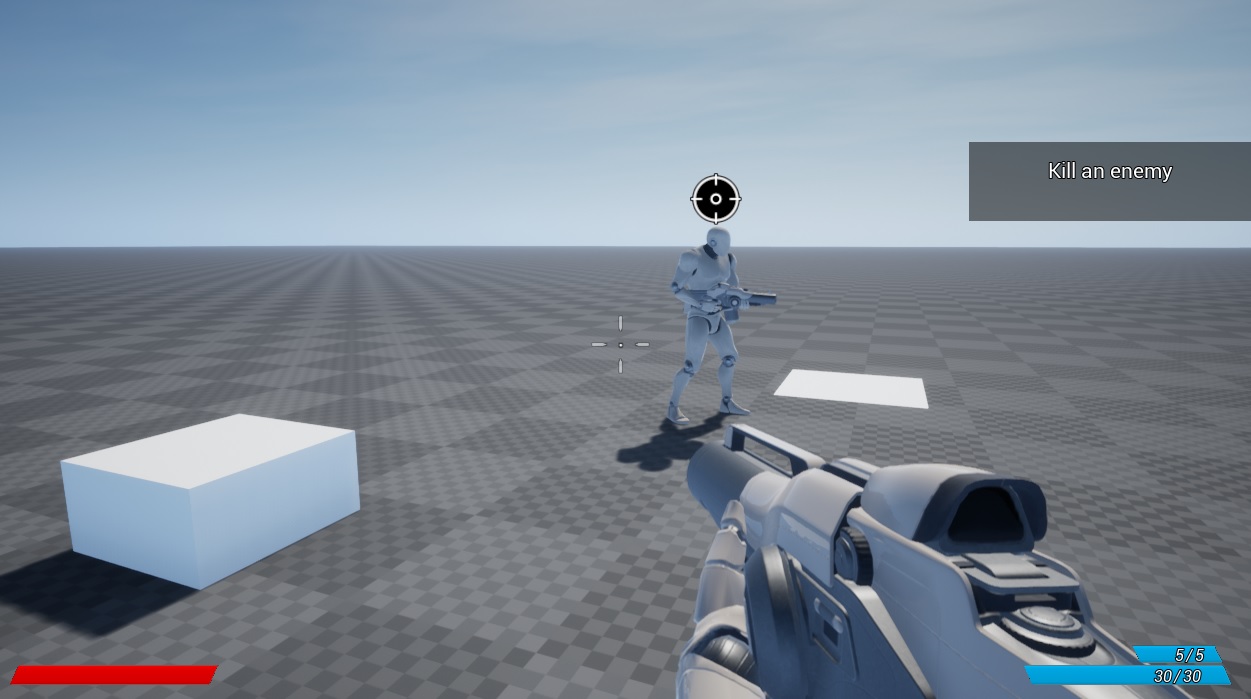
KILL ENEMY EXAMPLE (Tracking an actor)
7. In the next objective, we will kill an enemy, so in order for the waypoint to track it, we need to add it as a child class inside it and specify what it’s index is

8. Still on the enemy, when it dies, basically just tell it to complete the mission and then have the actor destroyed, this varies from project to project, depends on what AI you’re using, just don’t call it after its been destroyed.
ENTER VOLUME EXAMPLE
9. The next objective in the array was to enter a specific area, you can place this blueprint anywhere really (entering a door, discovering a new area, etc.)
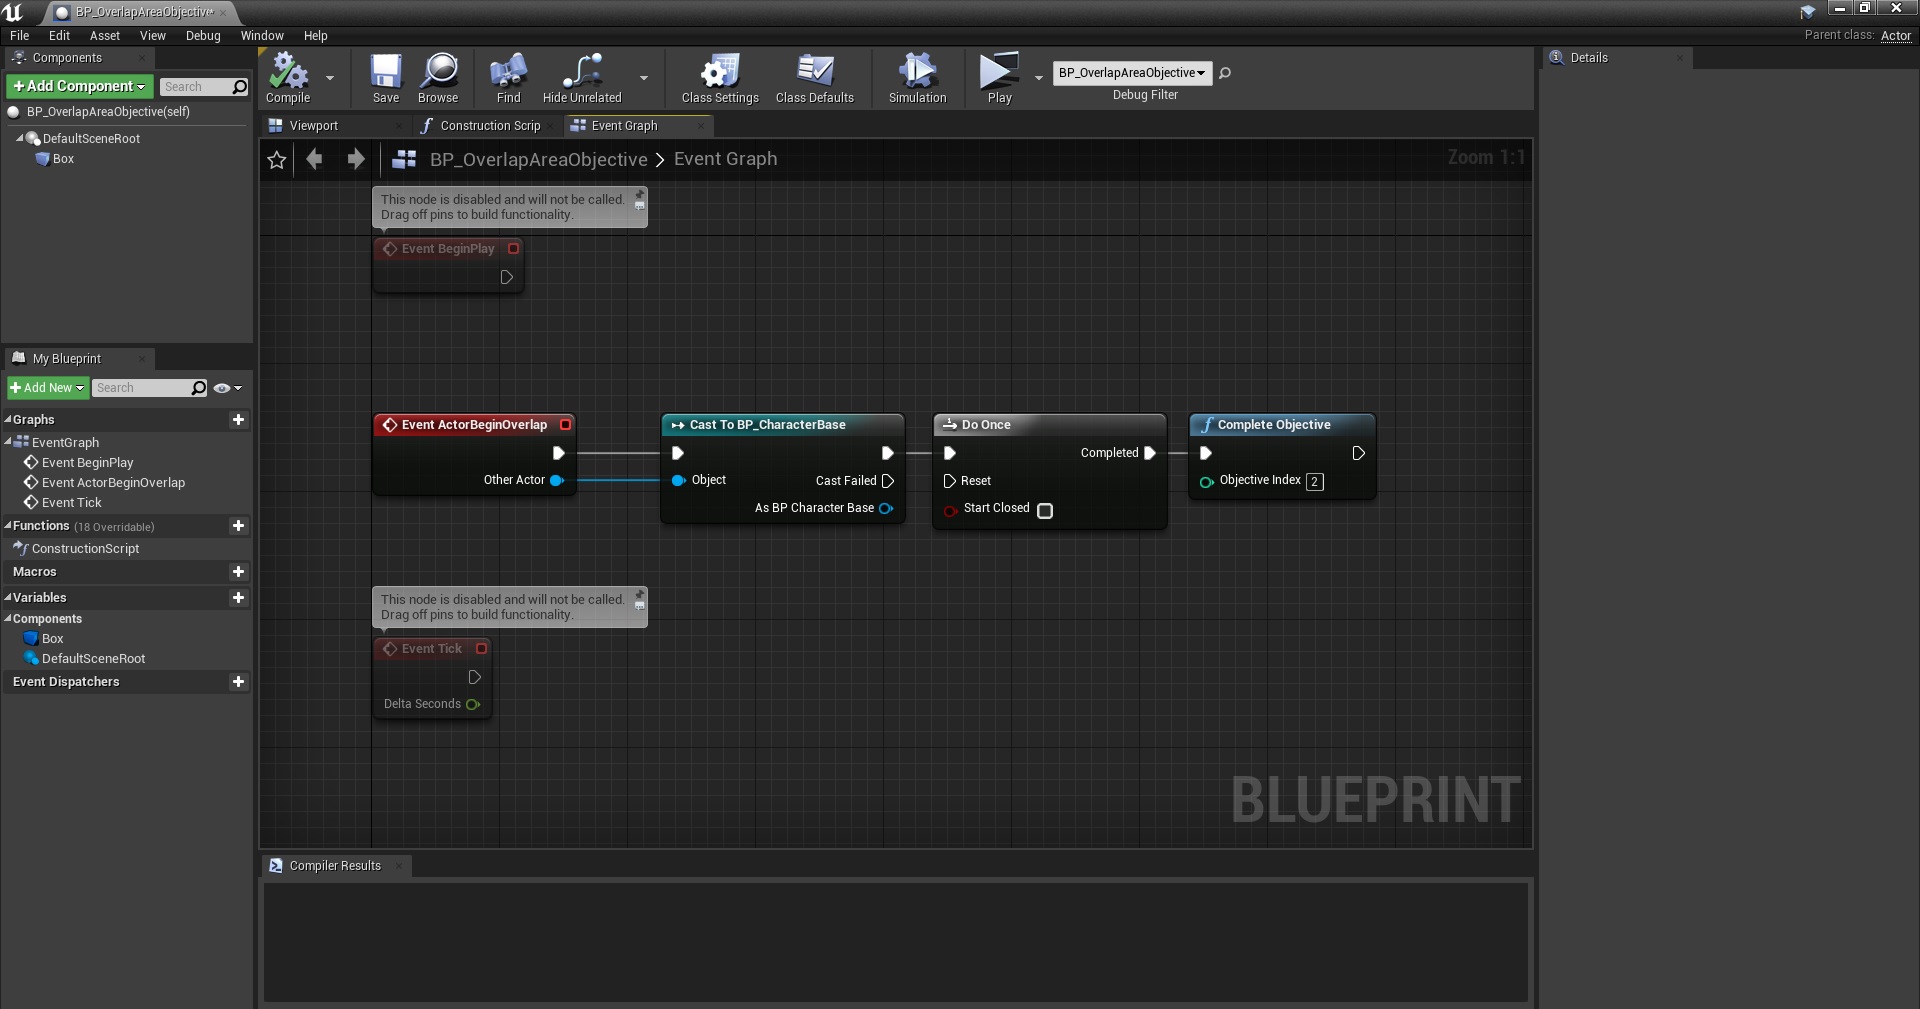
10. Place the area in the level, and another waypoint and tell it what index it is in the array

SAVE/LOAD
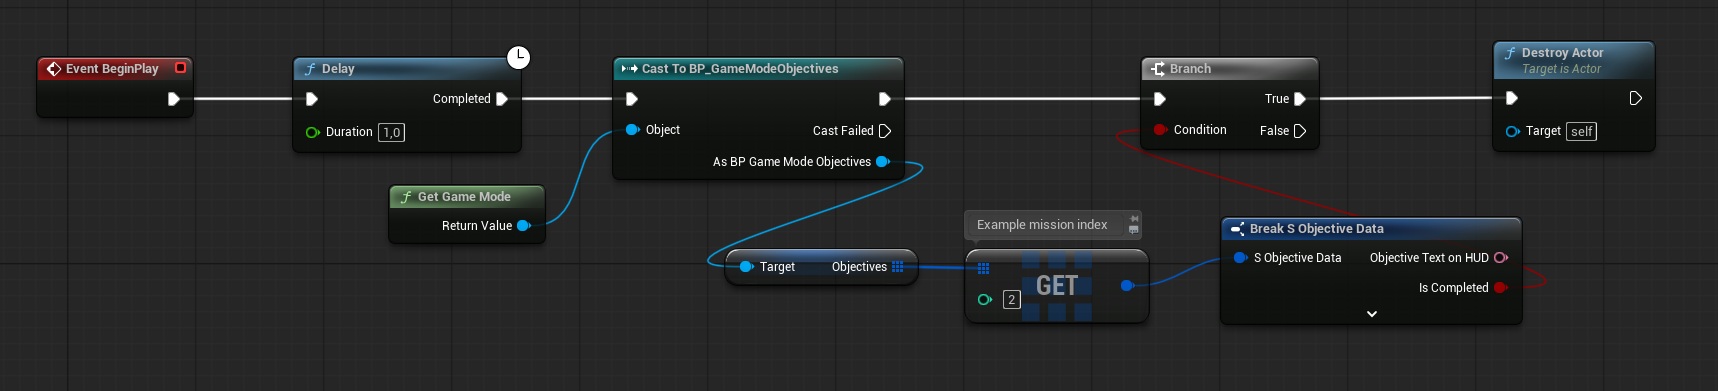
11. Nothing to do here really, it’s already set up to automatically save progress after each objective, and all 3 save slots are also supported. The only thing you need to be aware of is if you change the order or add new missions or delete old ones from the array, it’s always a good idea to delete old .sav files.
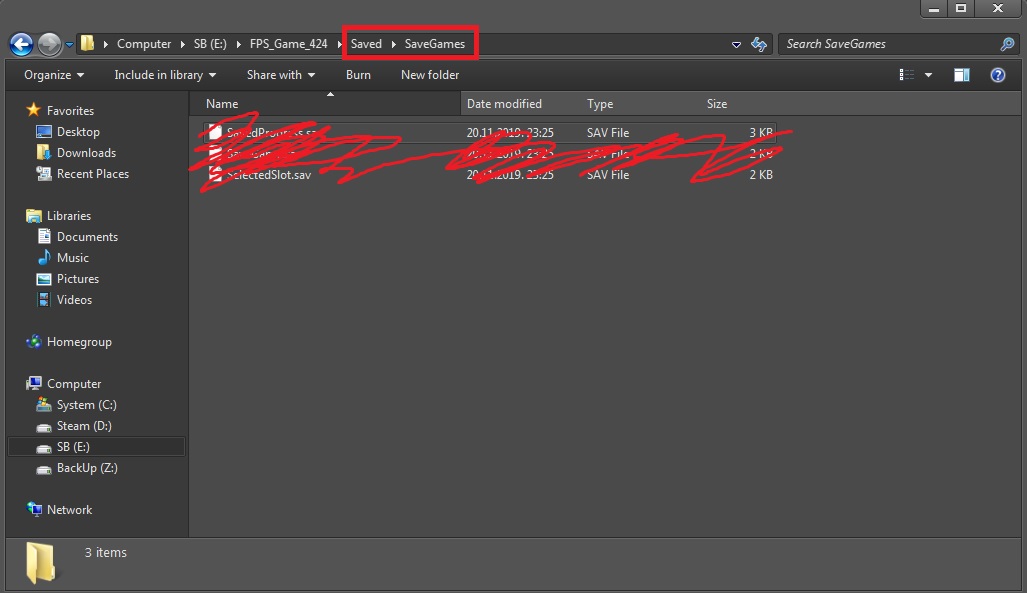
…/YourProjectFolder/Saved/SaveGames
That’s it!
Related tutorials:
How to replace the default starting map
Edit:
If you find this tutorial too difficult and stressful to follow, I made a simplified video of how to add a mission in just a few clicks. You can see it here.
Edit 2:
If you need to do something if a mission is already completed, for example make something destroy itself if the mission is already done, and you don’t want to respawn the thing, you can add this to its begin play: