
In this tutorial we will change the image that gets generated when you create a new project into a custom one.
1. Create a new project and give it any name you like
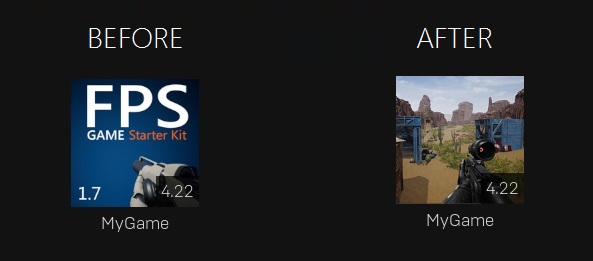
2. Open it and go to Project Settings and under Description pick any image that you like
NOTE:
The image needs to be 192×192 resolution and in PNG format, as an example I prepared few unbranded ones that you can use (if you want).
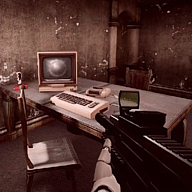

That’s it!
It will show up next time you start the Launcher.
You can create your own one of course too.
