
In this tutorial we will use Blender to change a third person character model to only have the arms and remove the rest of the body.
This tutorial does not expect any prior Blender knowledge and is a step-by-step guide how to do it, the same procedure should work on all characters that use the UE4 skeleton. For this tutorial I used the Cyborg Pack 01 from Blind Manta.
So let’s begin:
-Download and install Blender (any version that’s 2.80 or newer should work)
-Create a new FPS Game Starter Kit project
-Add Cyborg Pack 01 or your own character that you plan to use for this tutorial
1. Locate and duplicate the third person mesh of your character
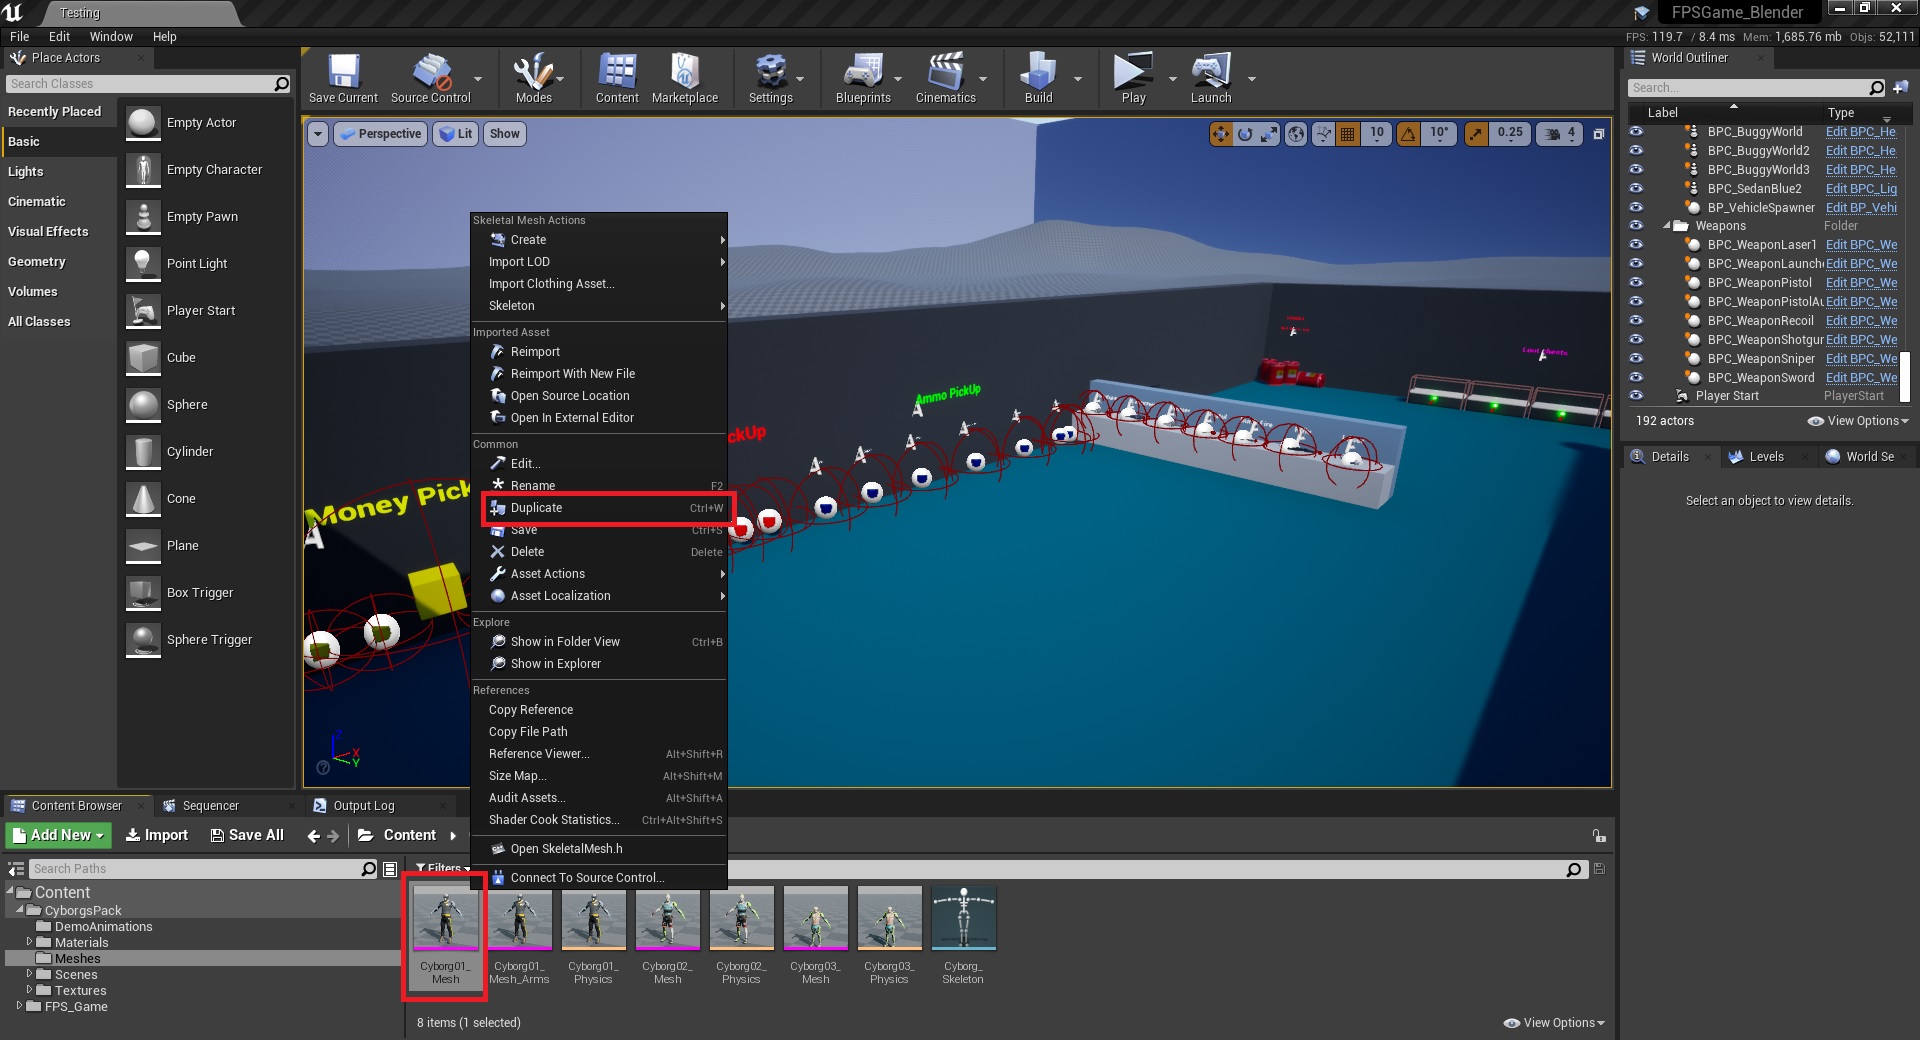
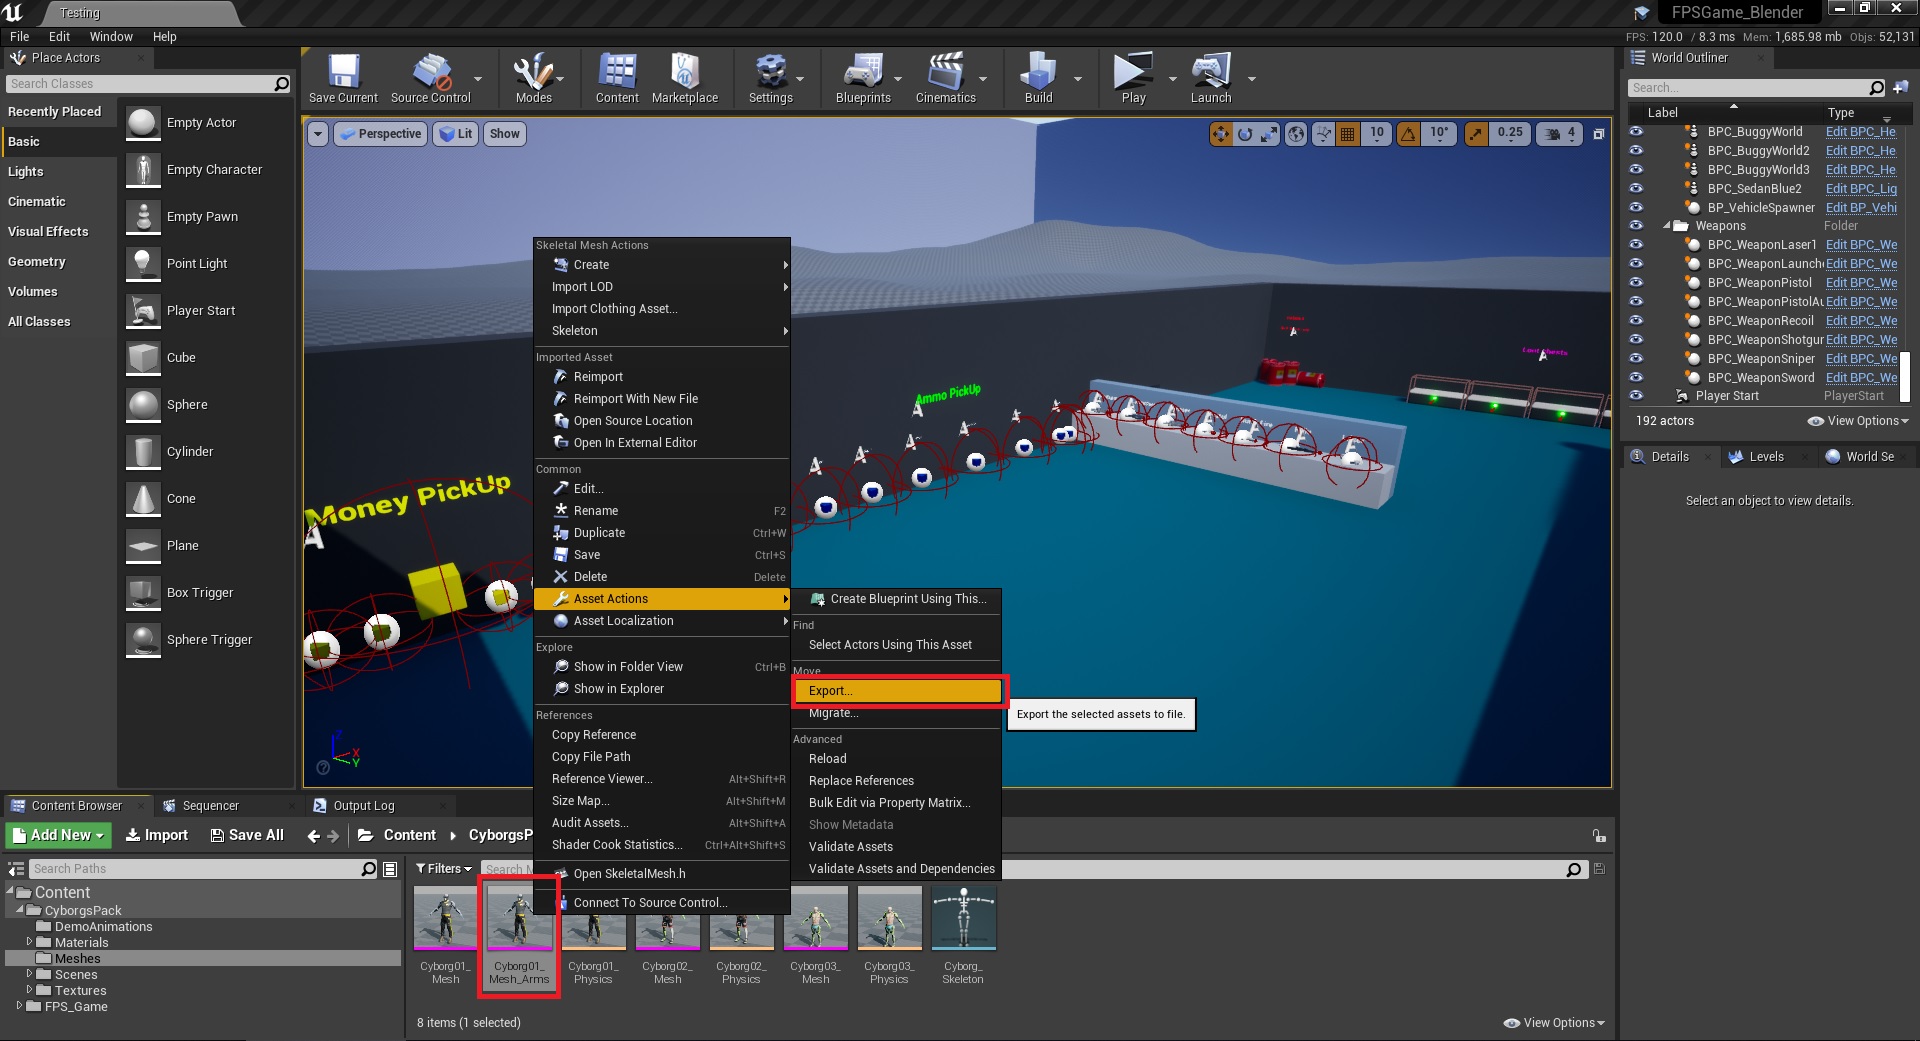
2. Call it however you want, in this case I just added _Arms at the end of it so that I know which one it is, then right click on it and export as FBX, default settings should work fine.
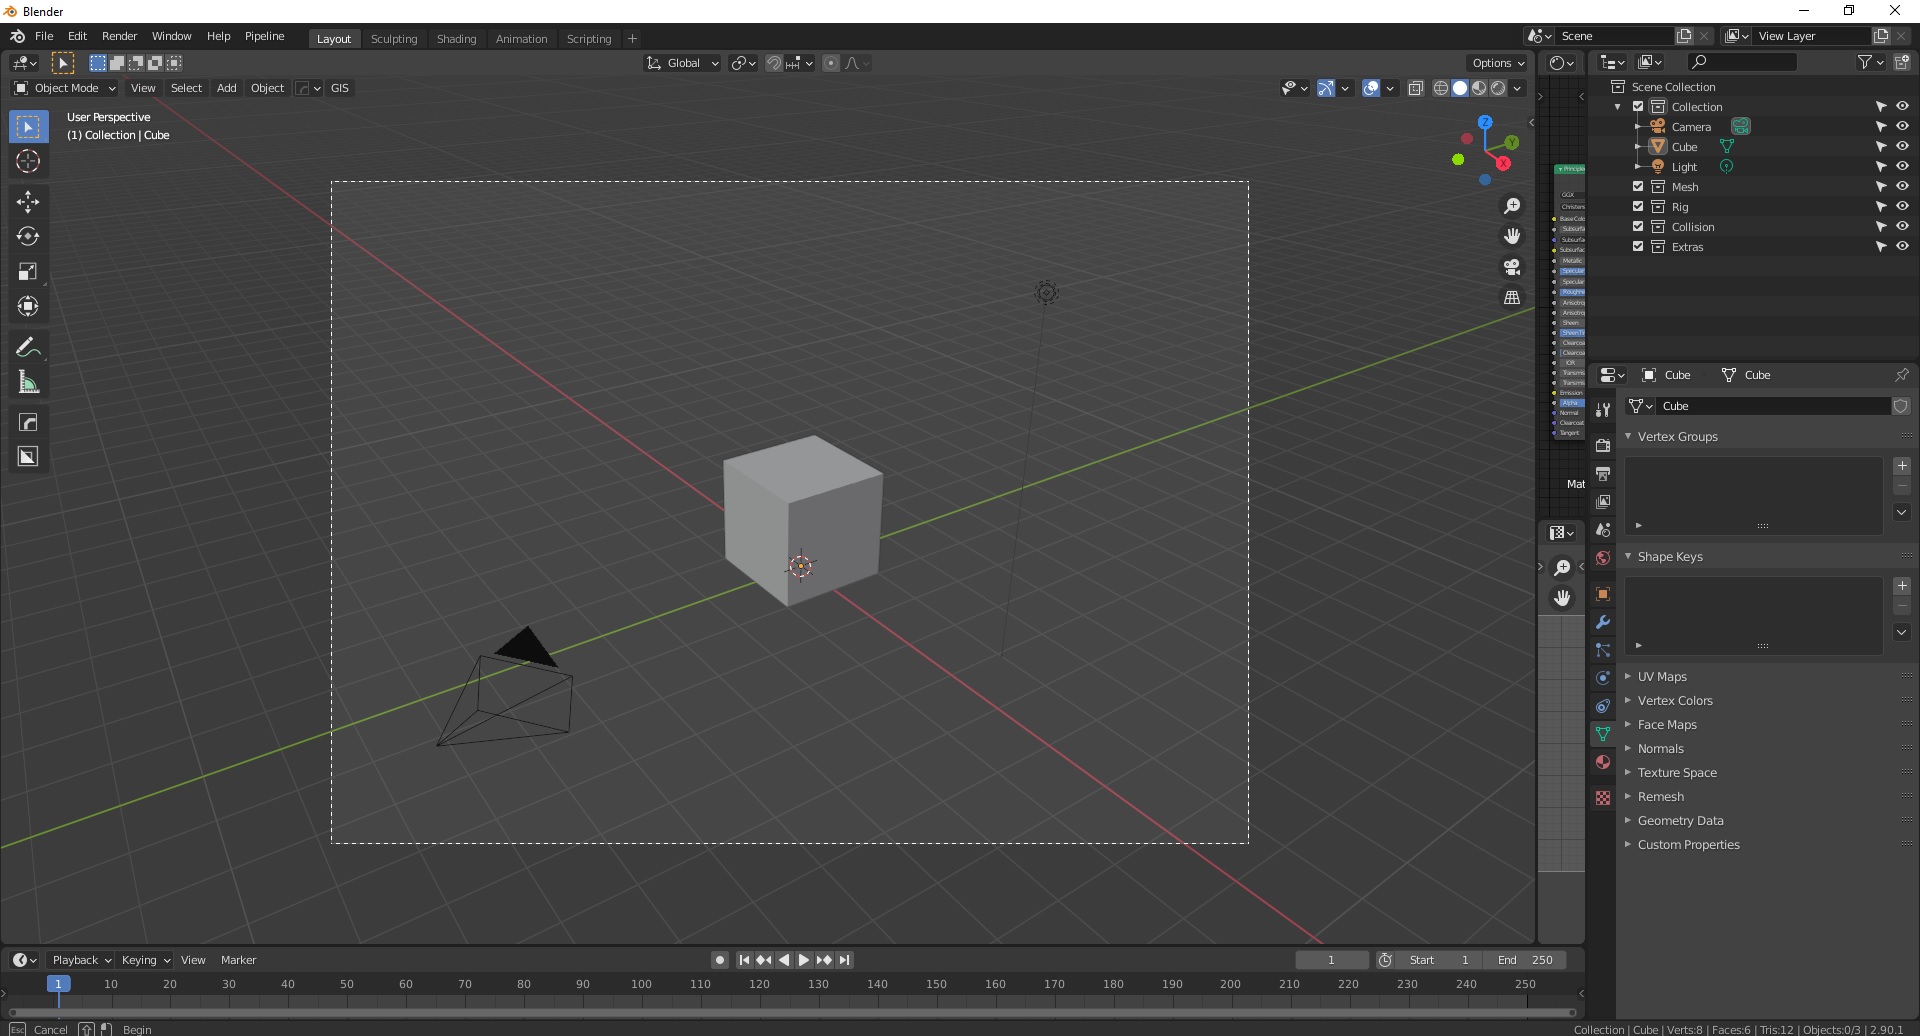
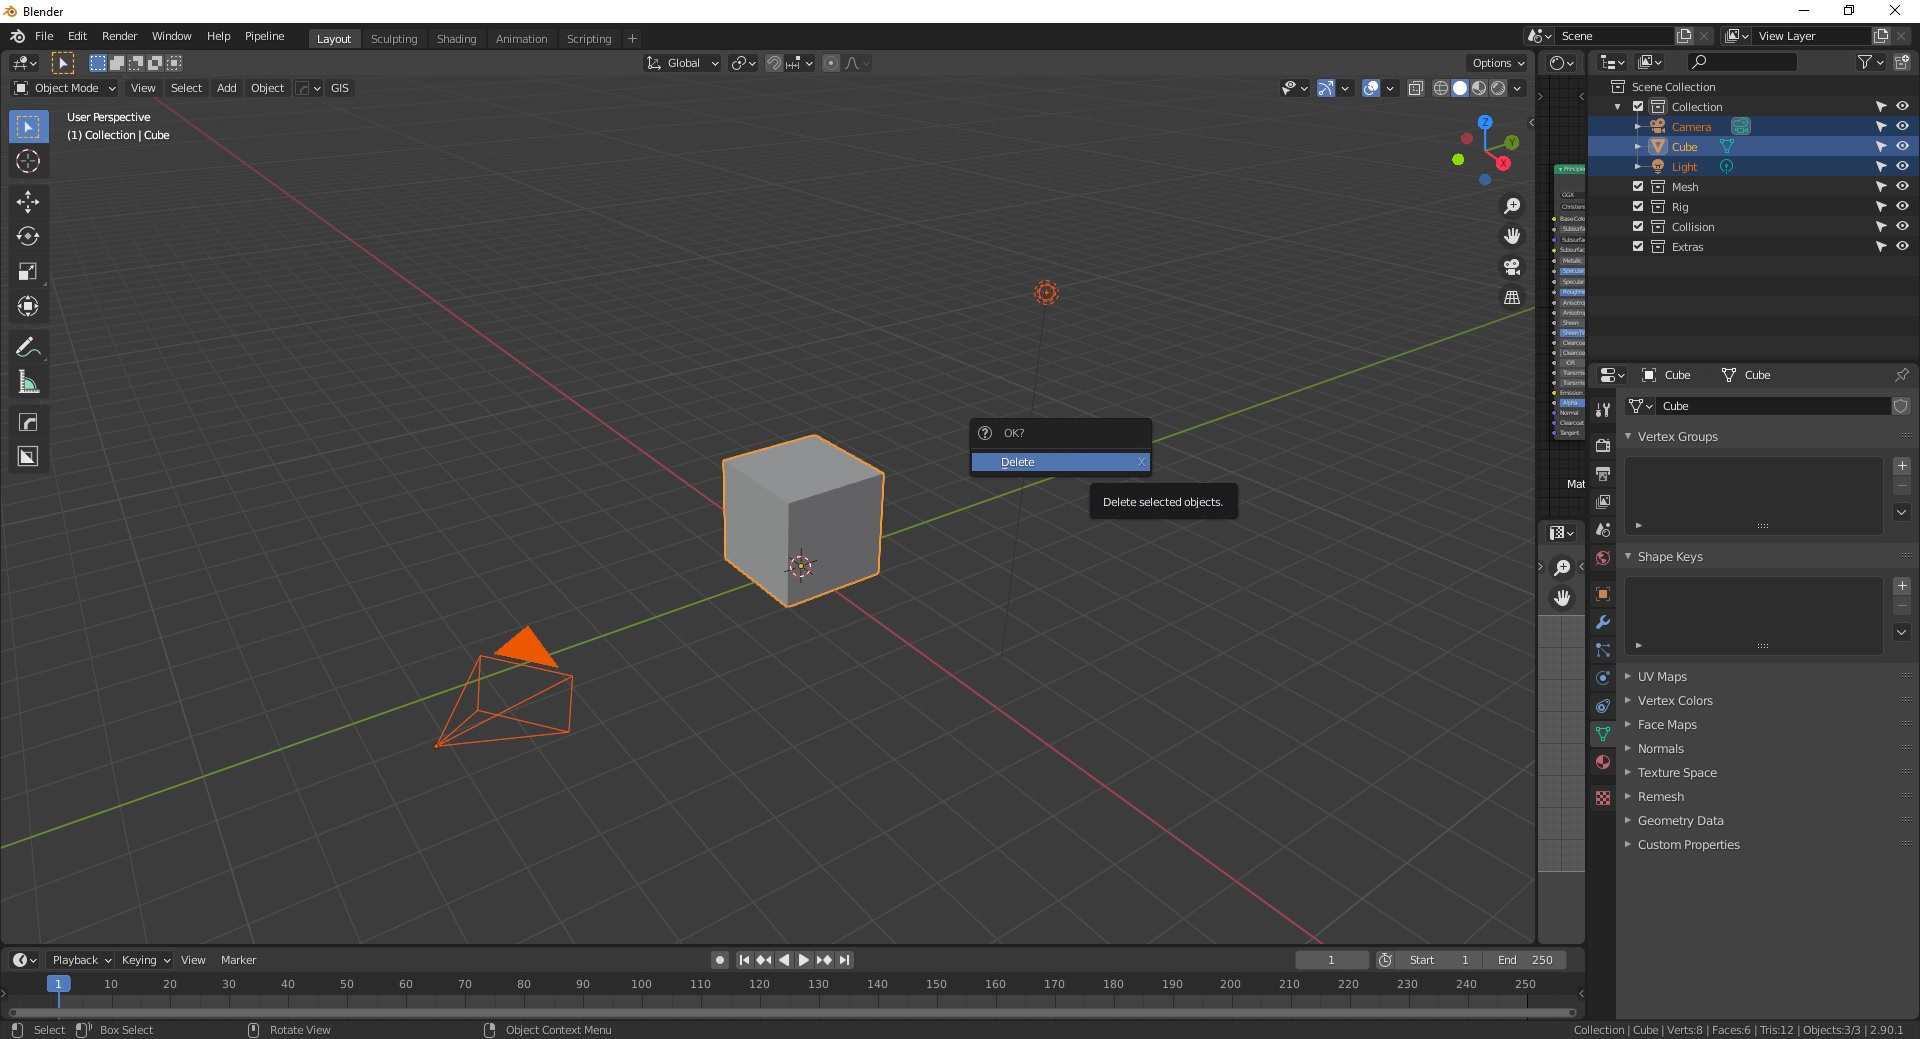
3. Now open Blender (yep, this got serious real fast XD) and select everything in the scene
4. Press the X key and then Delete (in Blender, keyboard shortcut for delete is X)
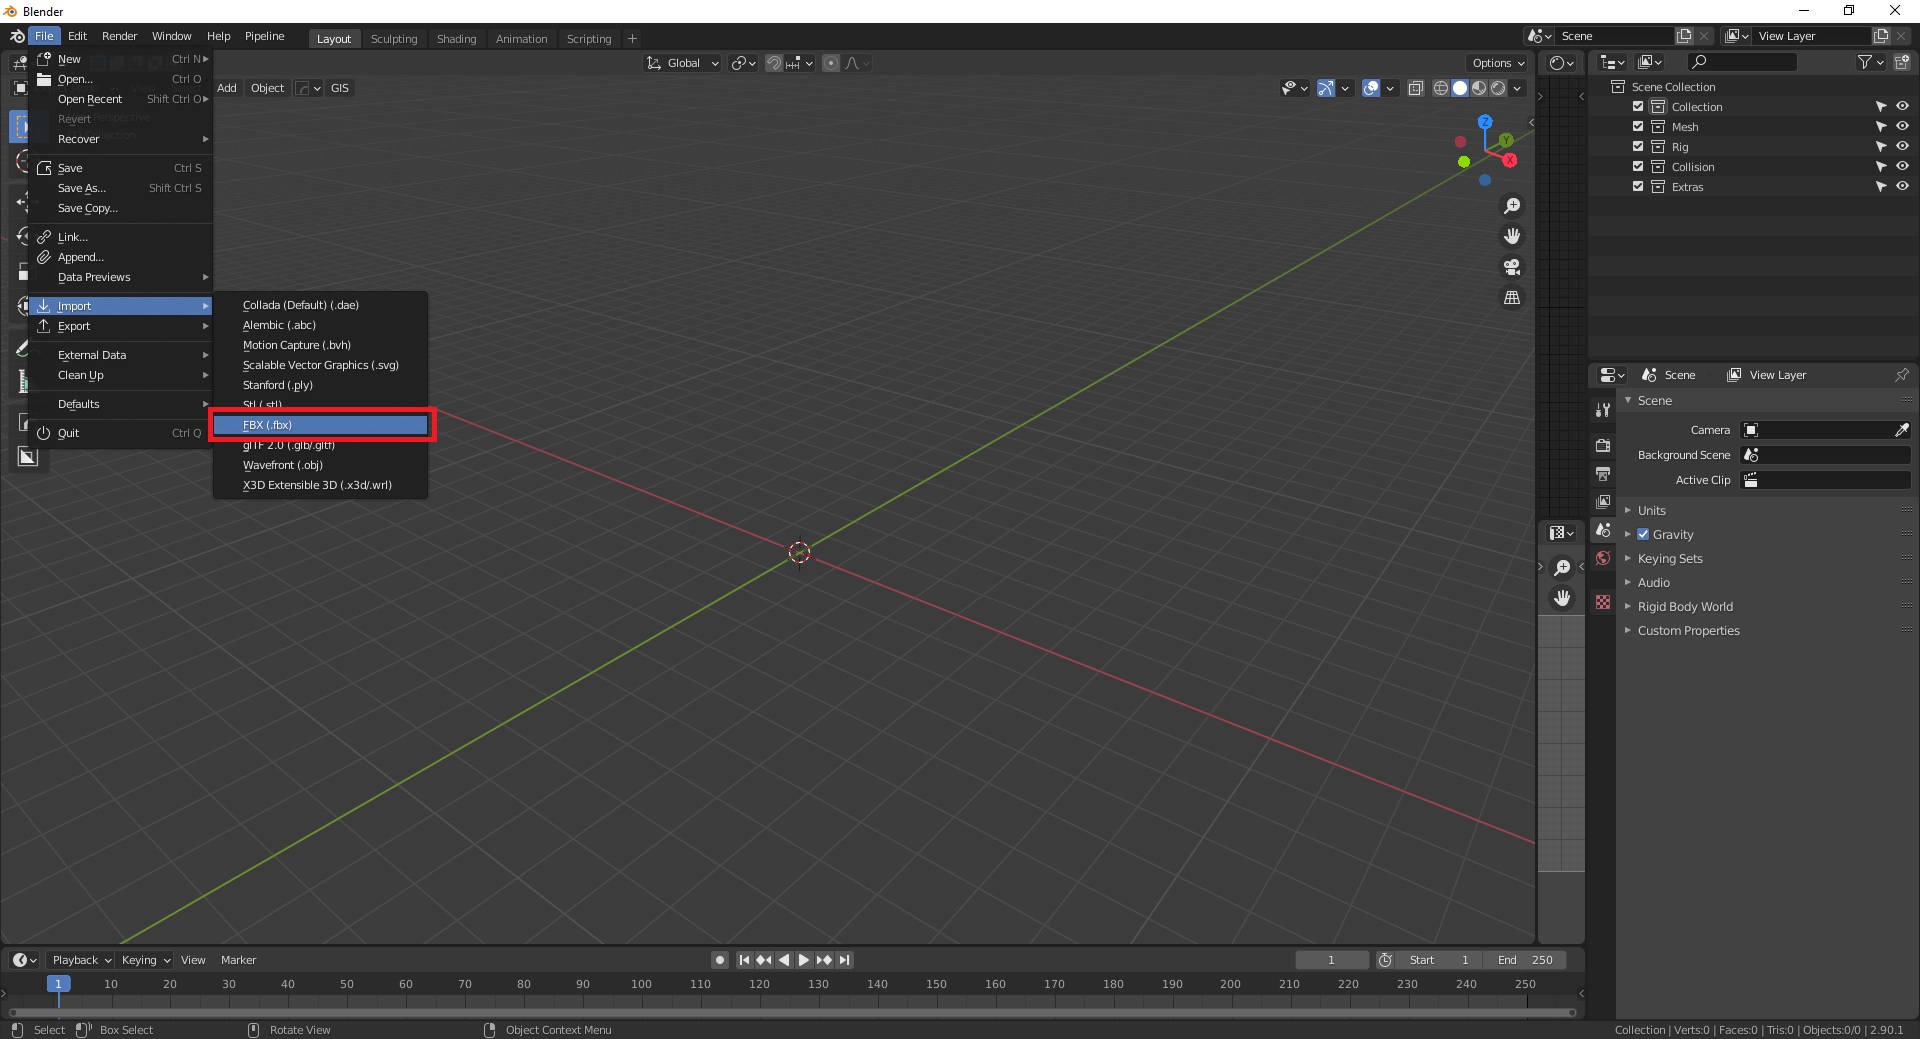
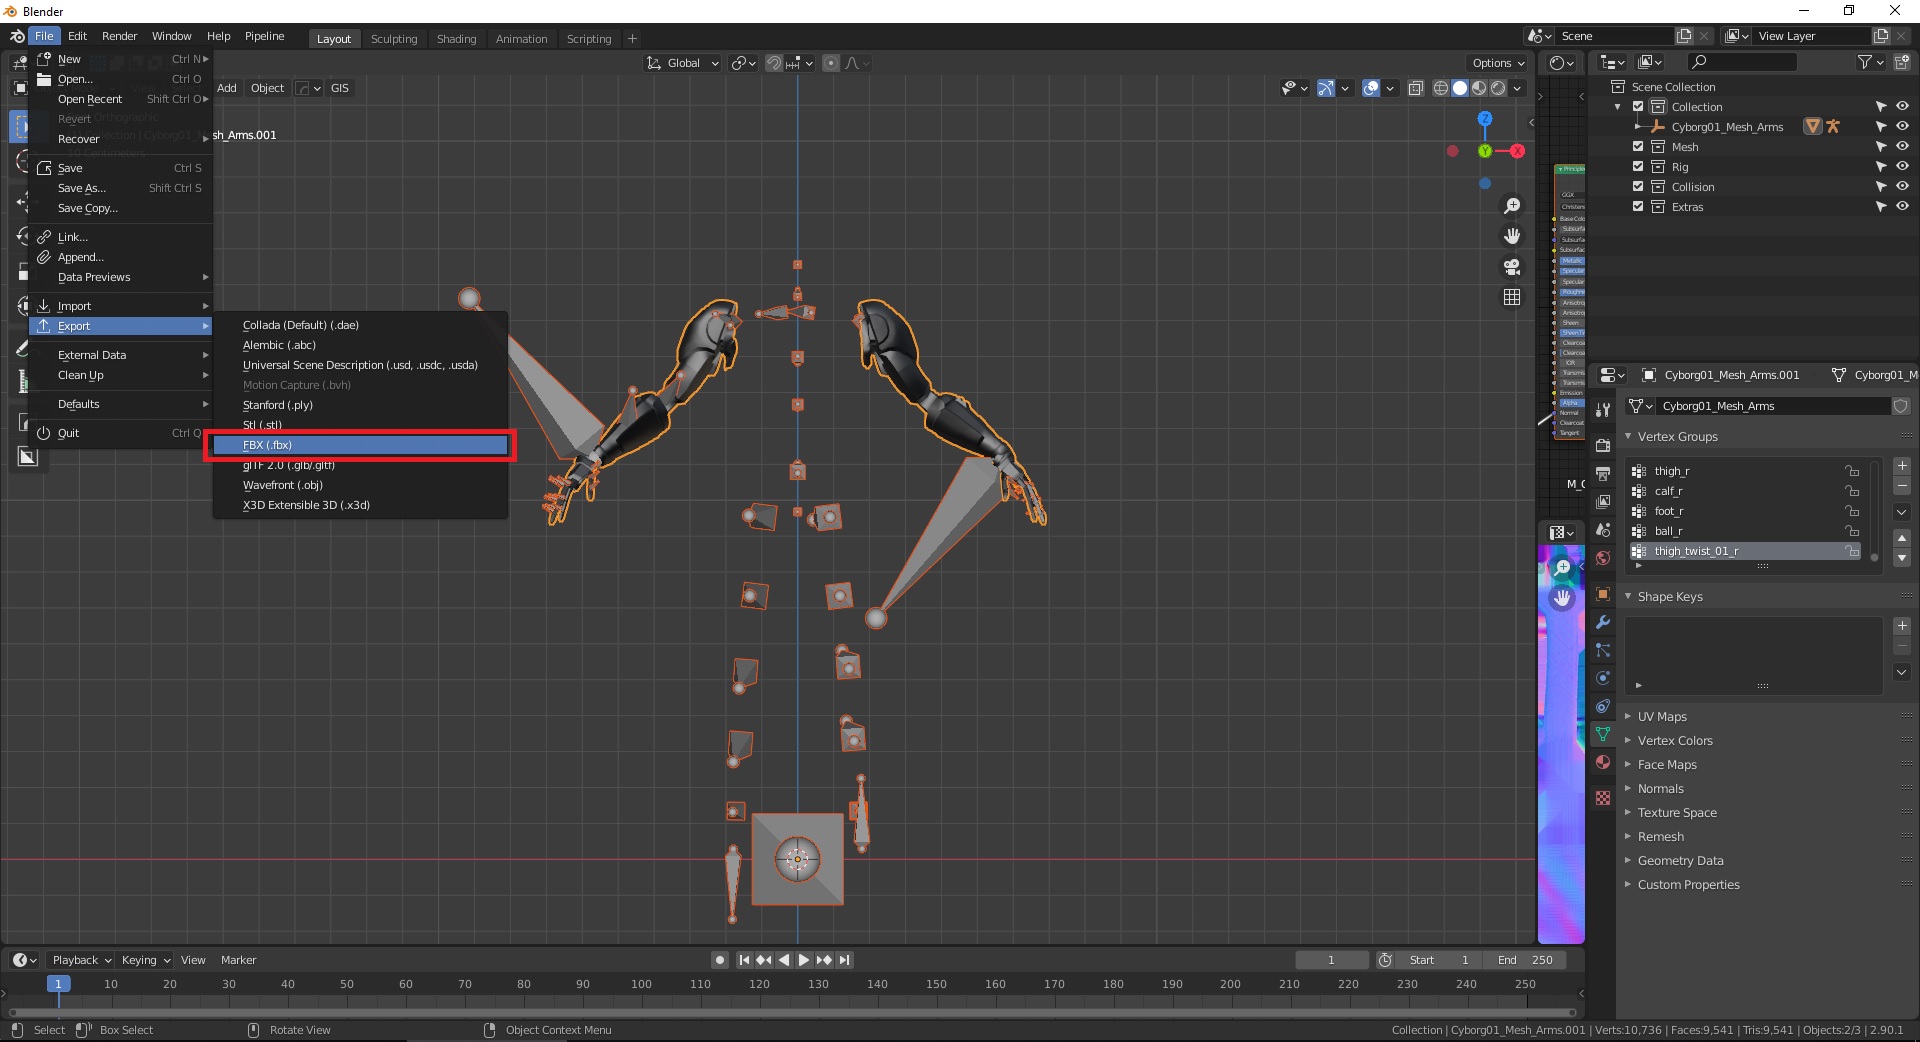
5. With a clear scene, go to File > Import > FBX file…
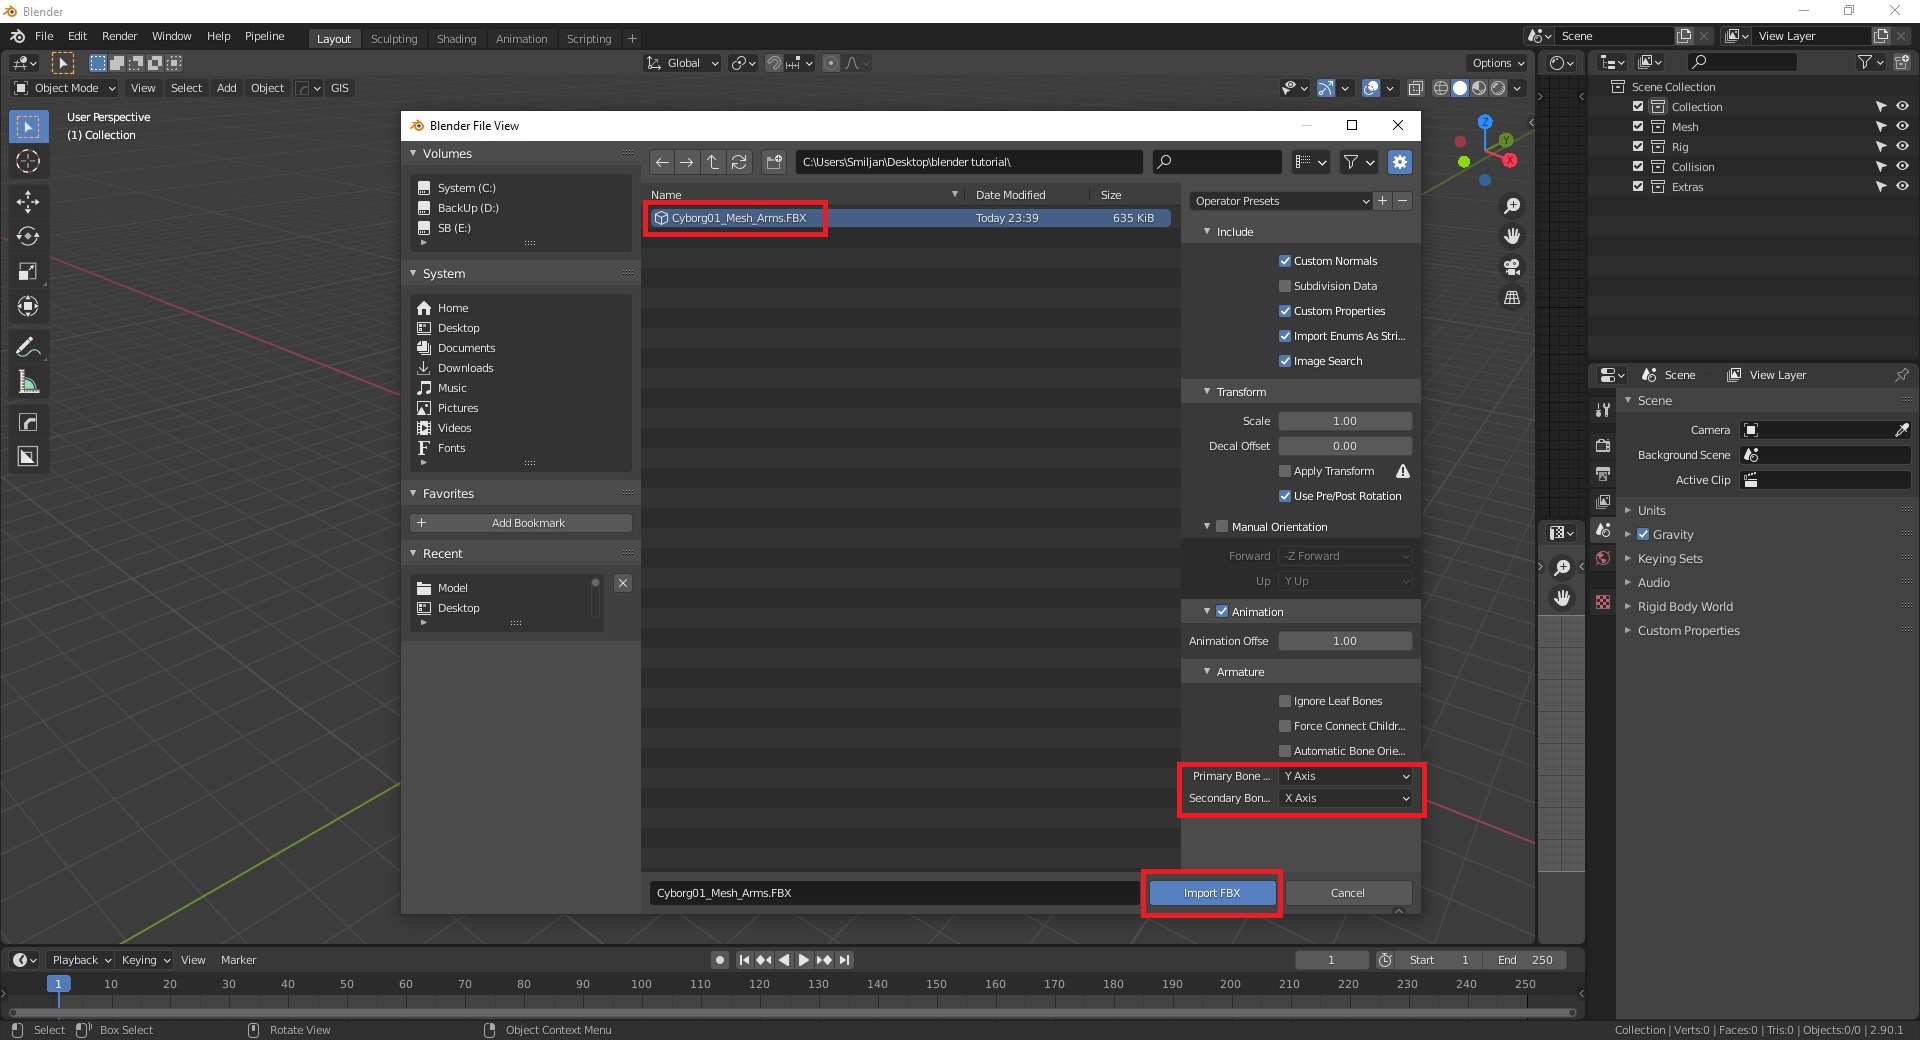
6. Locate the FBX file that we exported from UE4, make these settings look the same, there are more things to consider when dealing with Blender and characters for UE4, such as scale, bone rotation, an empty as the root, unit scale, etc. but for this tutorial we won’t do any of that, just get in, change the mesh and get out. To keep things simple.
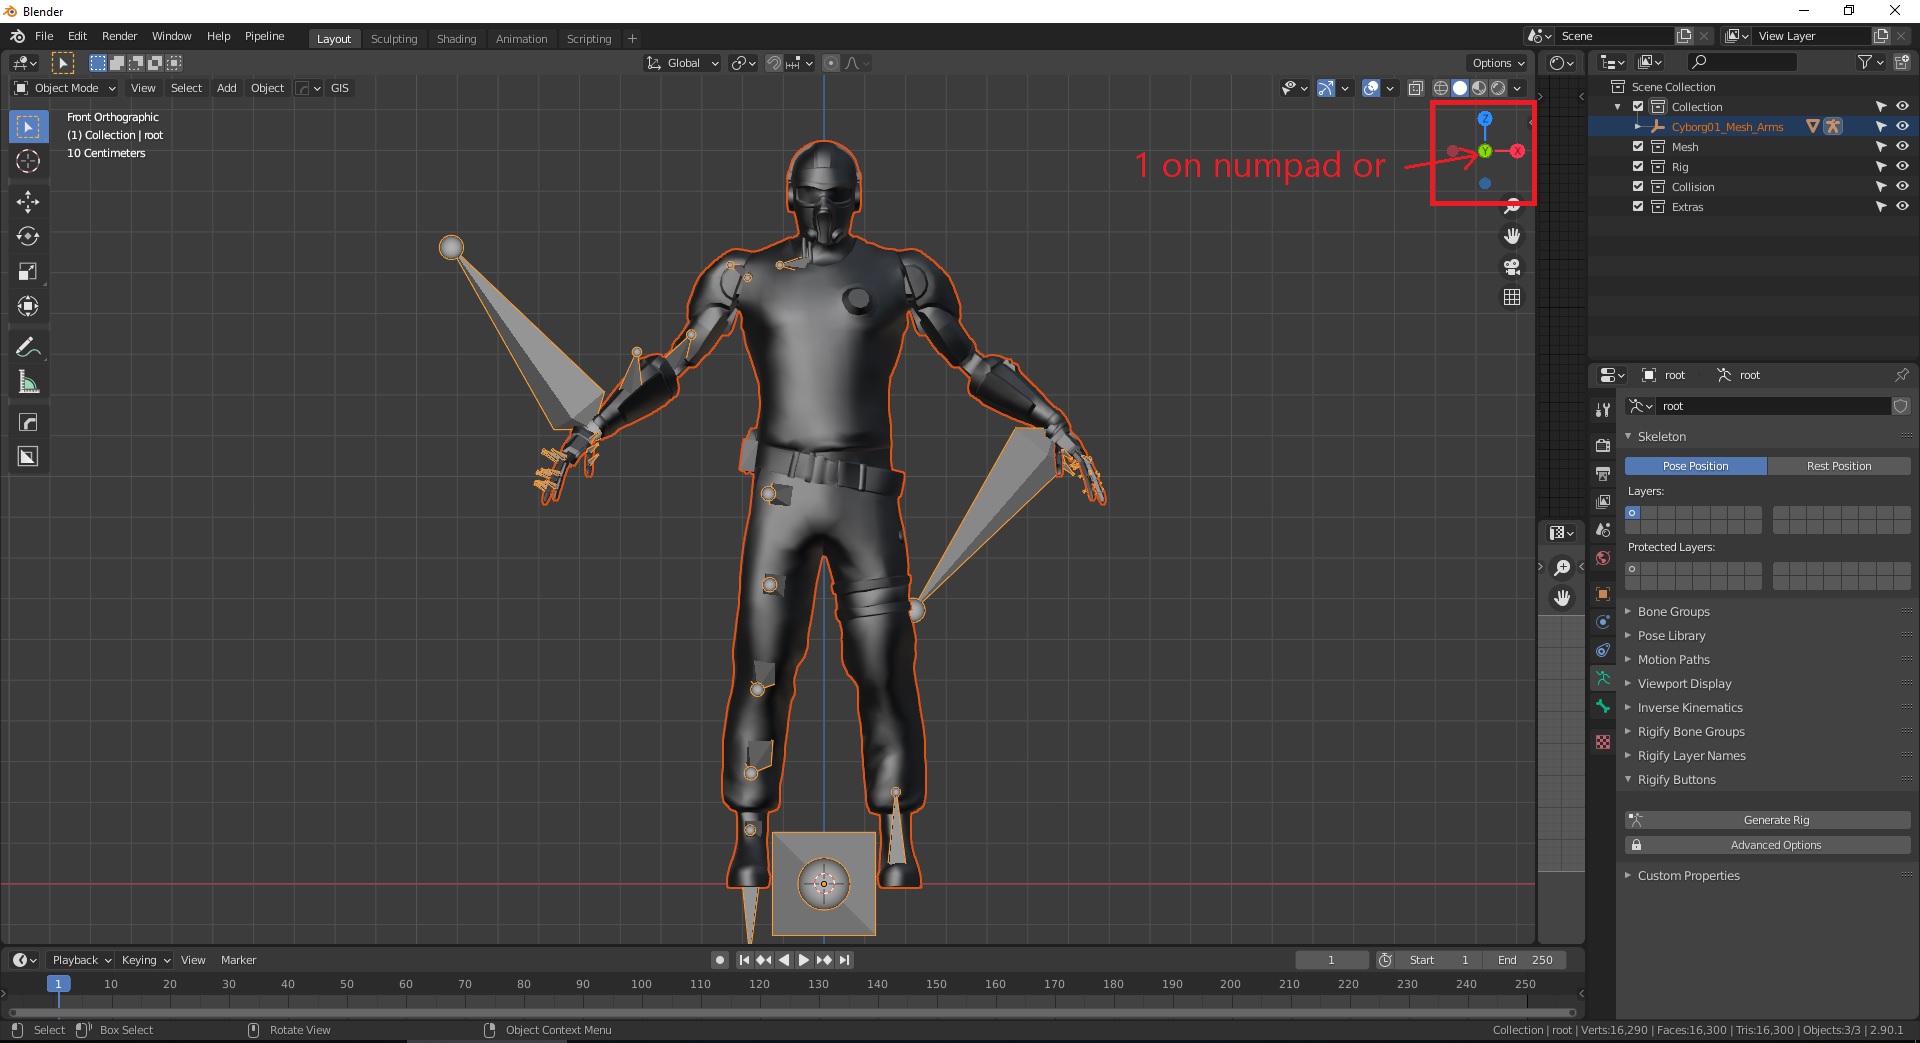
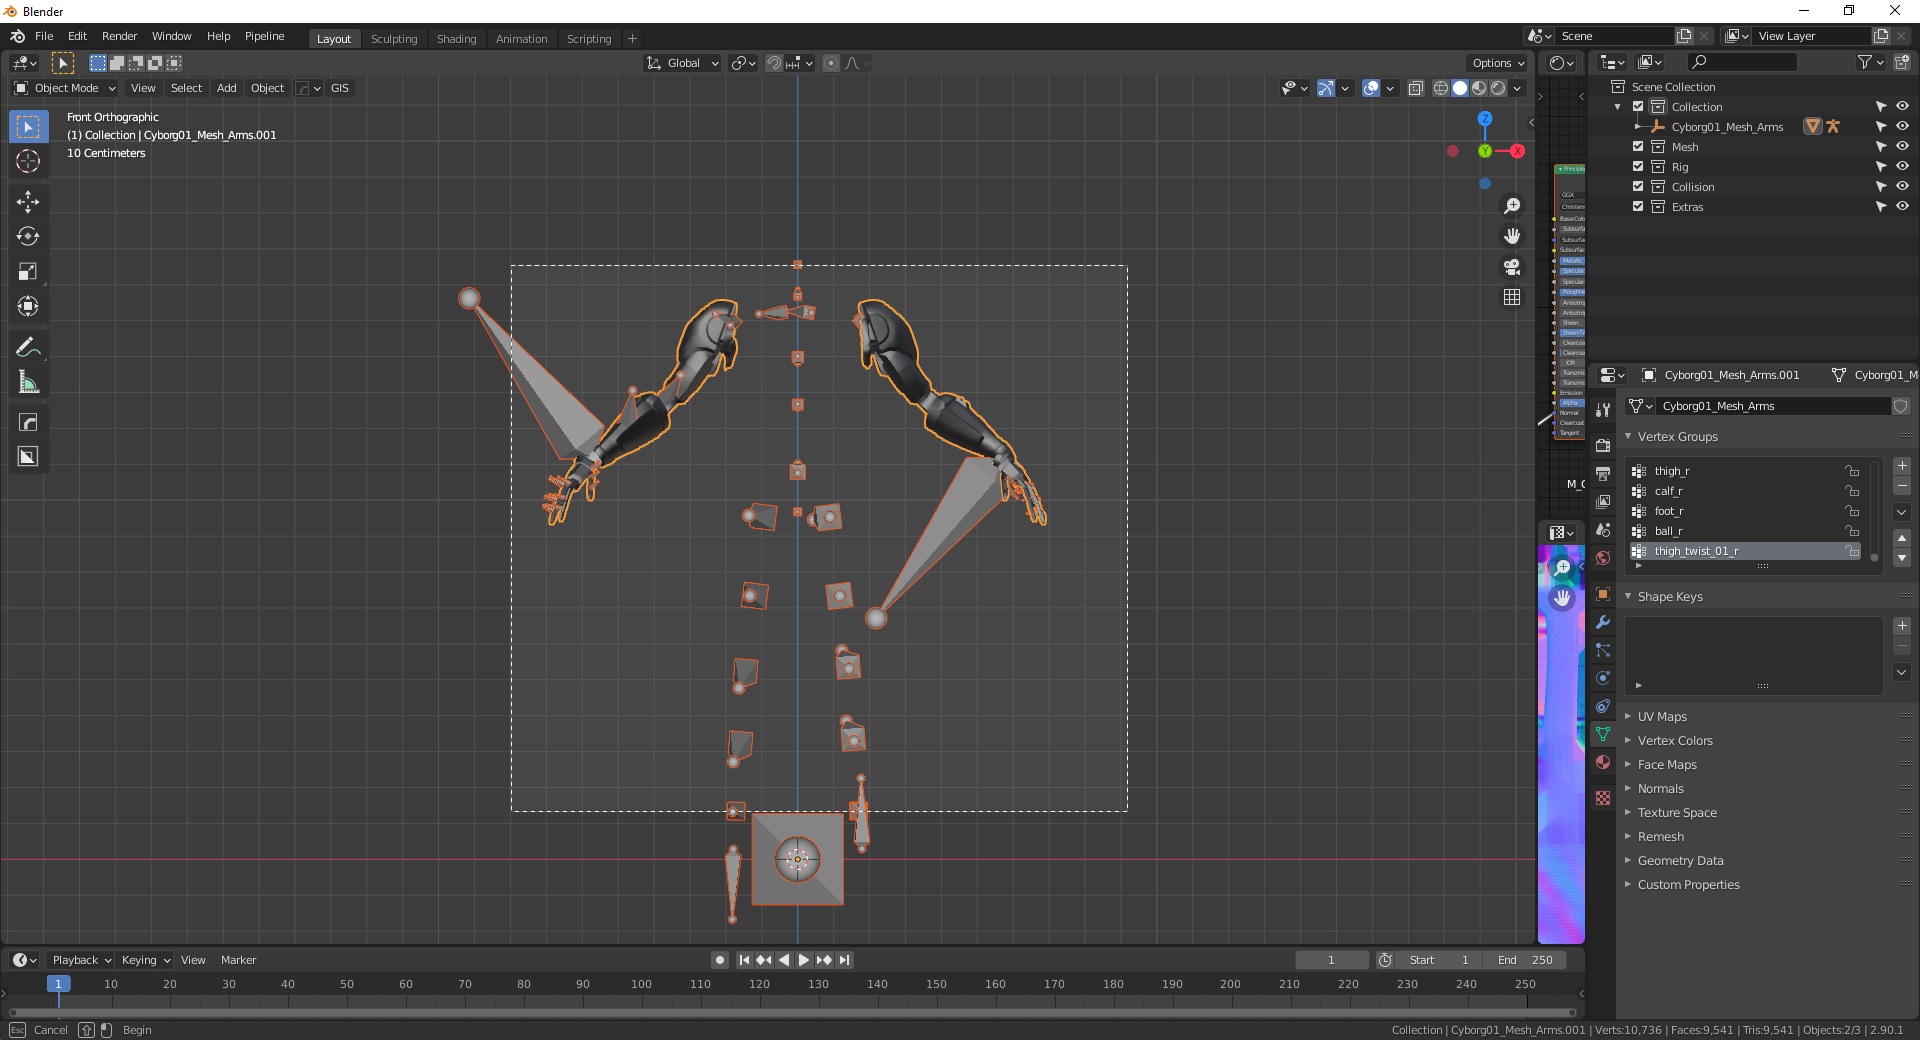
7. Once the character is imported, make sure it’s facing towards you and not being viewed from any perspective, the only reason we do this is so that it’s easier to work with, but feel free to use the middle mouse button to rotate it however feels best for you to see, or click 1 on the numpad to make it face the Y axis
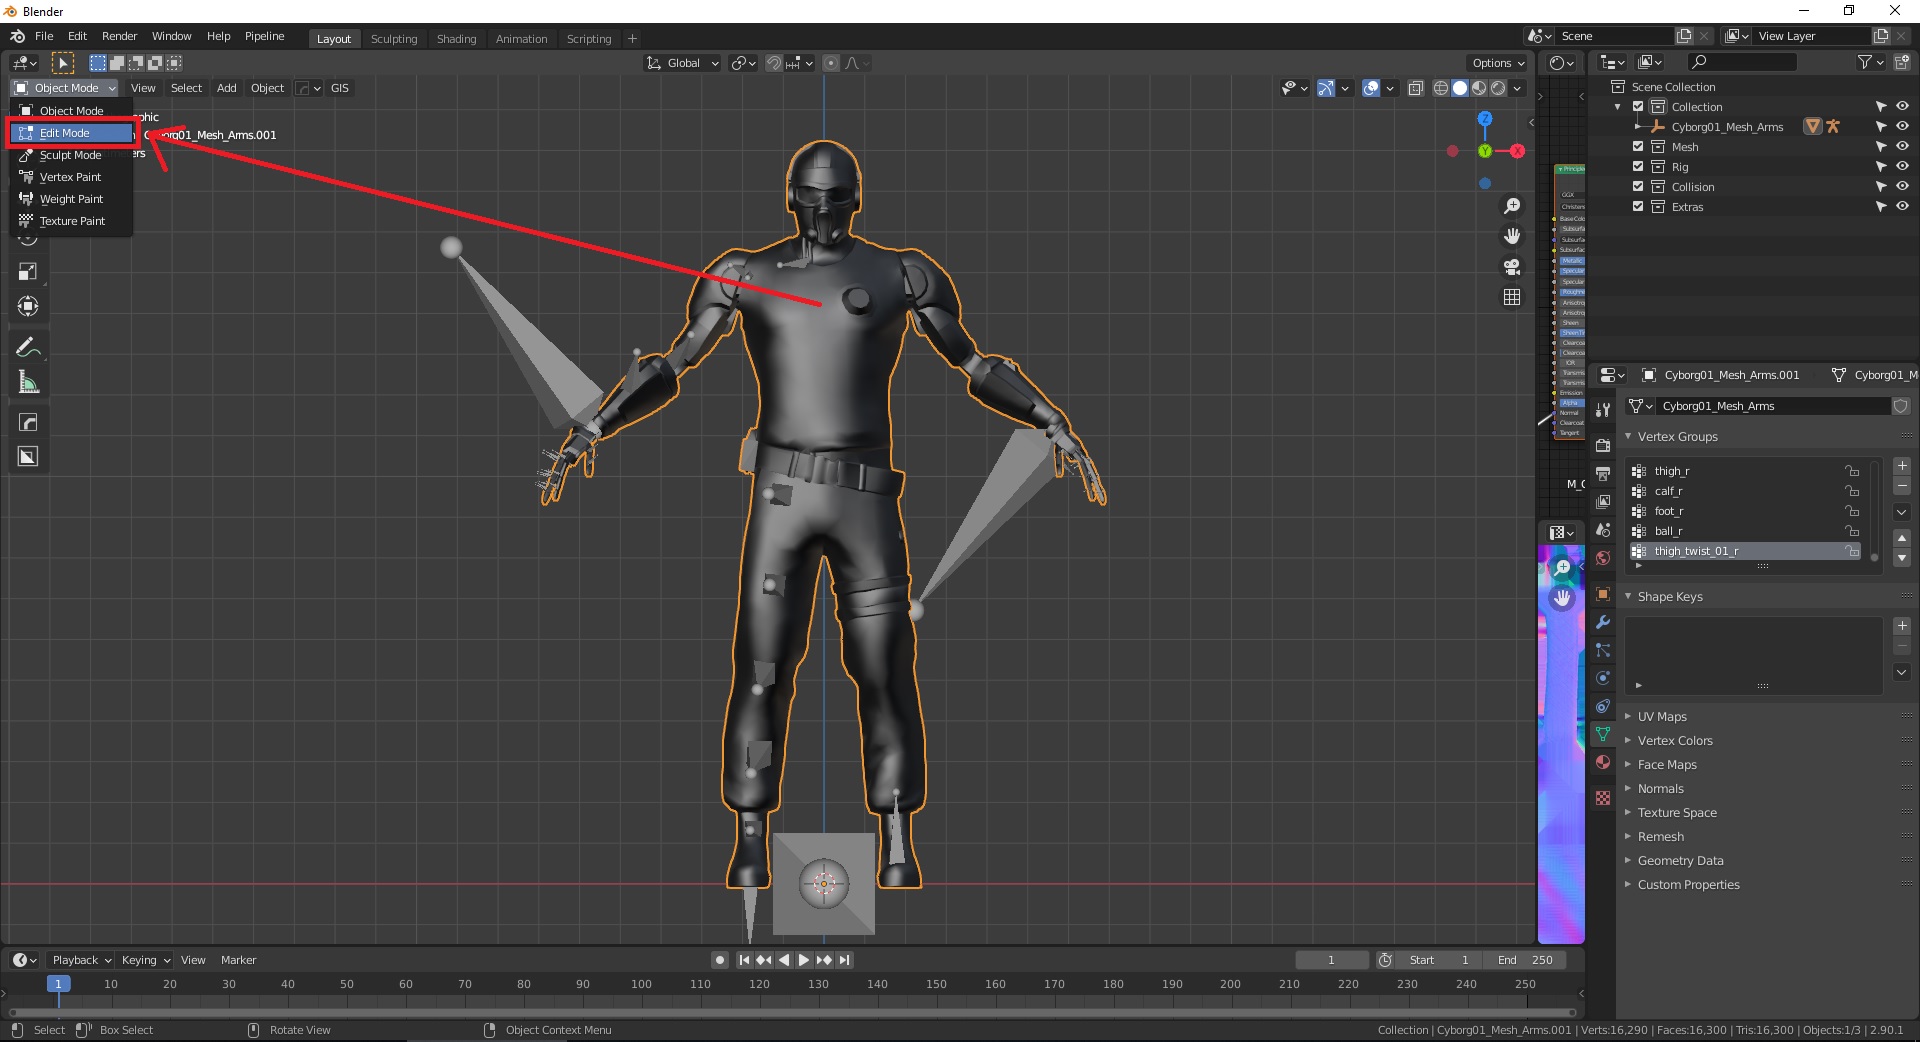
8. In the previous screenshot you can see that both the mesh AND the skeleton are selected, we don’t want that, select JUST the mesh, and go to Edit mode (keyboard shortcut is Tab)
9. Now in the upper left corner you can see 3 icons, these change what you select (vertex, edge or face), select the third one so that it selects faces. You can also move around the viewport using Shift + Middle Mouse and scroll the mouse wheel to zoom in and out or use the buttons on the right side.

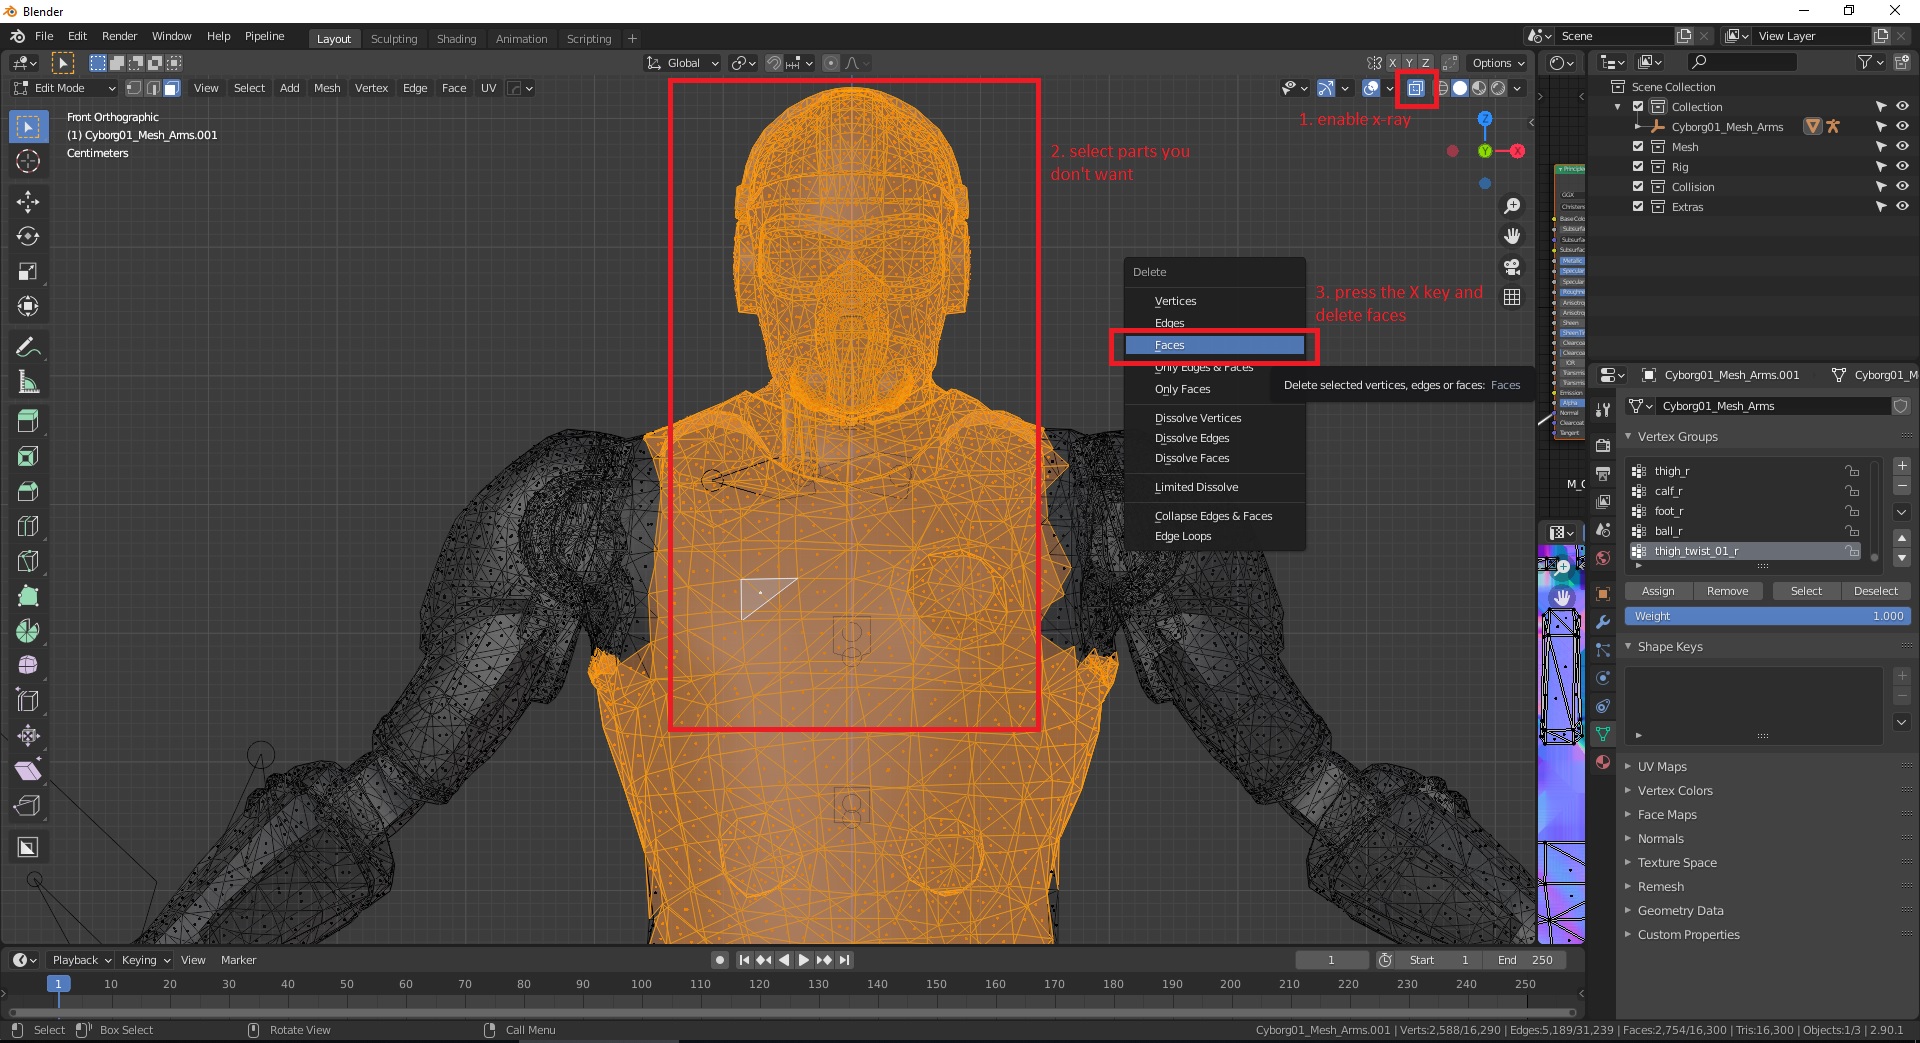
10. In the top right corner of the viewport you can see few icons, these change how you see things in the viewport, enable X-Ray so that you can select trough the mesh. Then simply select the parts you don’t need and press X (remember X key is delete in Blender), and select Faces.
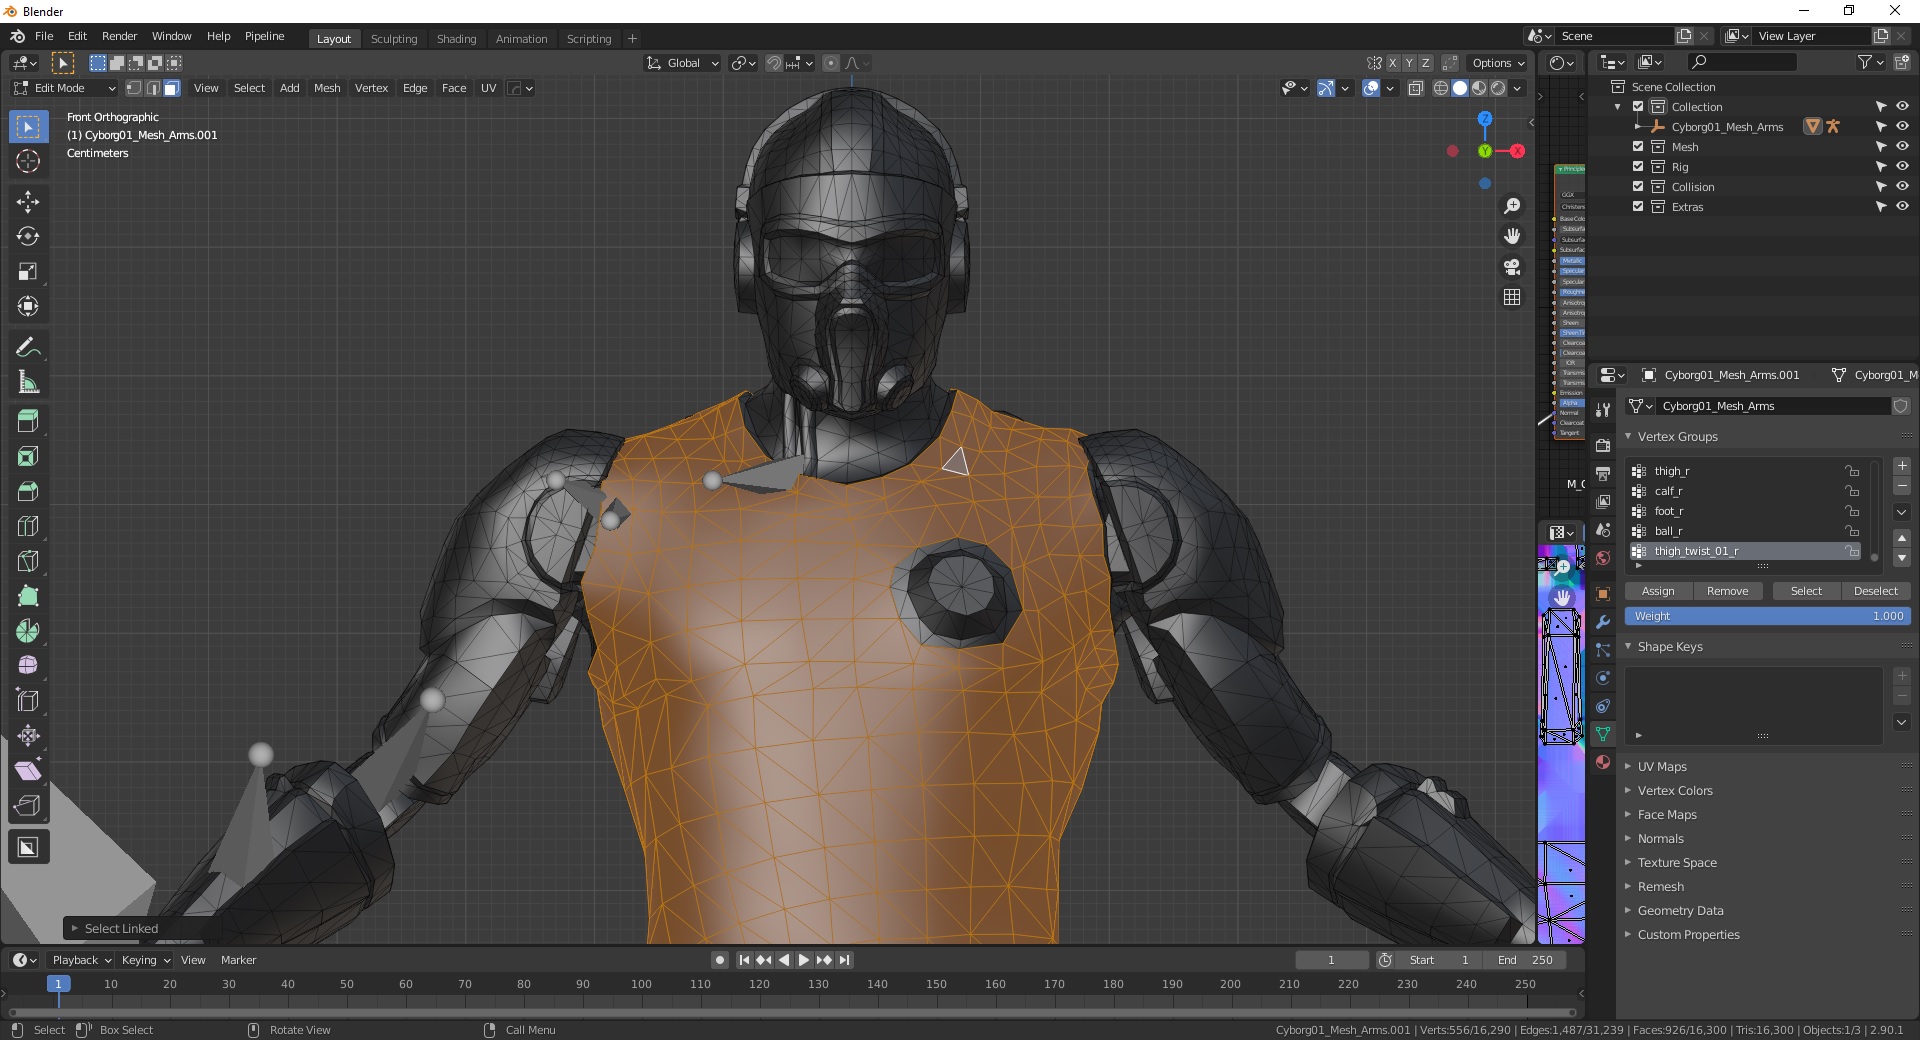
11. You can select them automatically too
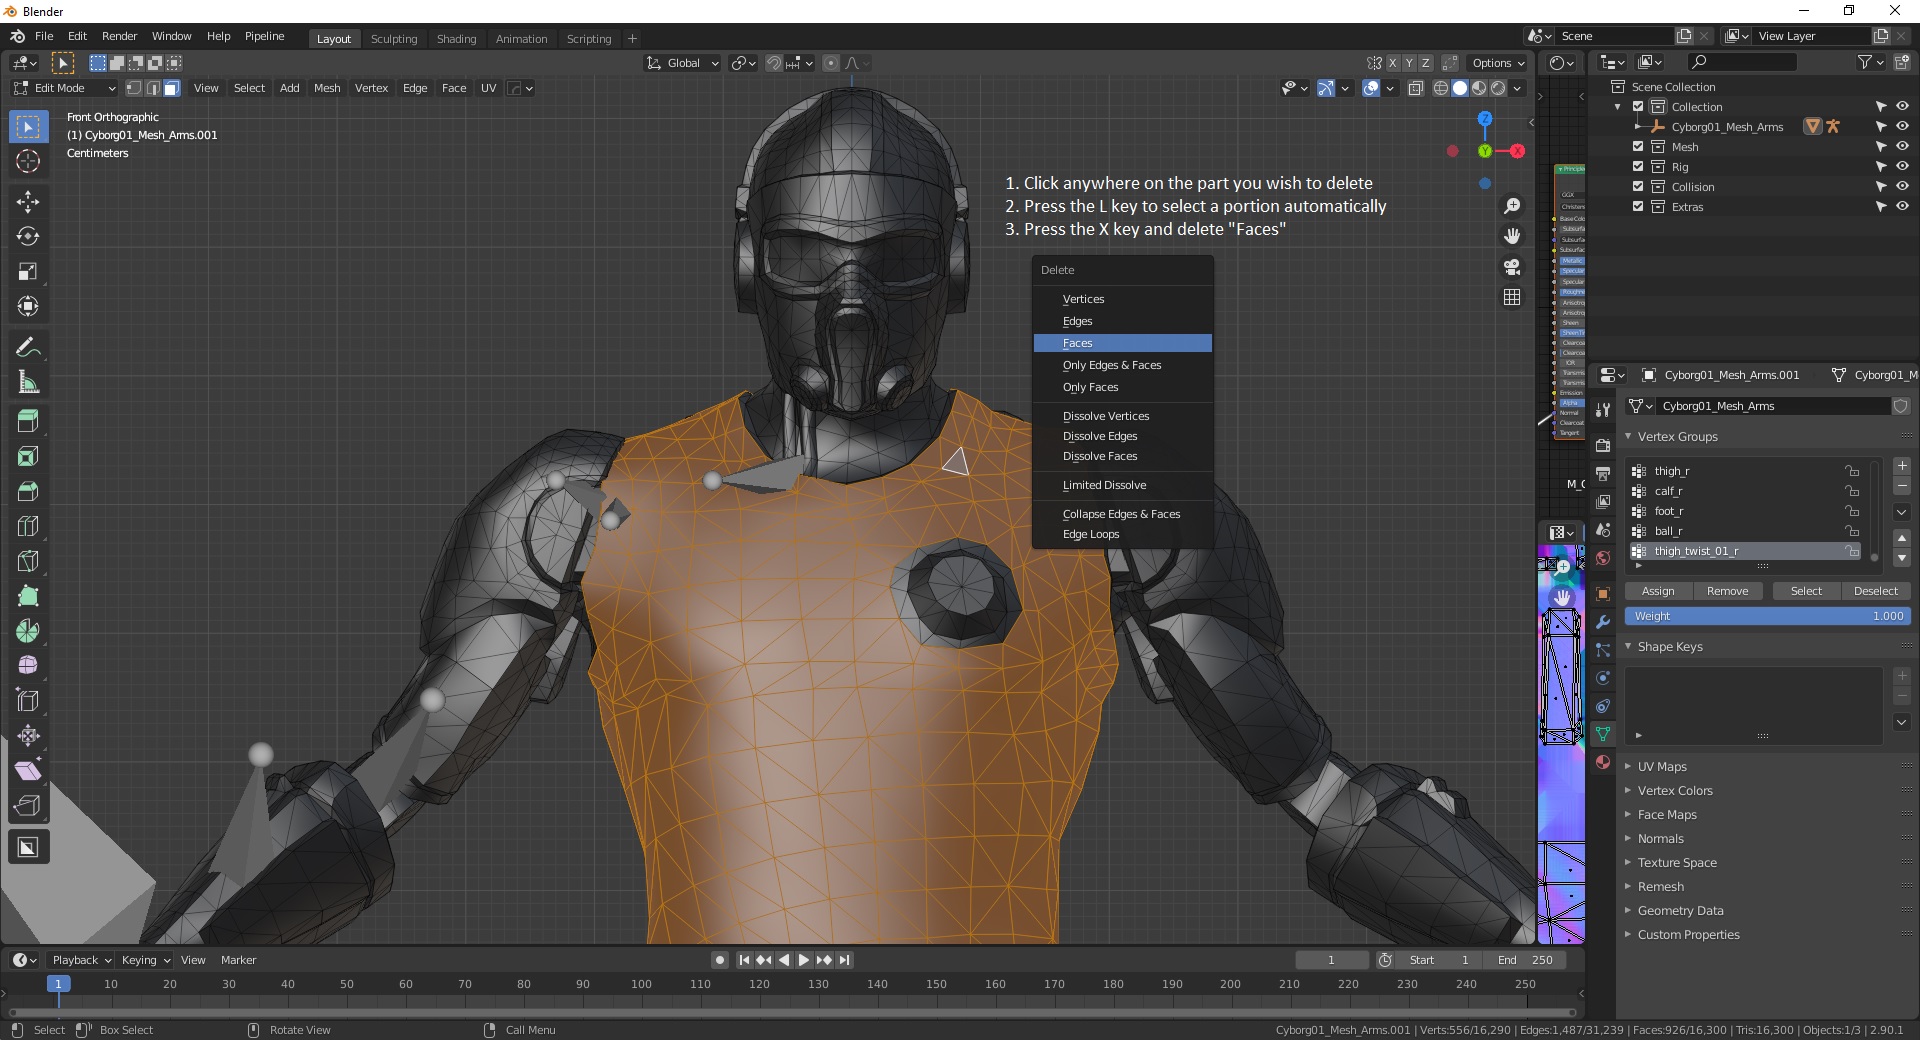
12. This is more like a tip, but you can also select just 1 face and click the L key, this will automatically select that entire portion of the mesh, if it’s modelled like this model is, it will work as expected, but if it’s not then yeah you’re out of luck, select the faces manually like in the previous screenshot and delete them manually.
13. Once all faces have been removed, go back to Object Mode
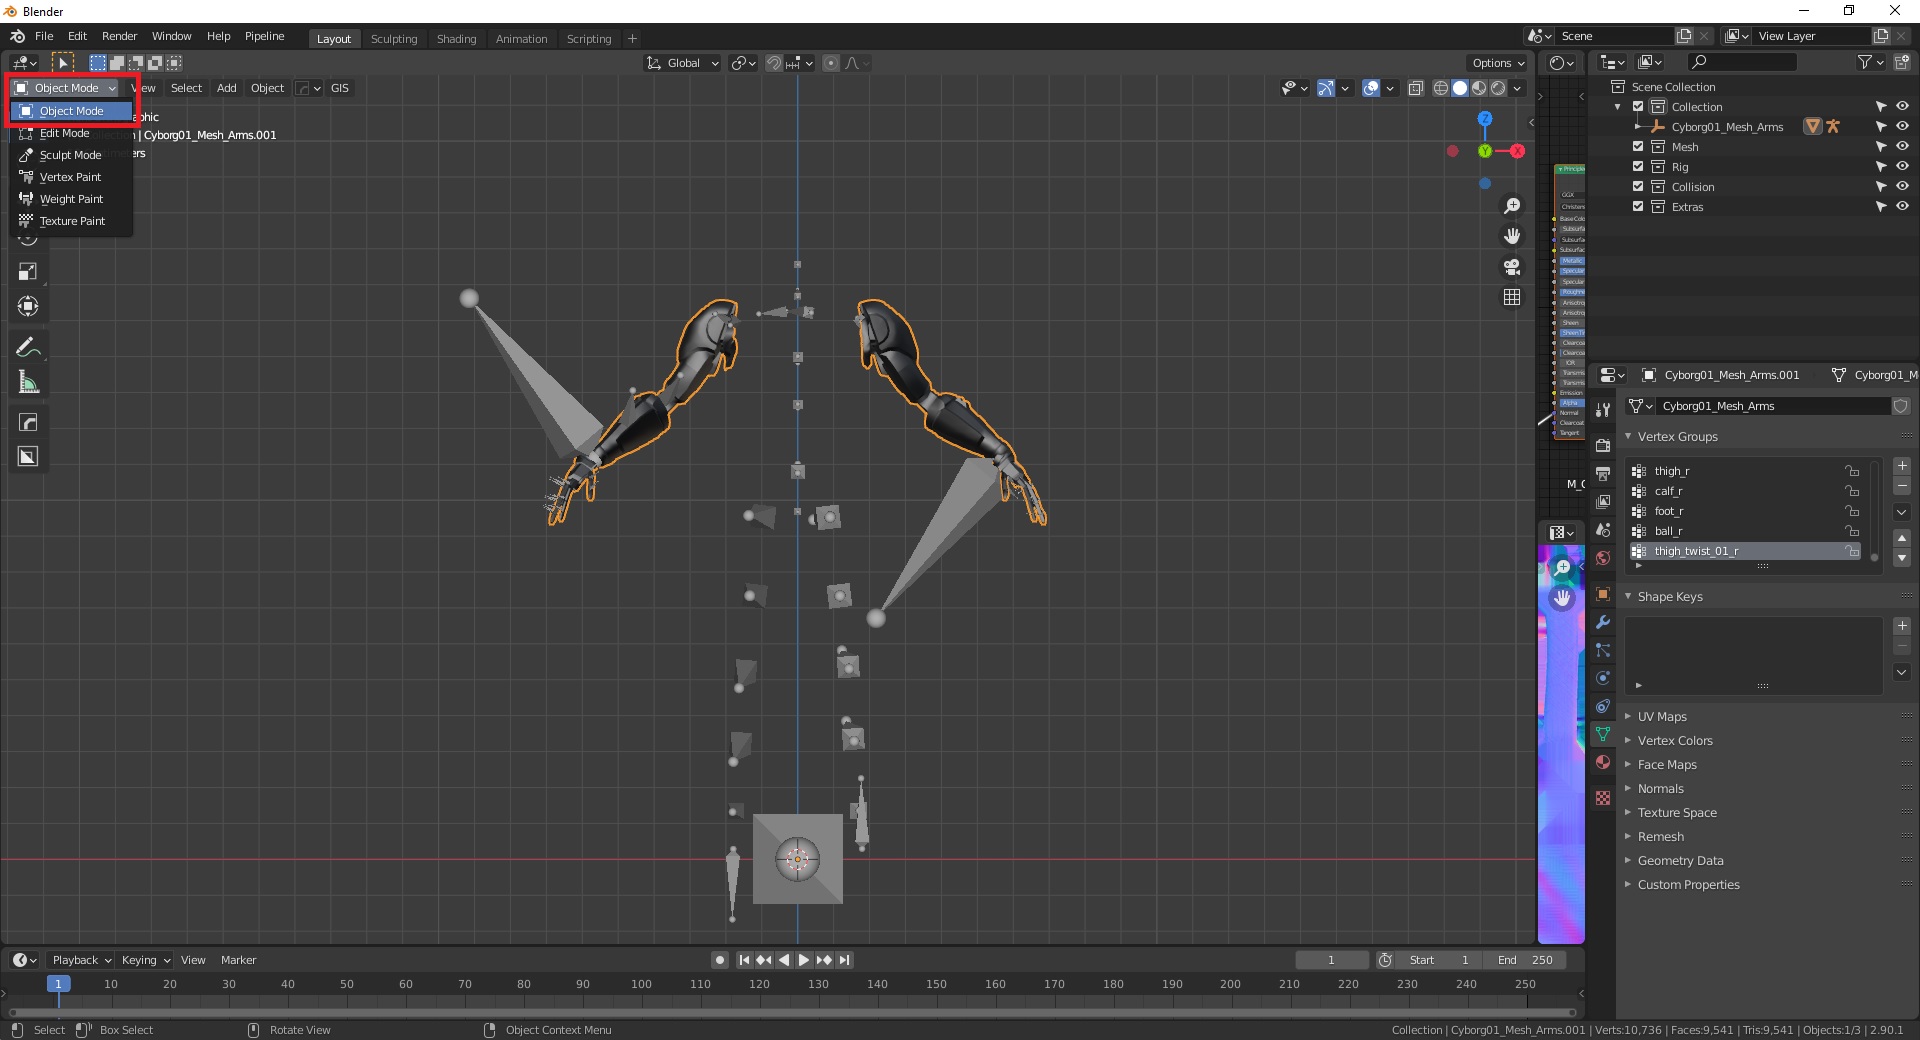
14. Select both the skeleton and mesh
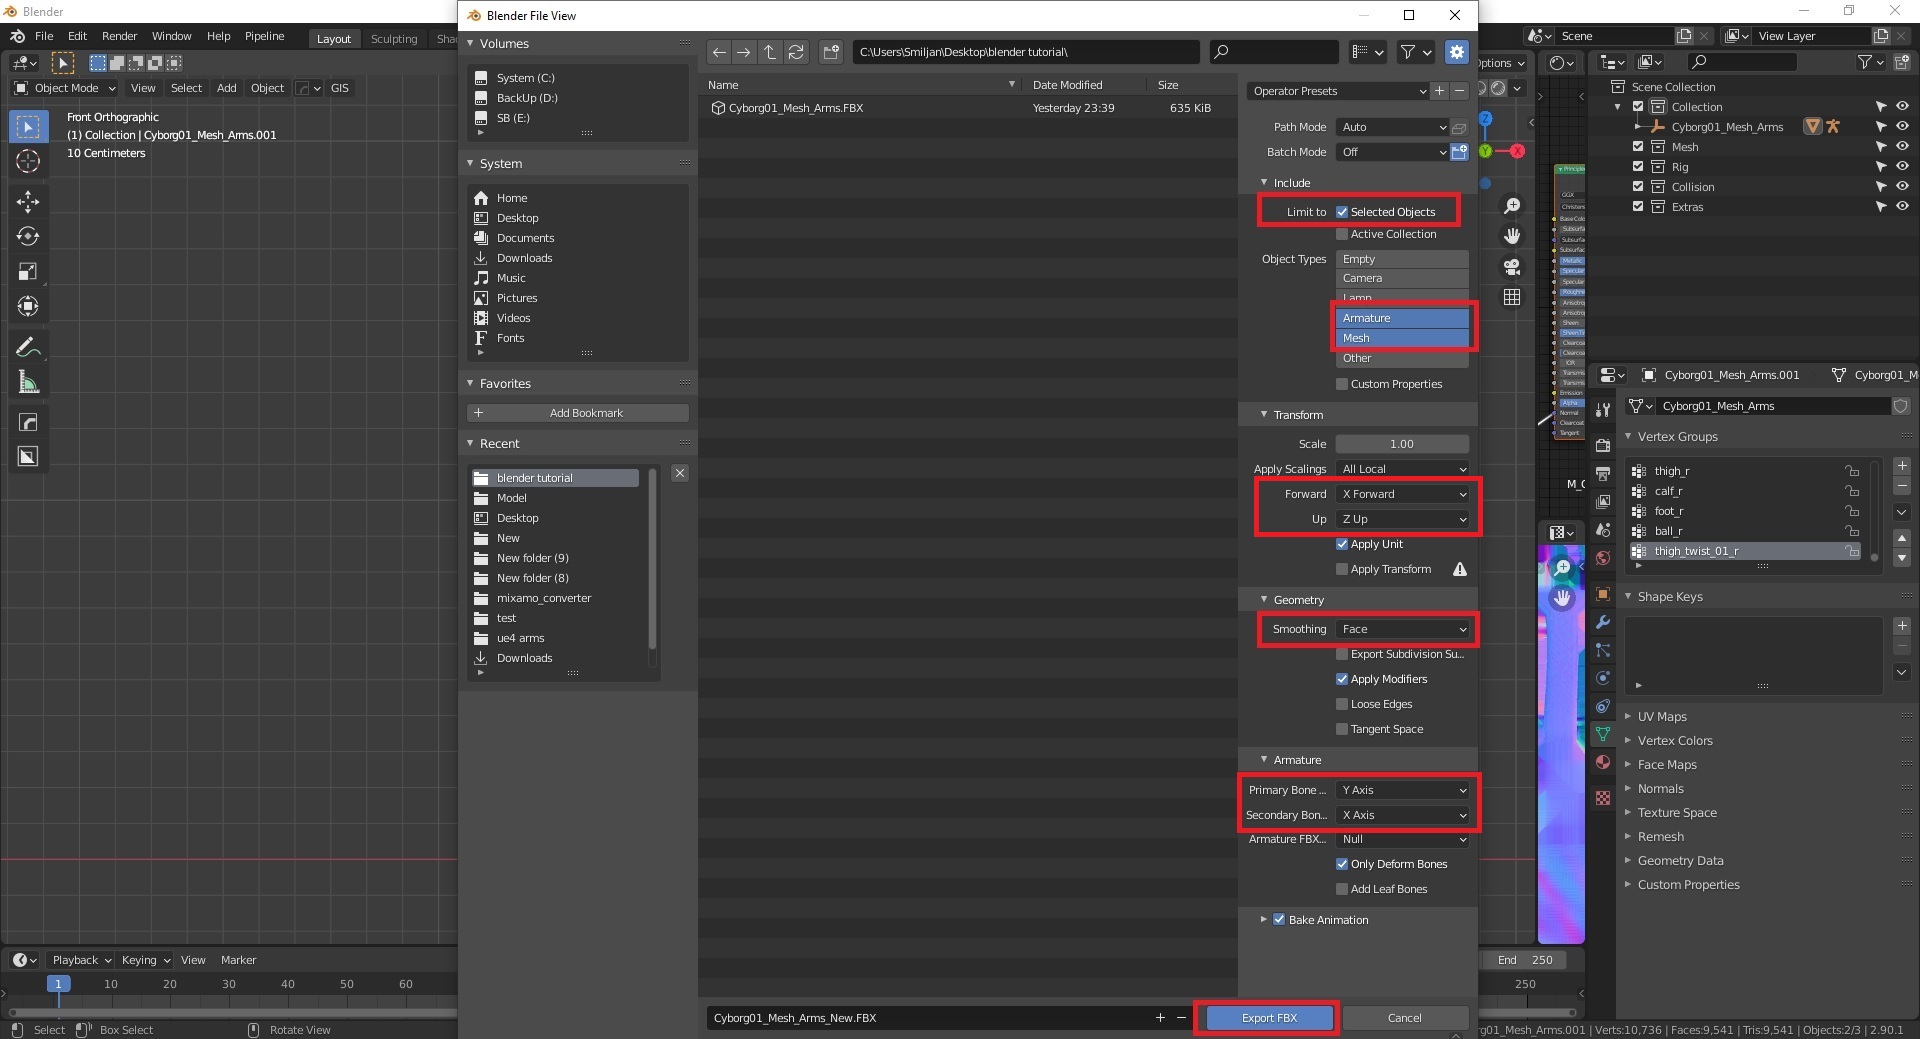
15. Go to File > Export > FBX
16. Make sure these settings look the same, name the file however you see fit, click on Export FBX
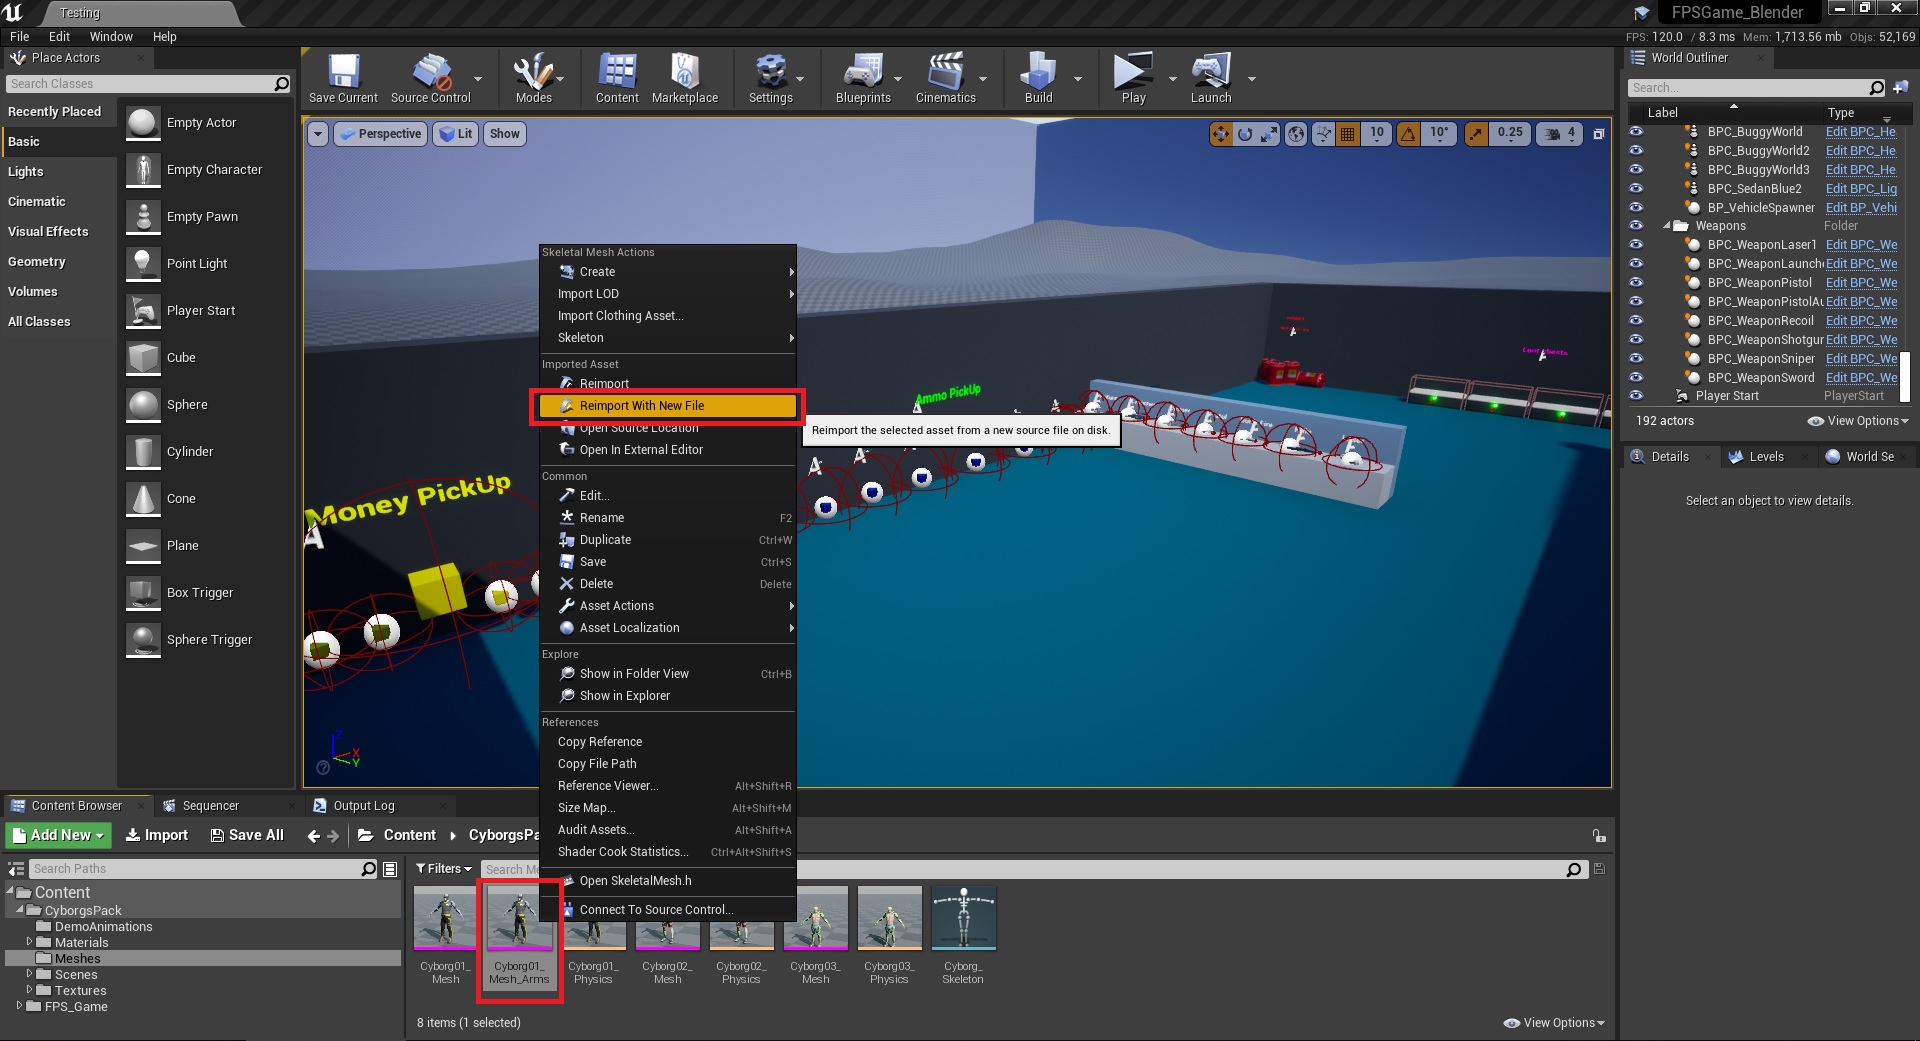
17. Back in UE4, right click on the _Arms duplicate that we created and exported and click on Reimport with new file
18. This is fine, just confirm, it asks about if it should set the same material that it used before, sure why not (we did not make any changes to the UV’s, so the same material and texture coordinates will still match perfectly).

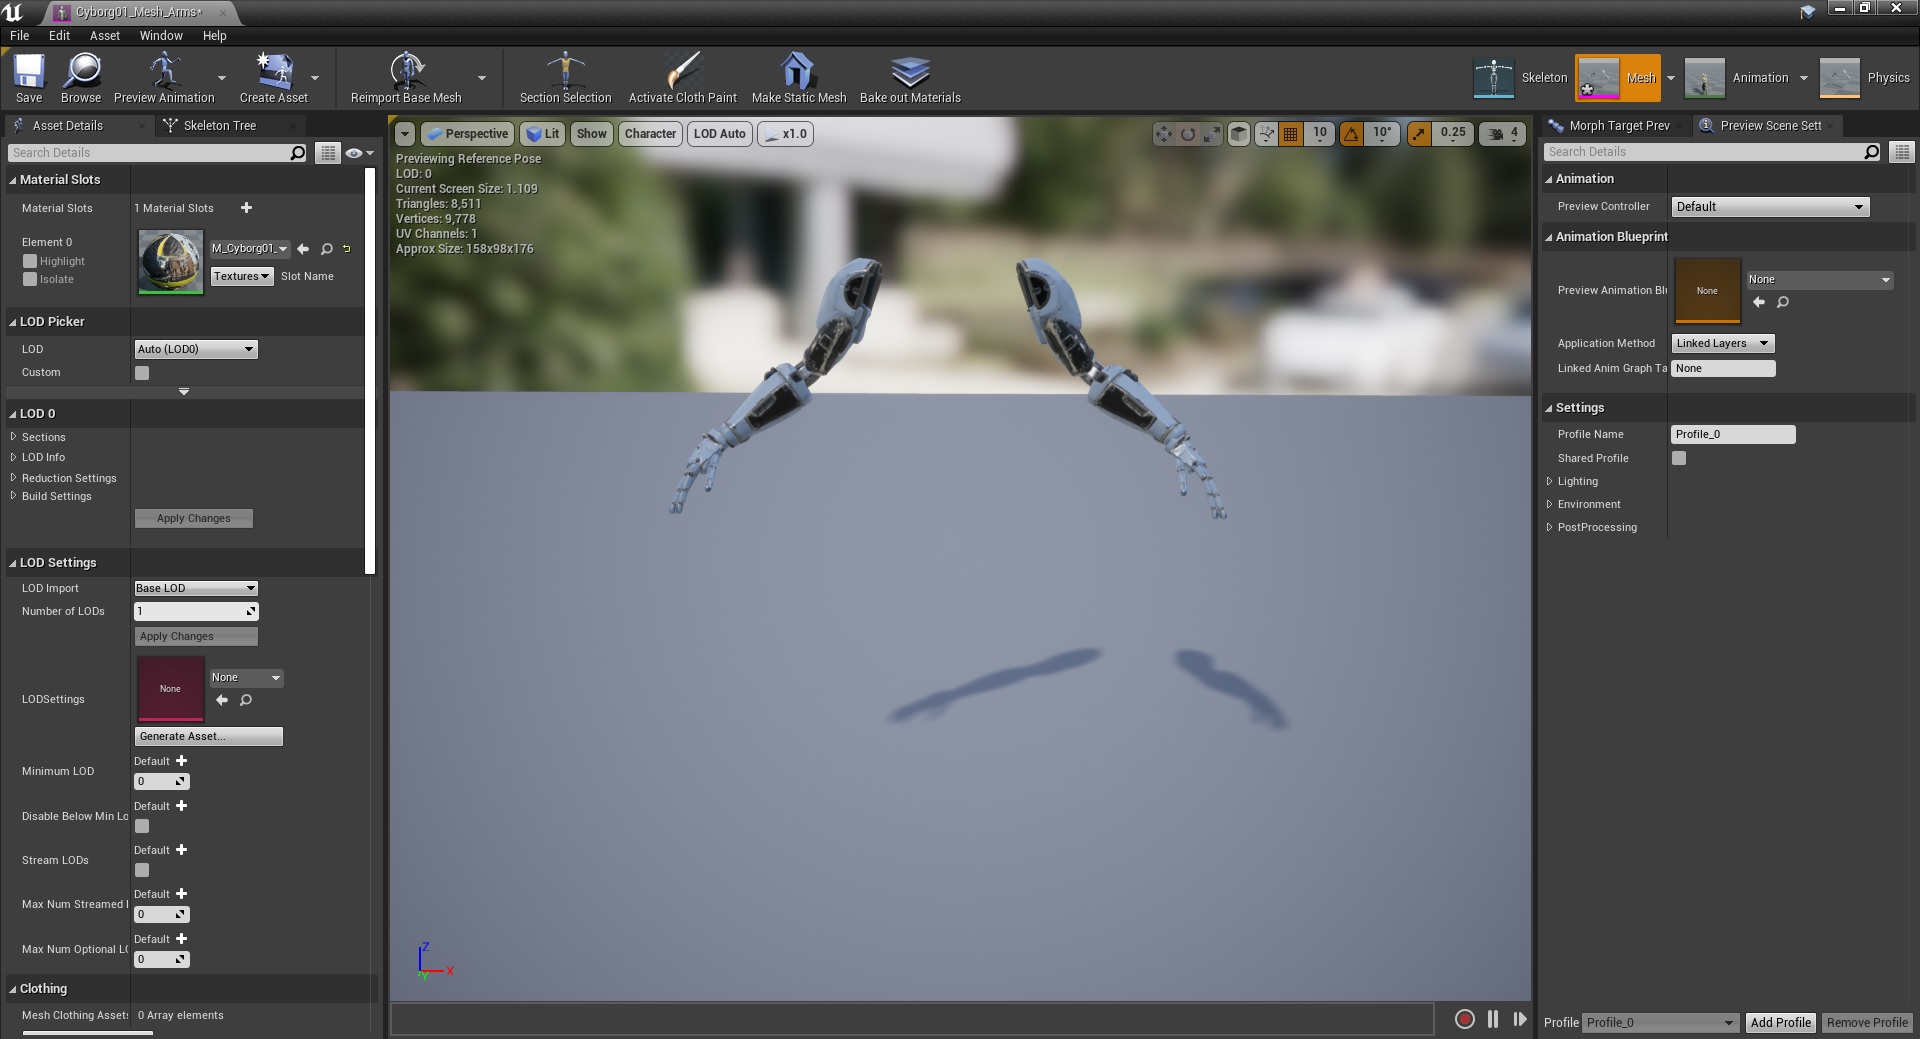
19. Voila! Will you look at that, perfectly matching arms mesh
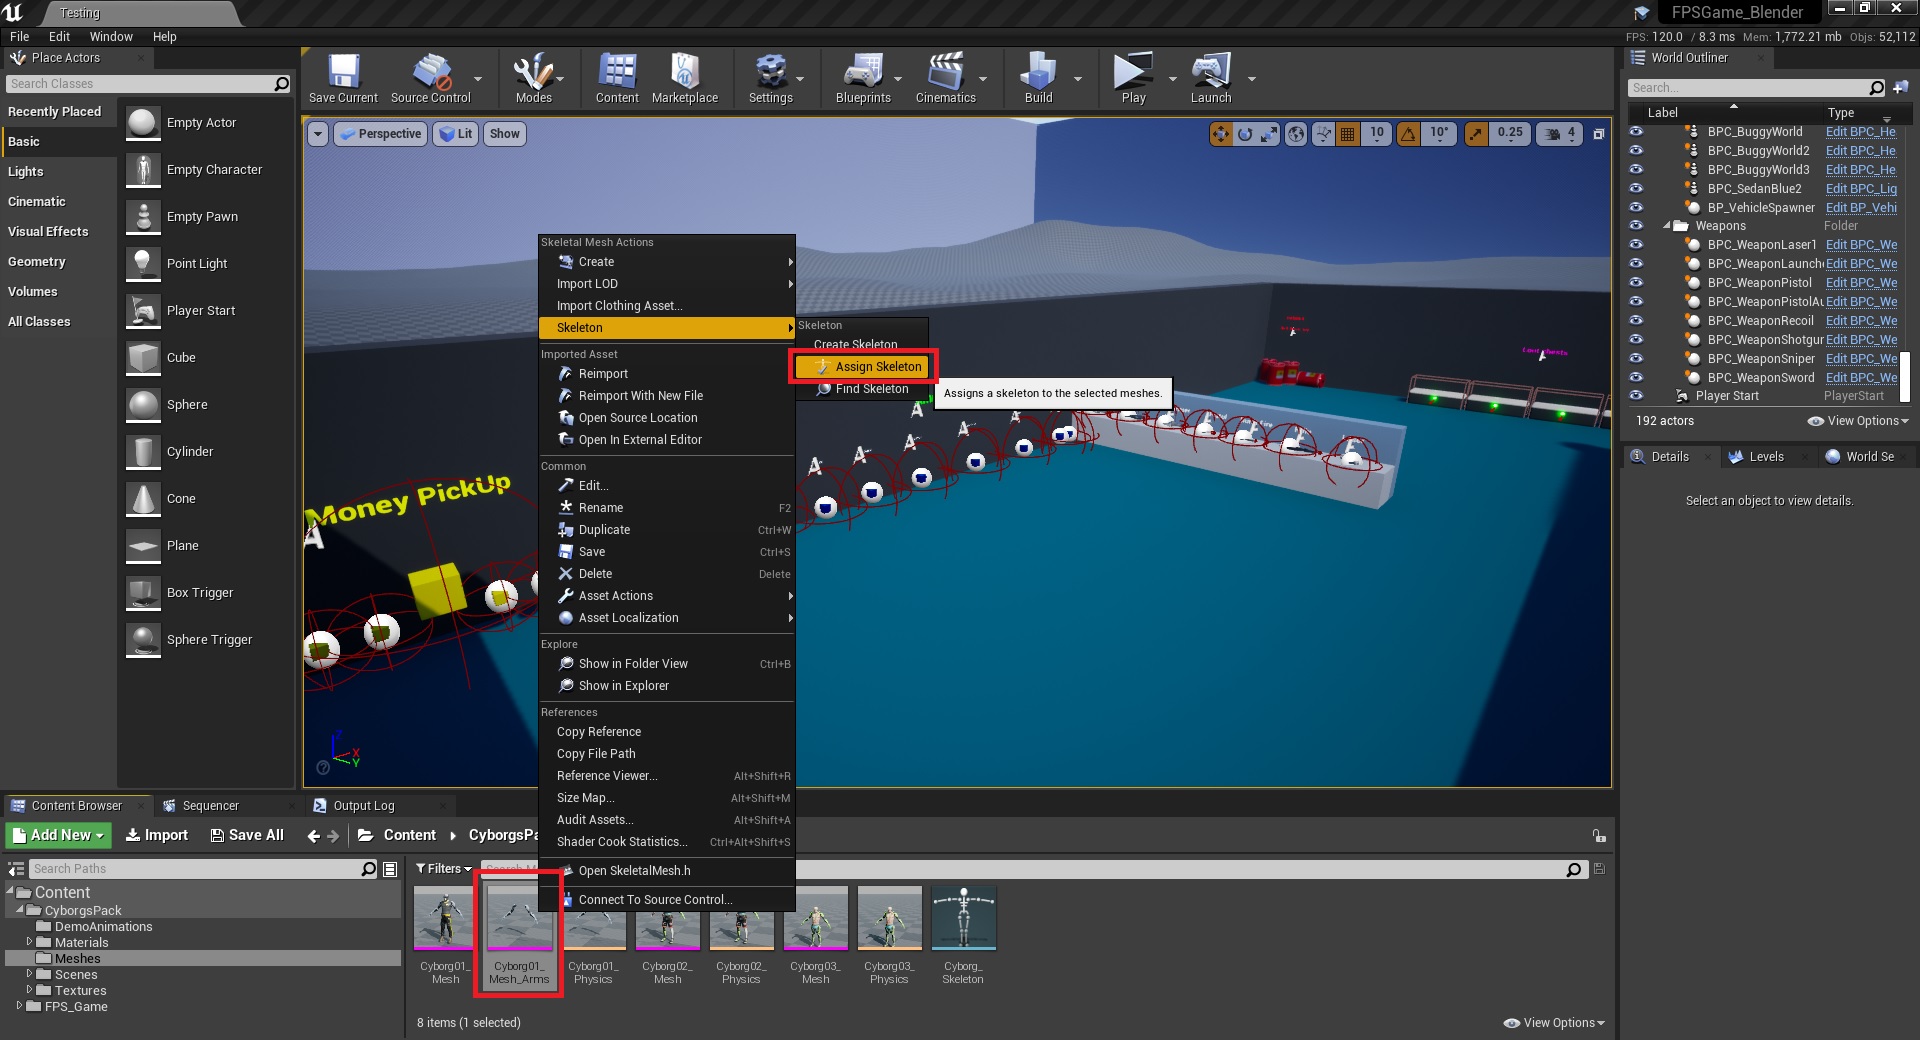
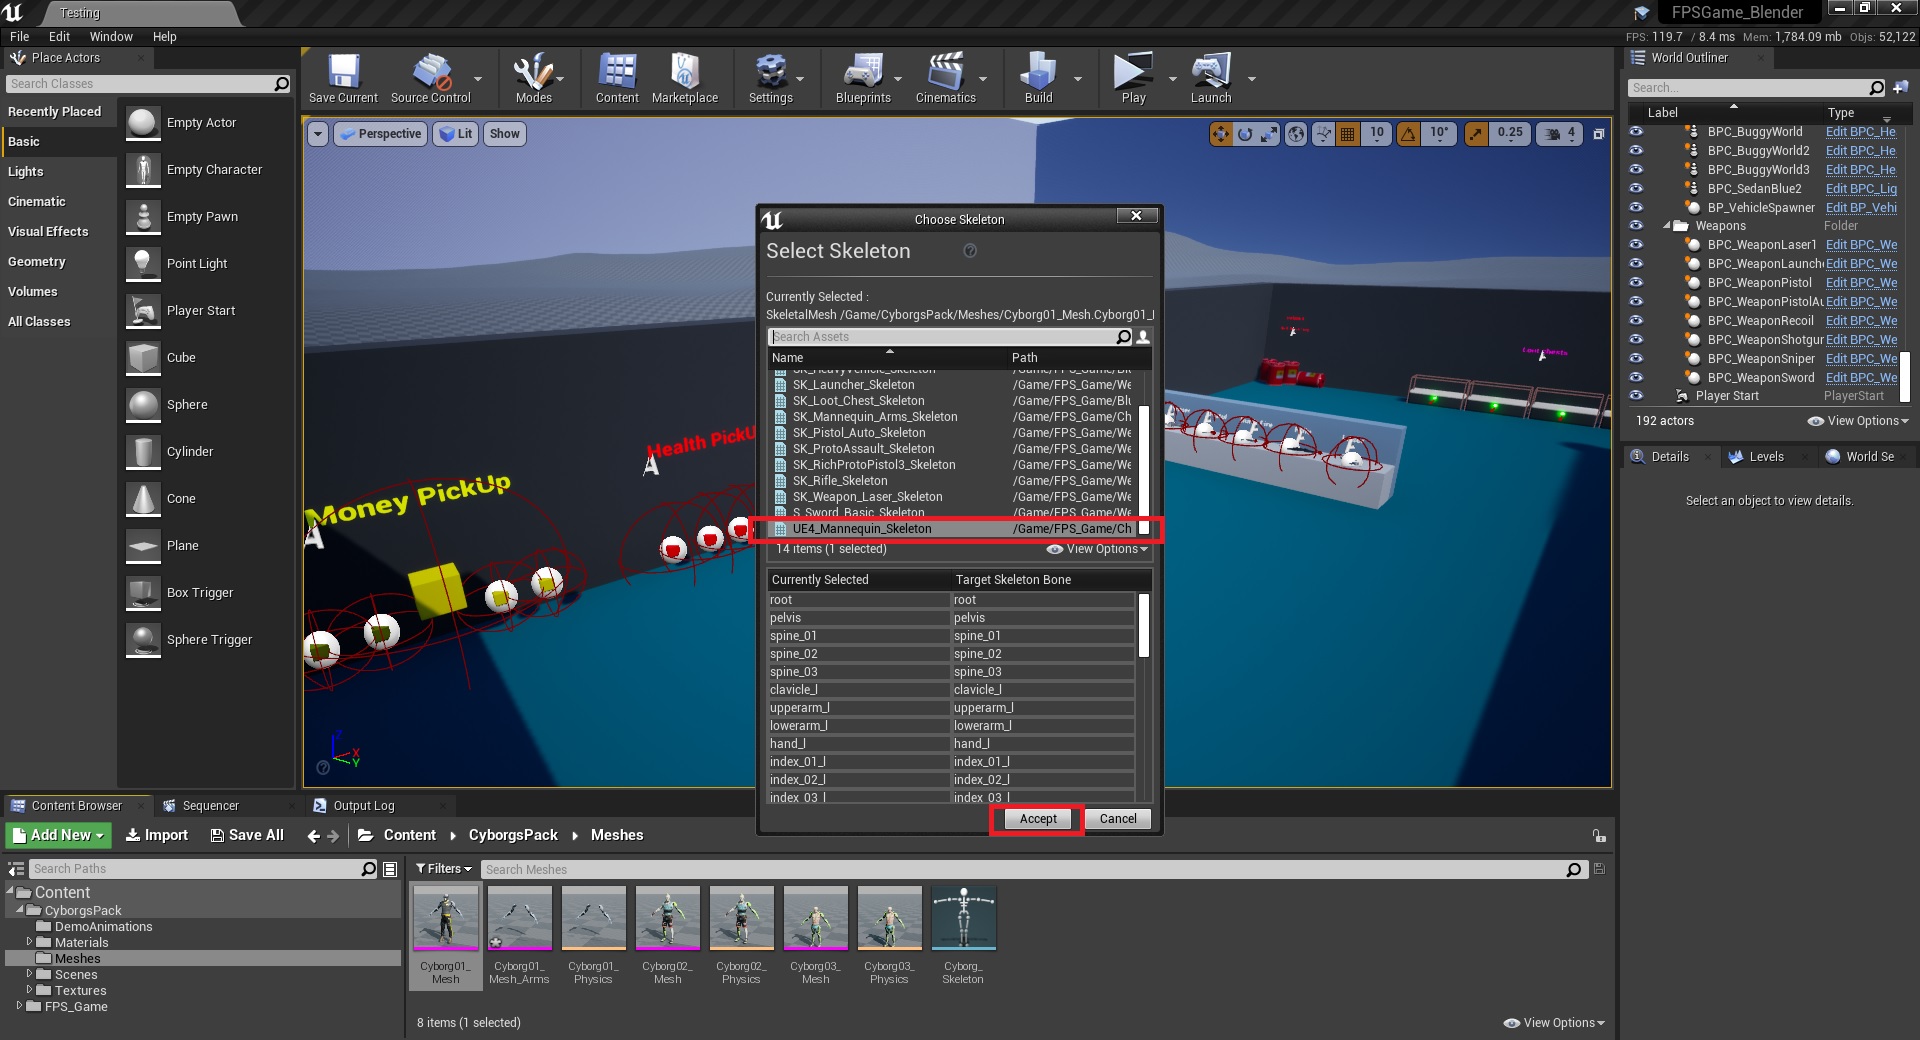
20. Now the usual way of changing the character like in that one tutorial I recorded almost half a decade ago. Right click on the arms mesh and click on assign skeleton
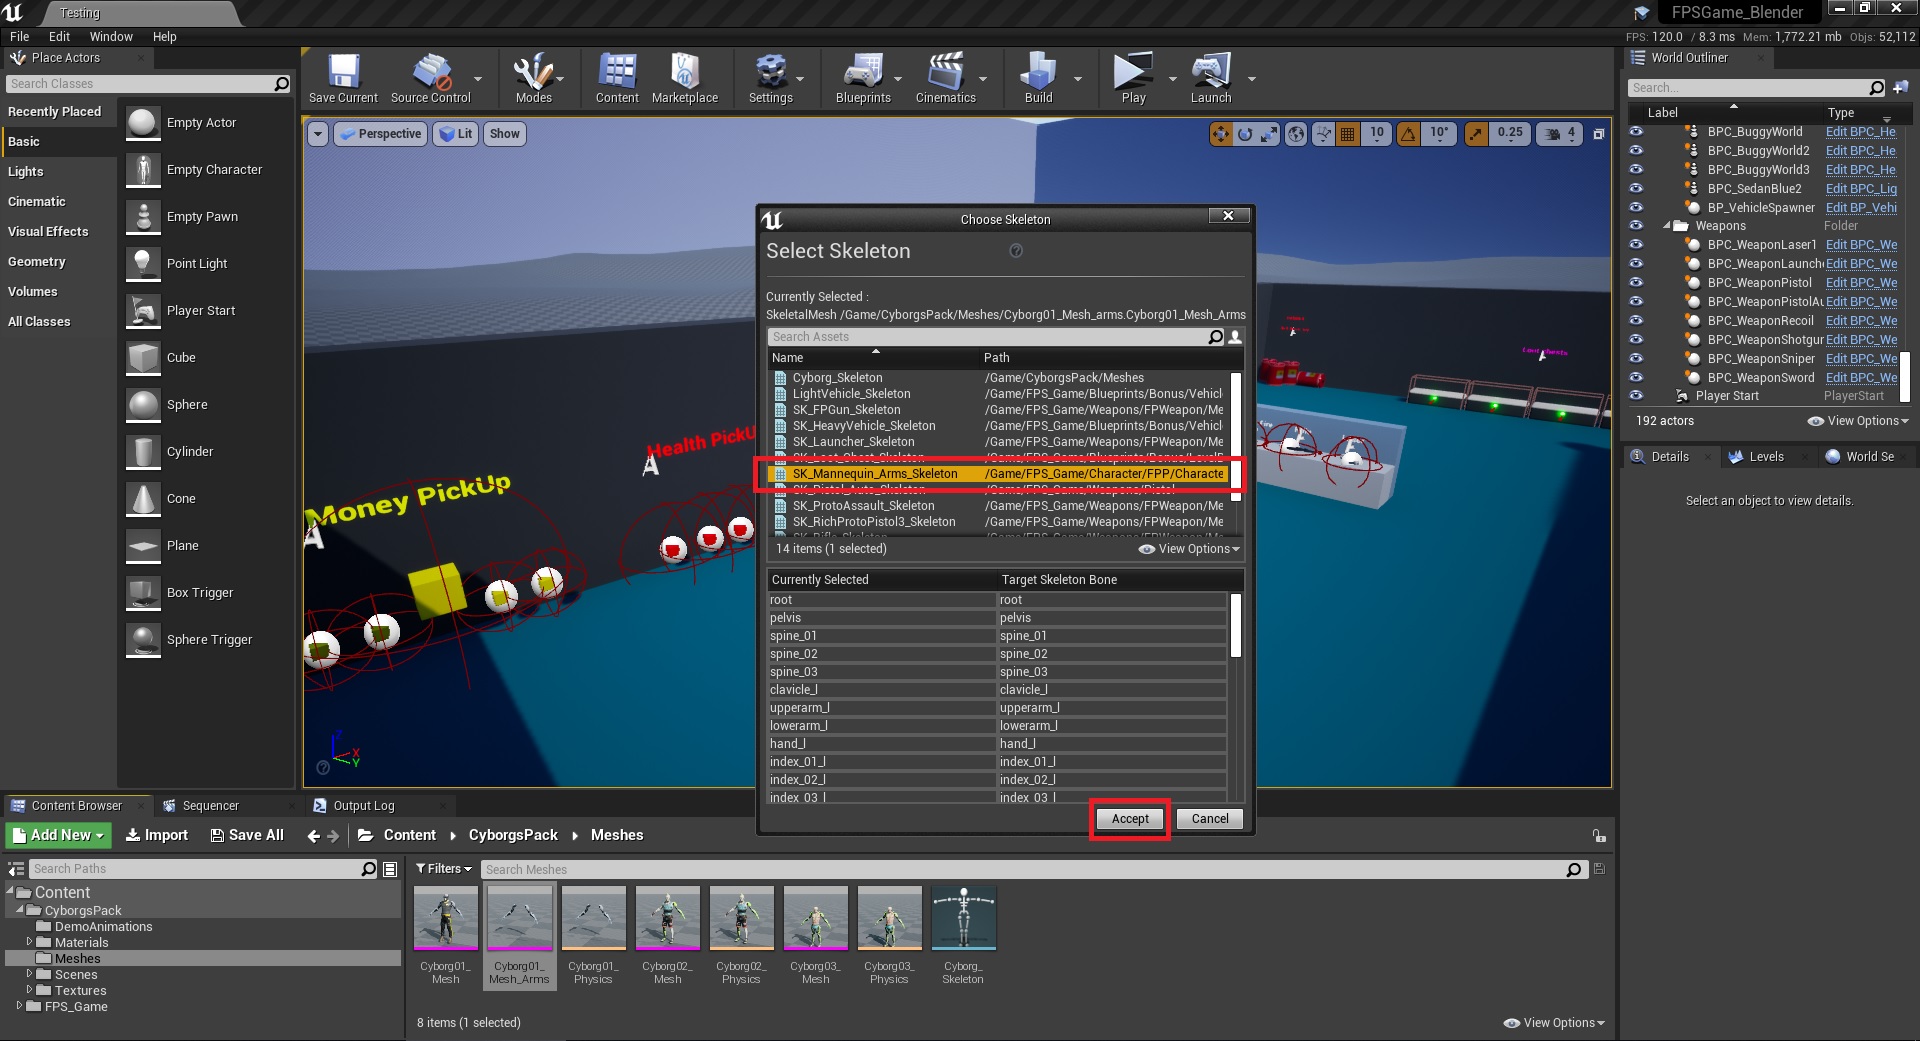
21. Pick the UE4 arms skeleton that comes with FPS Game Starter Kit
22. While there, might as well do the same for the third person one
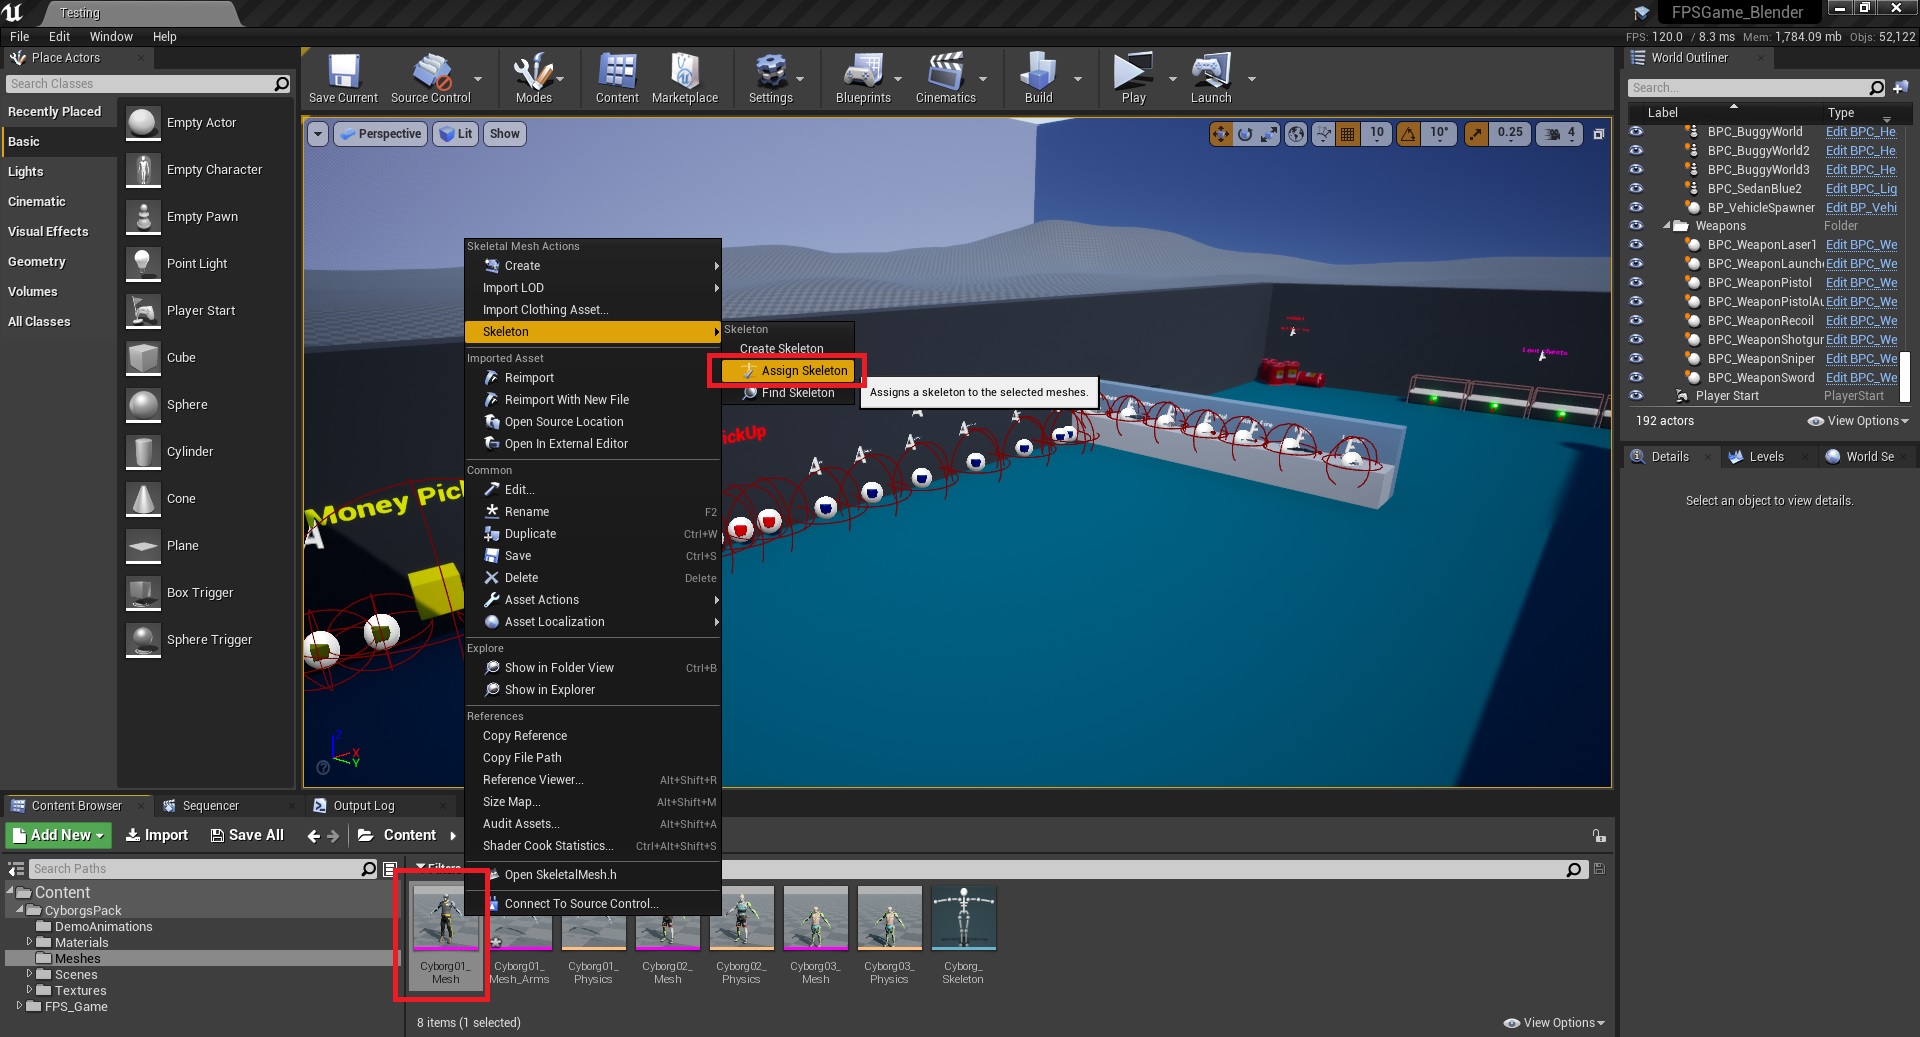
23. Use the TPS skeleton instead
24. Now open BP_CharacterBase and change the arms mesh to use the new one
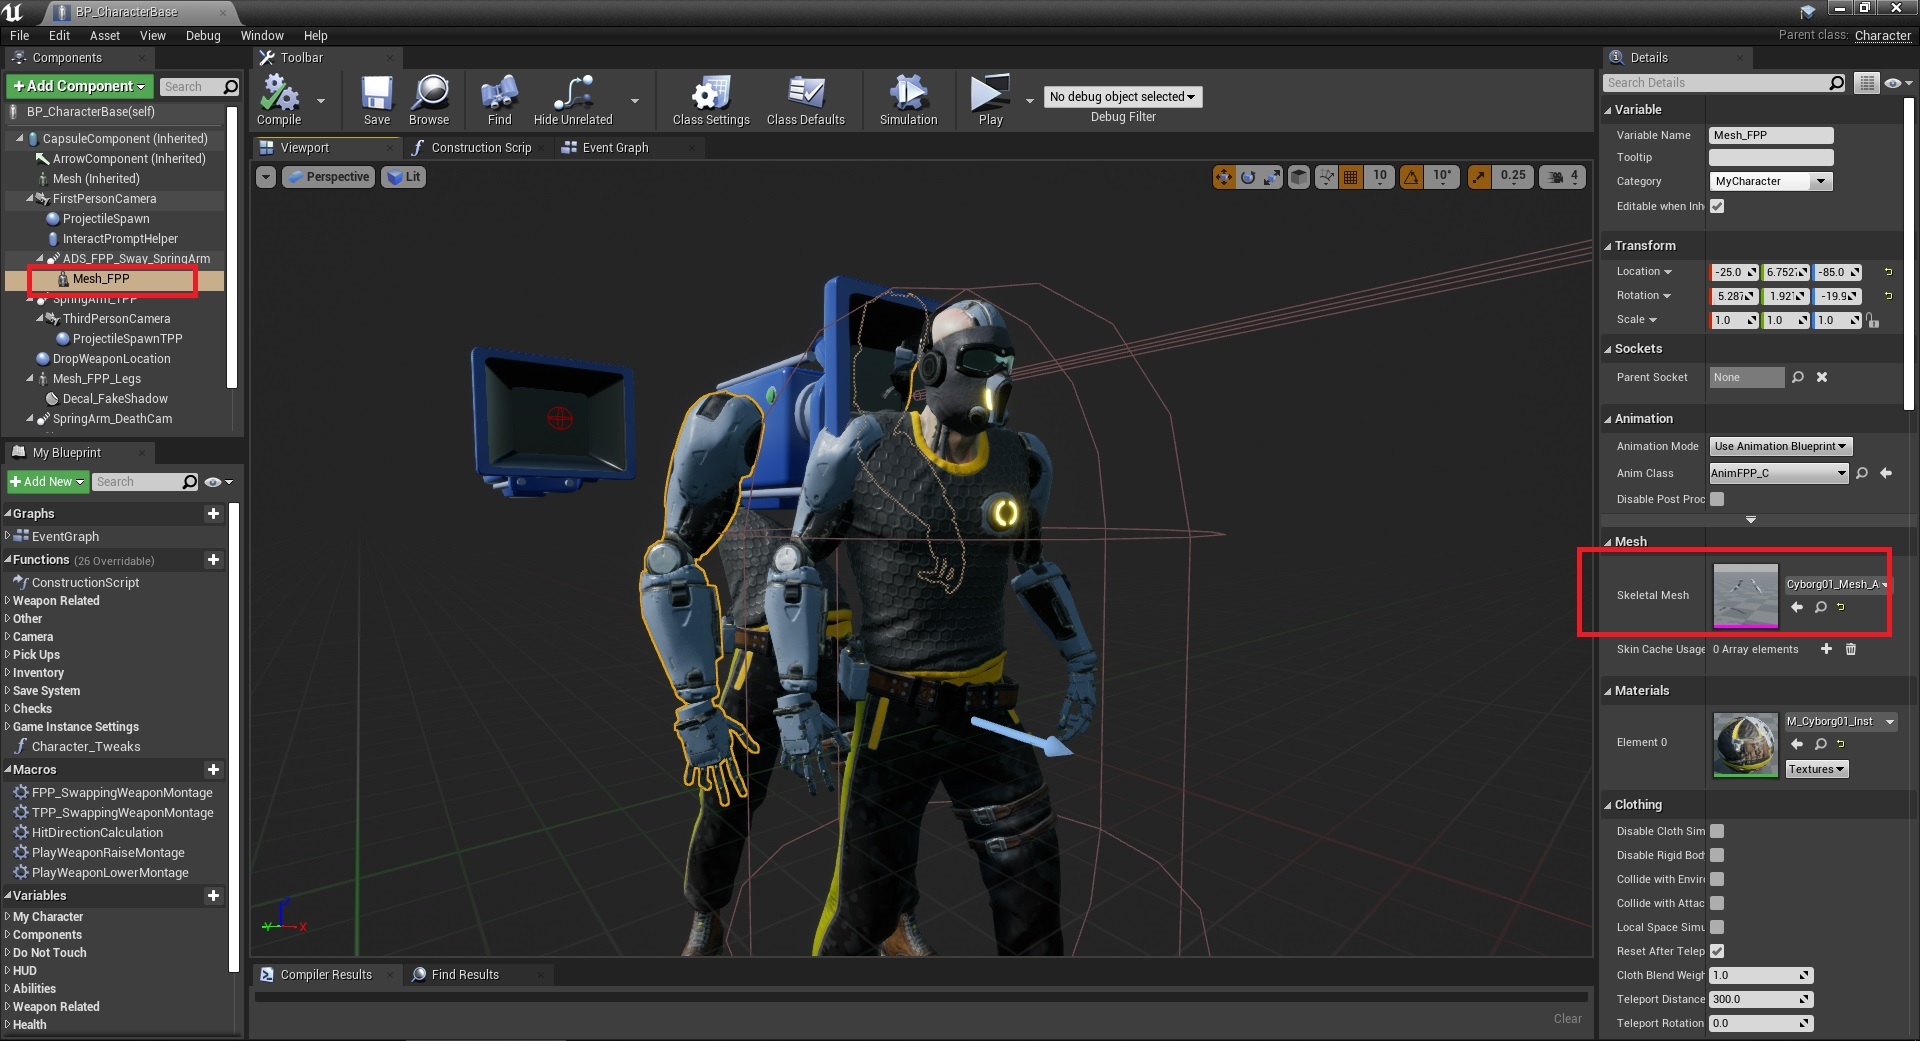
25. And also the TPS and Legs meshes to use the new third person mesh

That’s it!
NOTE:
This tutorial skips a lot of things like UVs, weight painting, animating, custom rigs, and a LOT of other things that are good to know, I highly recommend learning those from various YouTube tutorials for Blender, knowing how to do these things is a huge benefit.
