
In this tutorial we will add Steam and cover some topics about it.
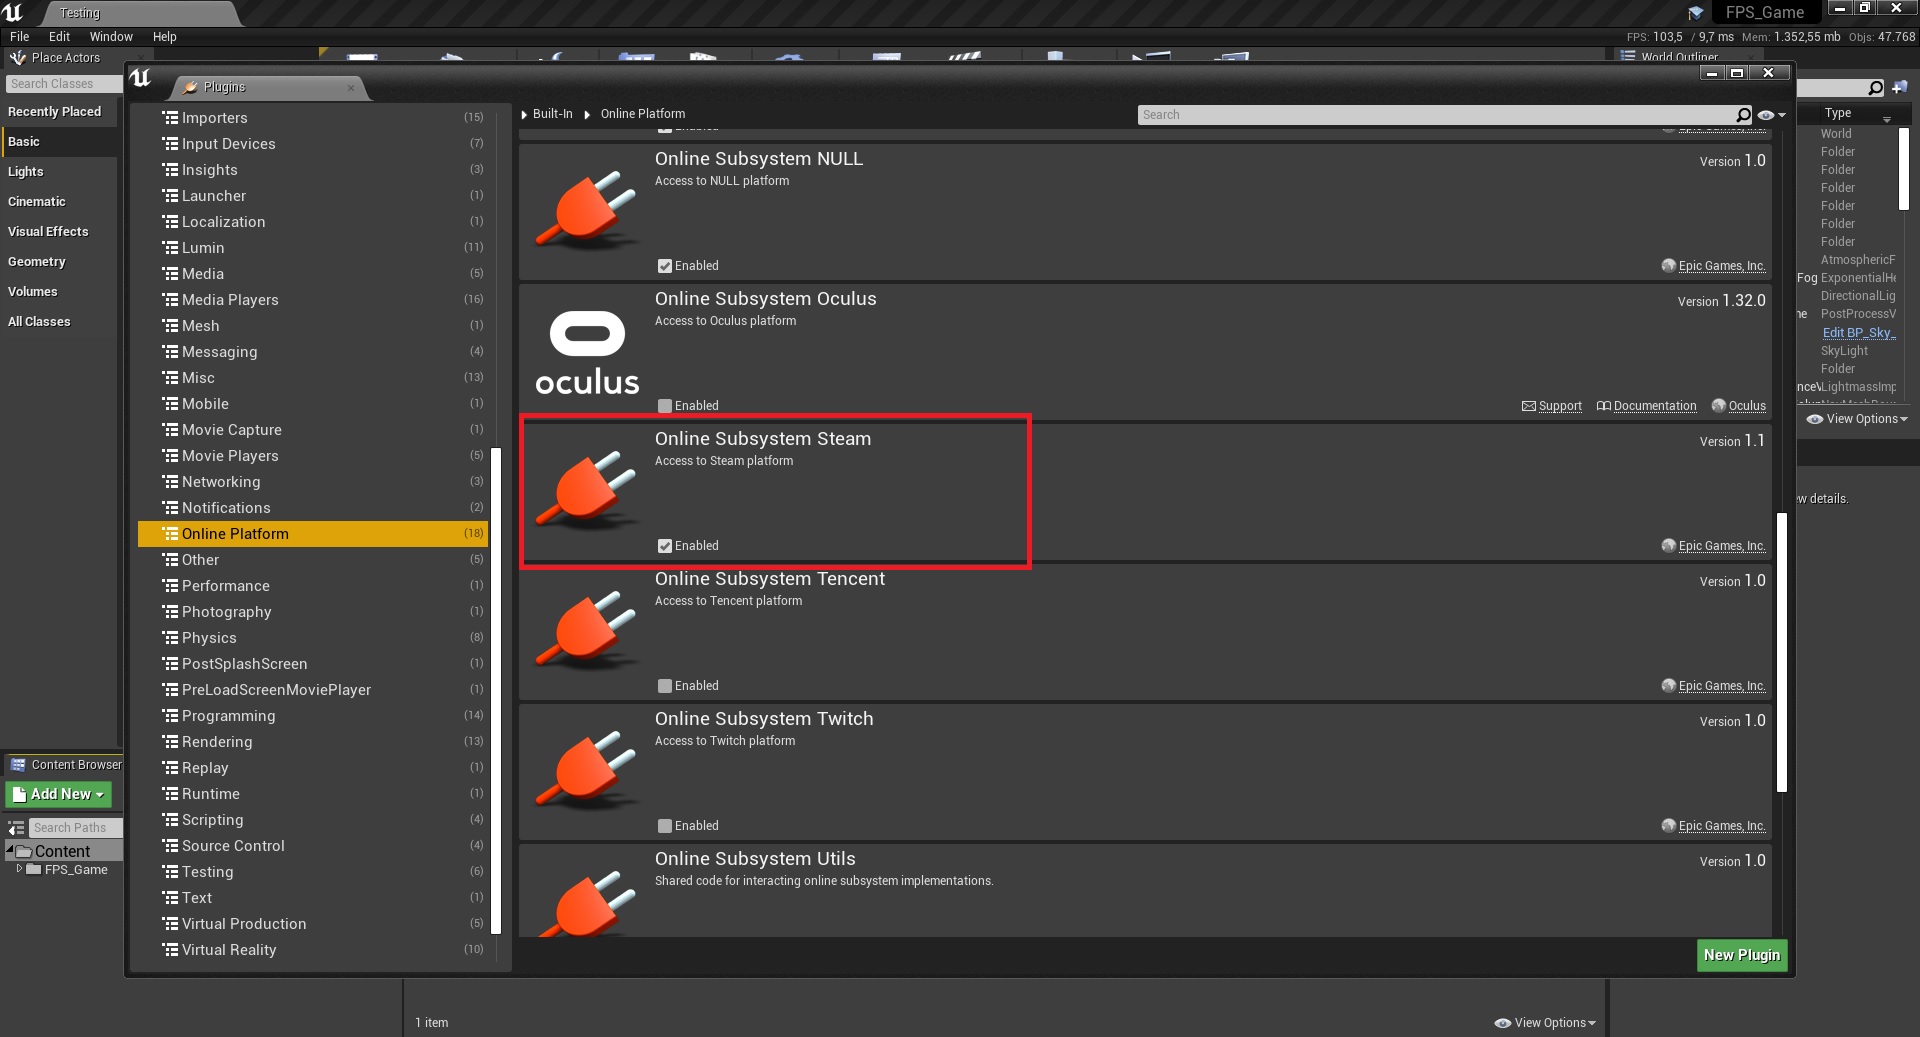
1. Make sure the Steam plugin is enabled (restart the editor after enabling it)
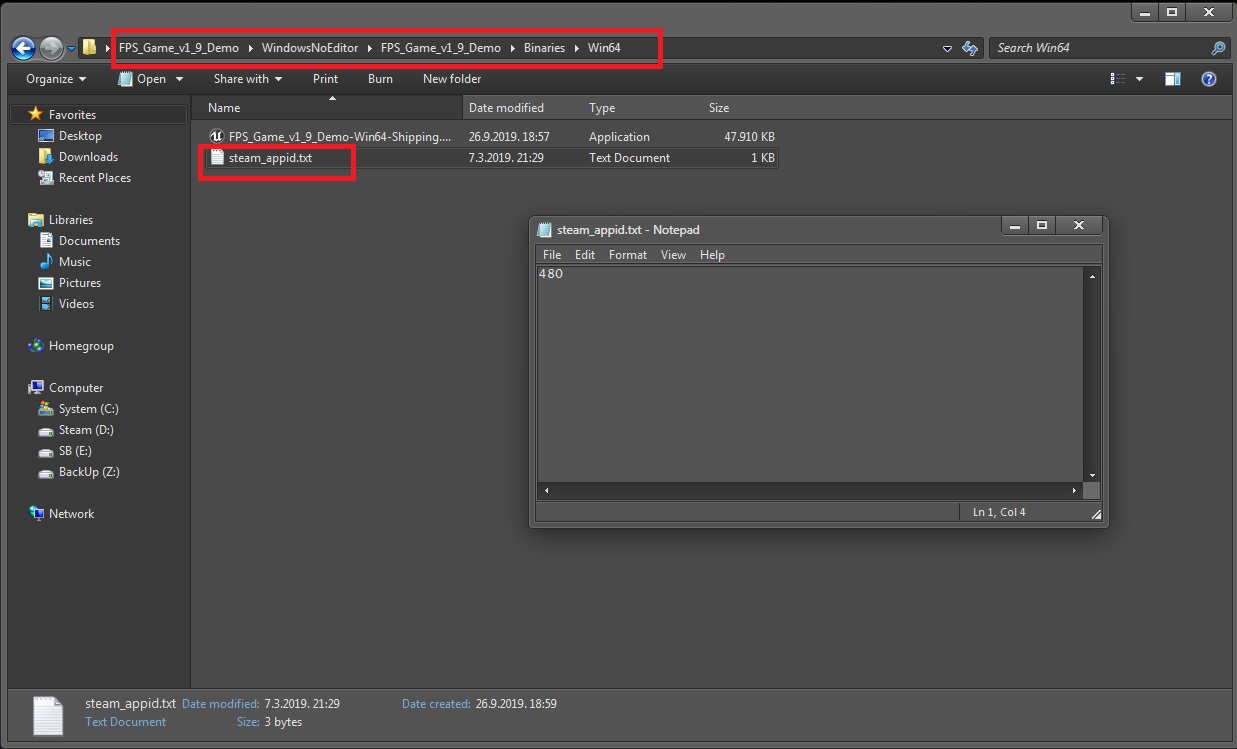
2. Add the 480 appid in the DefaultEngine.ini file in your project folder (in your actual game on Steam put the ID from your Appid that Steam gave you here, 480 is used for testing purposes only)

[/Script/Engine.GameEngine]
+NetDriverDefinitions=(DefName="GameNetDriver",DriverClassName="OnlineSubsystemSteam.SteamNetDriver",DriverClassNameFallback="OnlineSubsystemUtils.IpNetDriver")

[OnlineSubsystem]
DefaultPlatformService=Steam

[OnlineSubsystemSteam]
bEnabled=true
SteamDevAppId=480

[/Script/OnlineSubsystemSteam.SteamNetDriver]
NetConnectionClassName="OnlineSubsystemSteam.SteamNetConnection"
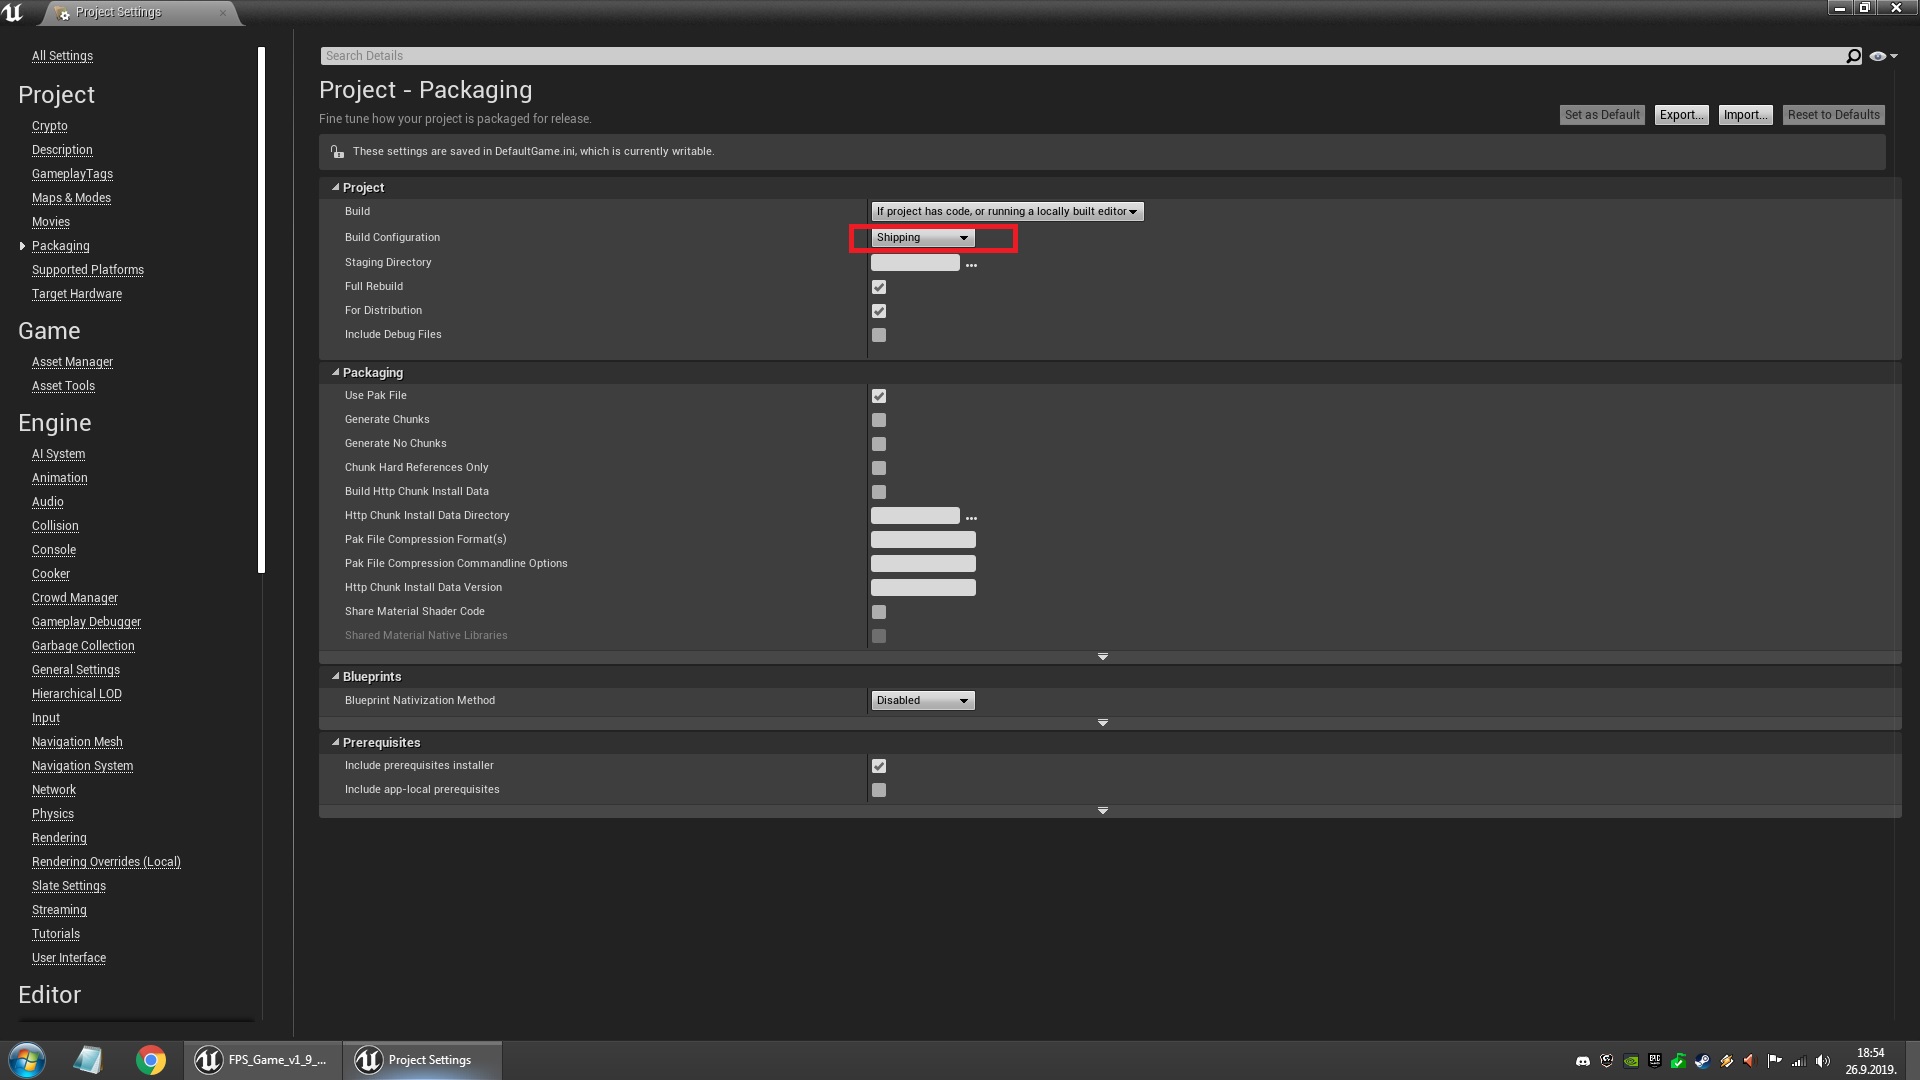
3. When testing it, make sure to compile it as a Shipping Build.

4. Place this text file where the .exe of the compiled game is, that file is not required when putting the game on Steam as it will generate it on its own. Also note the path leads to the Binaries/Win64 folder, as there are 2 exe files and this one is the correct one.
That’s it!
Things to be aware of:
-Steam will not work in editor mode, so you need to launch it as stand alone or compile the project.
-This tutorial does not publish and make your game available on the Steam store…
-Zip the shipping build folder with your game .exe and share it with friends
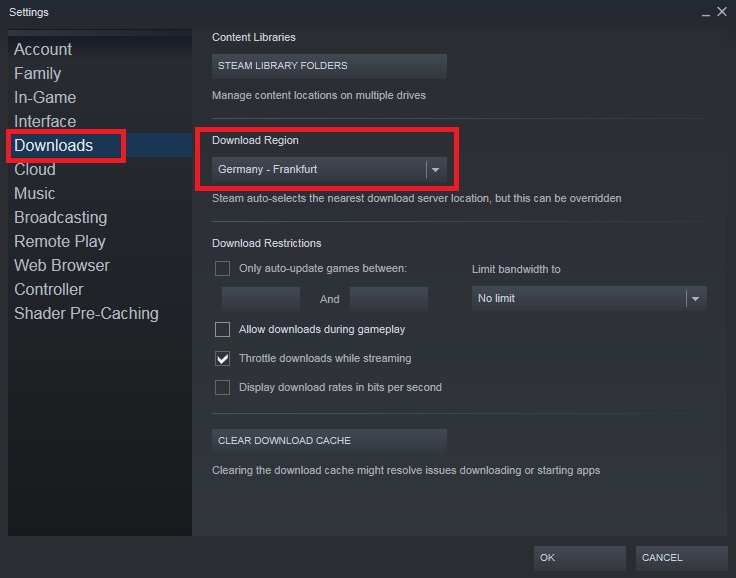
-If you’re using the 480 appid, when testing it both you and your friends need to have the same Download Region in Steam settings (Frankfurt used as an example because I happened to be visiting it while I was making this tutorial, put it on clients to whatever region you’re hosting from).
-In some cases the overlay doesn’t show up, make the shipping game folder NOT read-only
To check for if a DLC is owned and installed, see this tutorial.
