
I noticed that there are many people who use my FPS template to make a TPS game, so I decided to write this page in order to fill in the gaps regarding some stuff that exist in TPS games but not in FPS games, such as a weapon holster socket on the back of the character.. In the past this was a somewhat messy process, but I streamlined it quite a lot and these things are easier to do now.
Preparation
1. Add a socket to the skeleton of the character, call it WeaponHolster (or something along those lines)
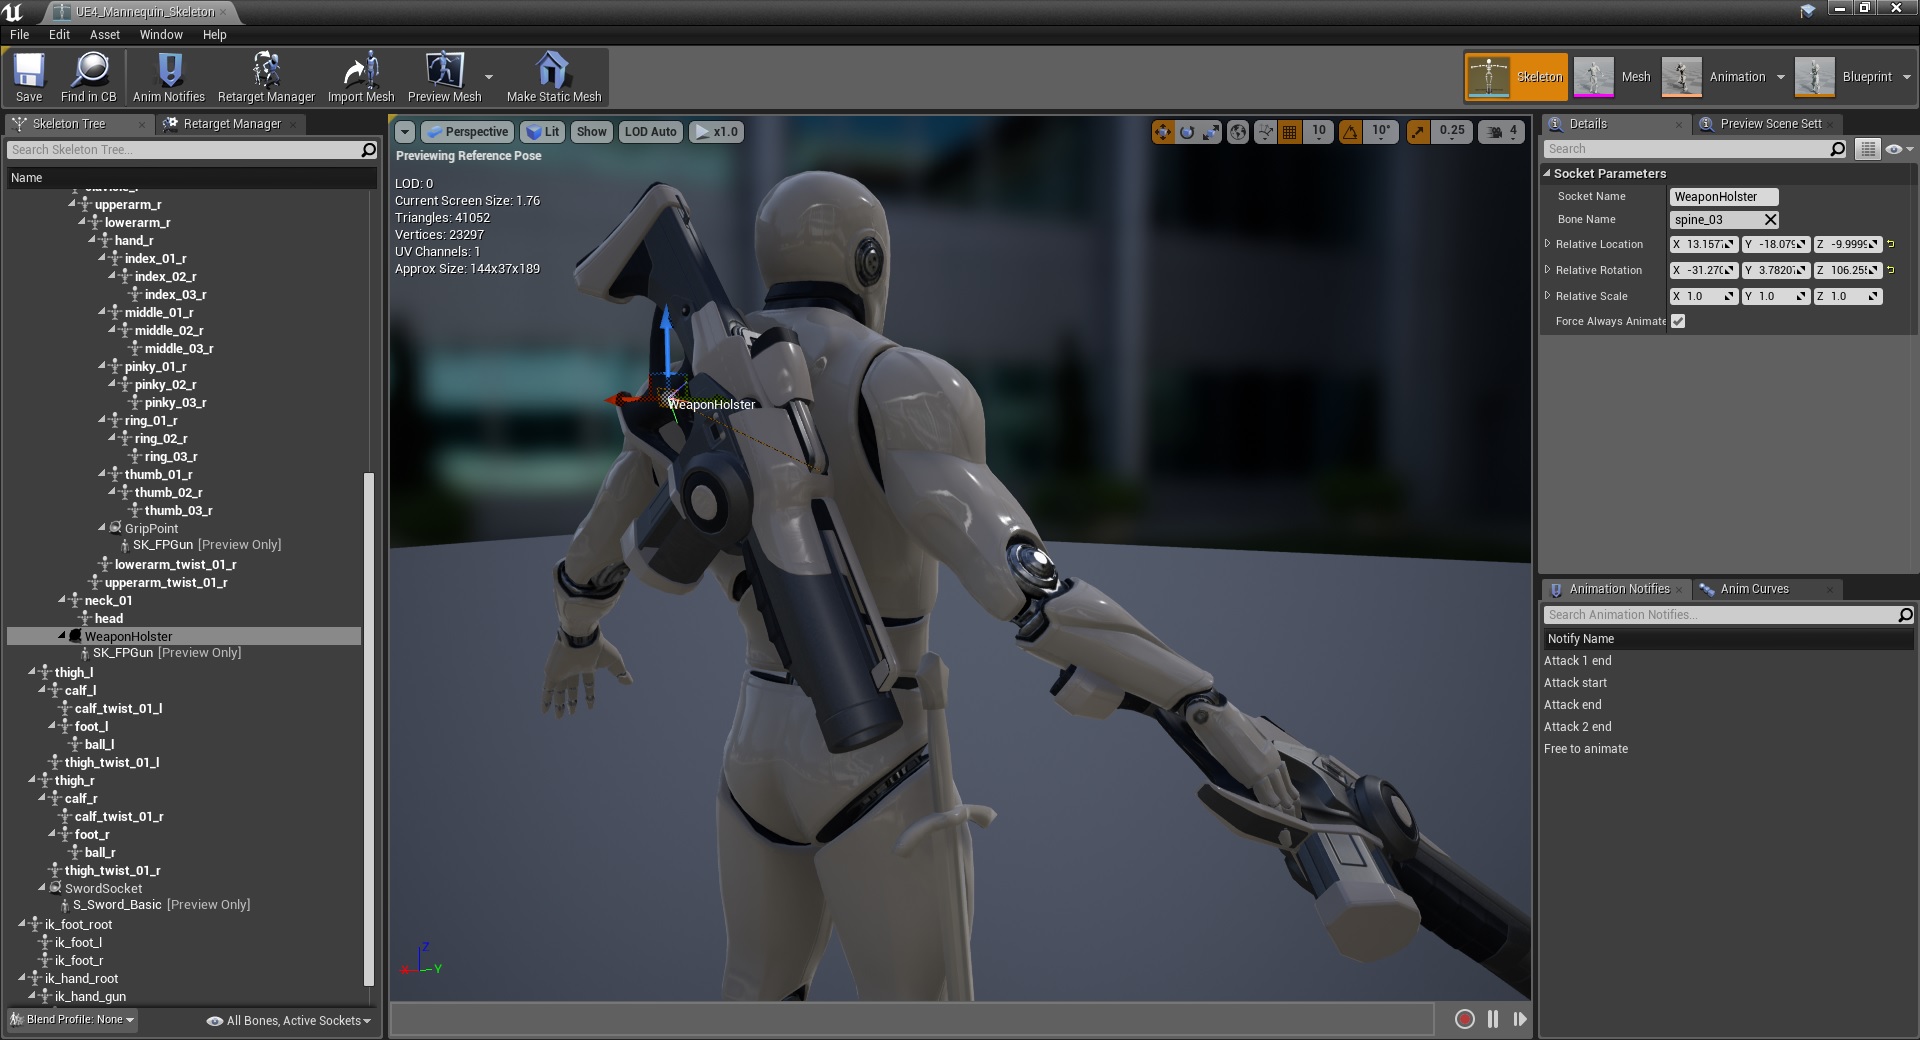
Tip: you can add multiple sockets (for different kind of weapons)
Character changes
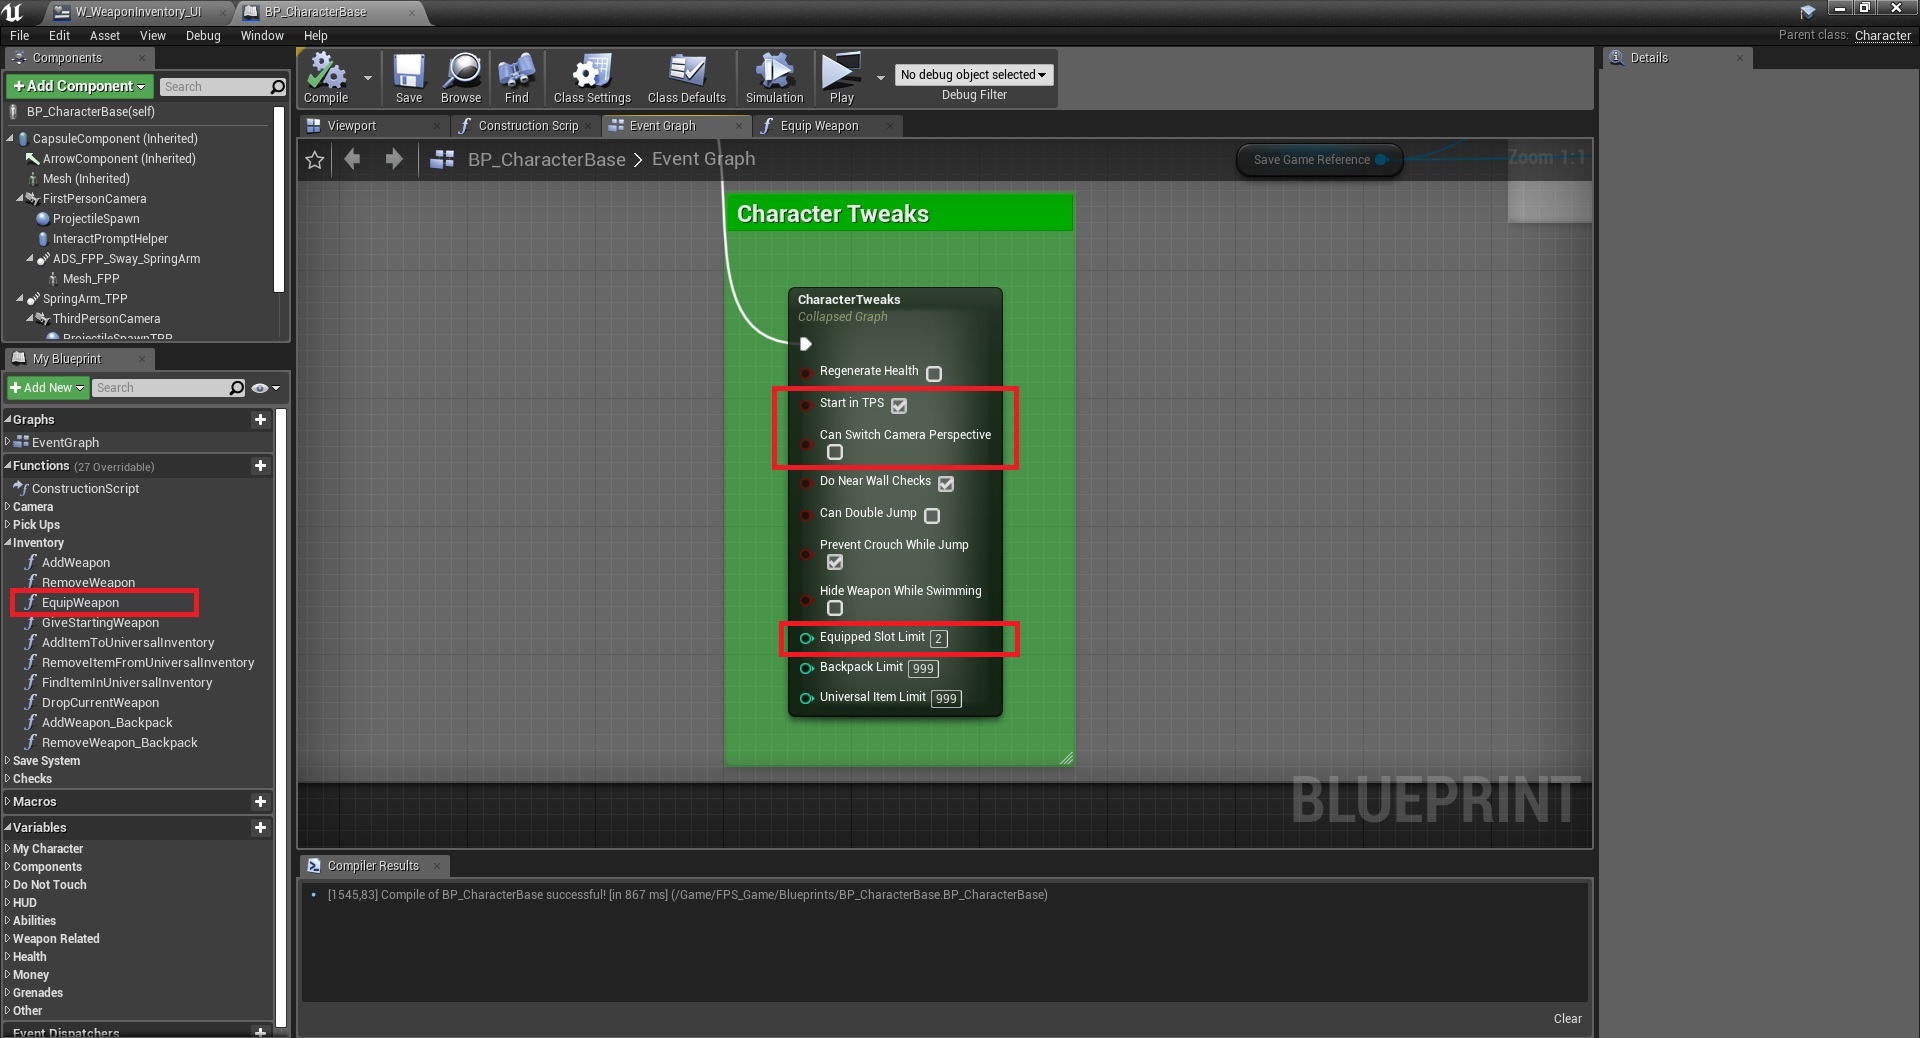
3. Open BP_CharacterBase (FPS_Game/Blueprints/) and on Begin Play set these checkboxes to look like this, basically make it TPS only.
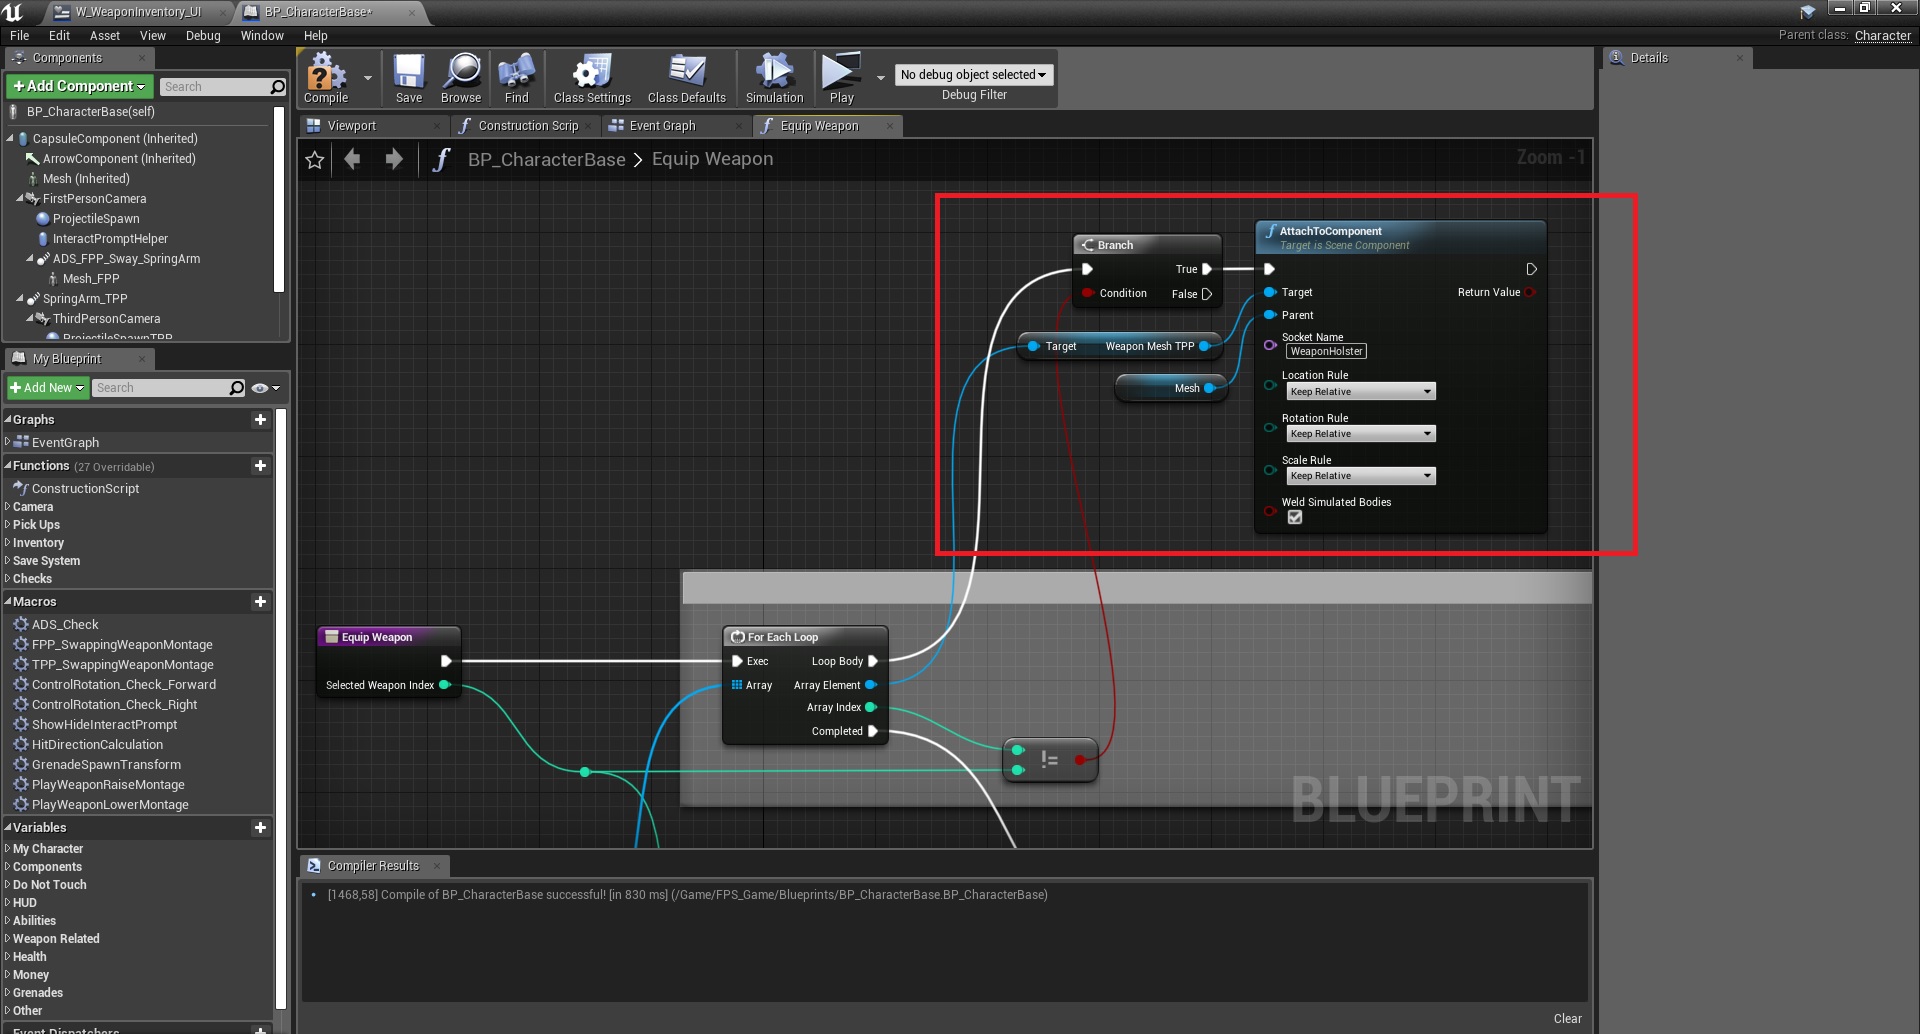
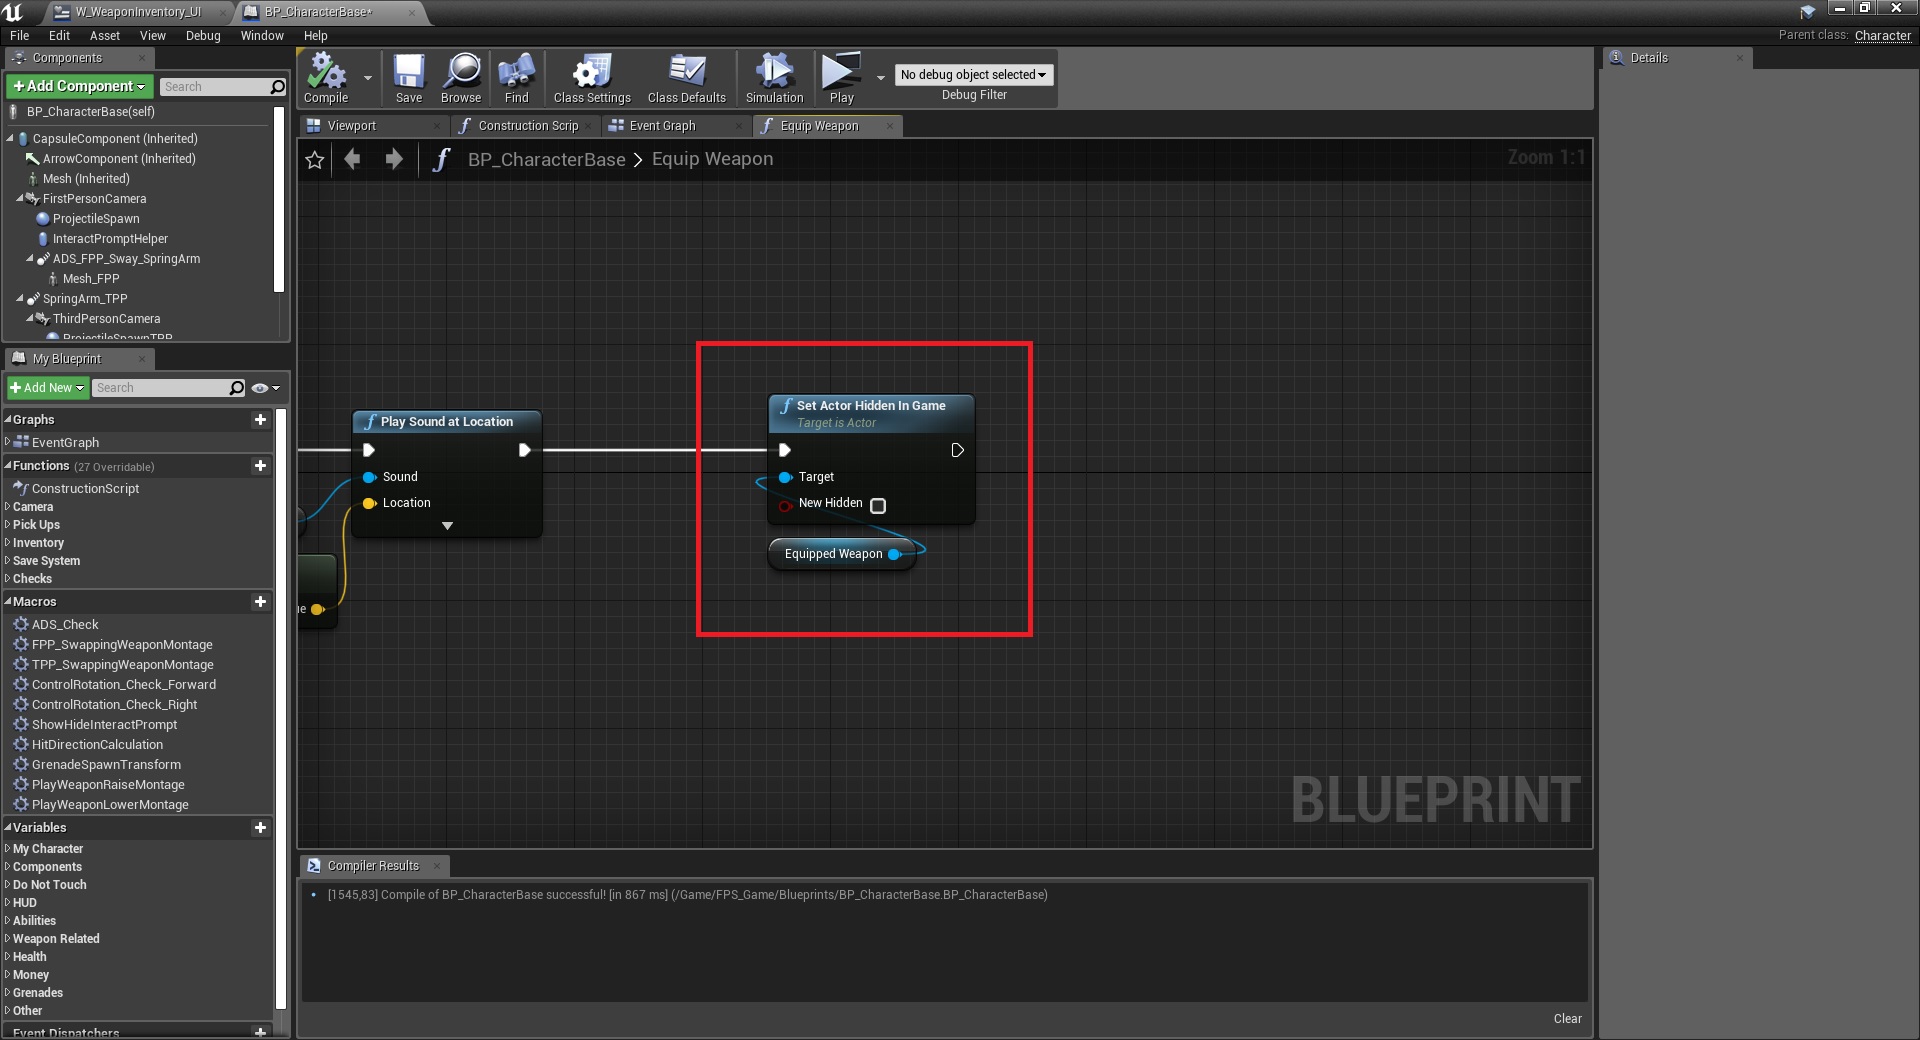
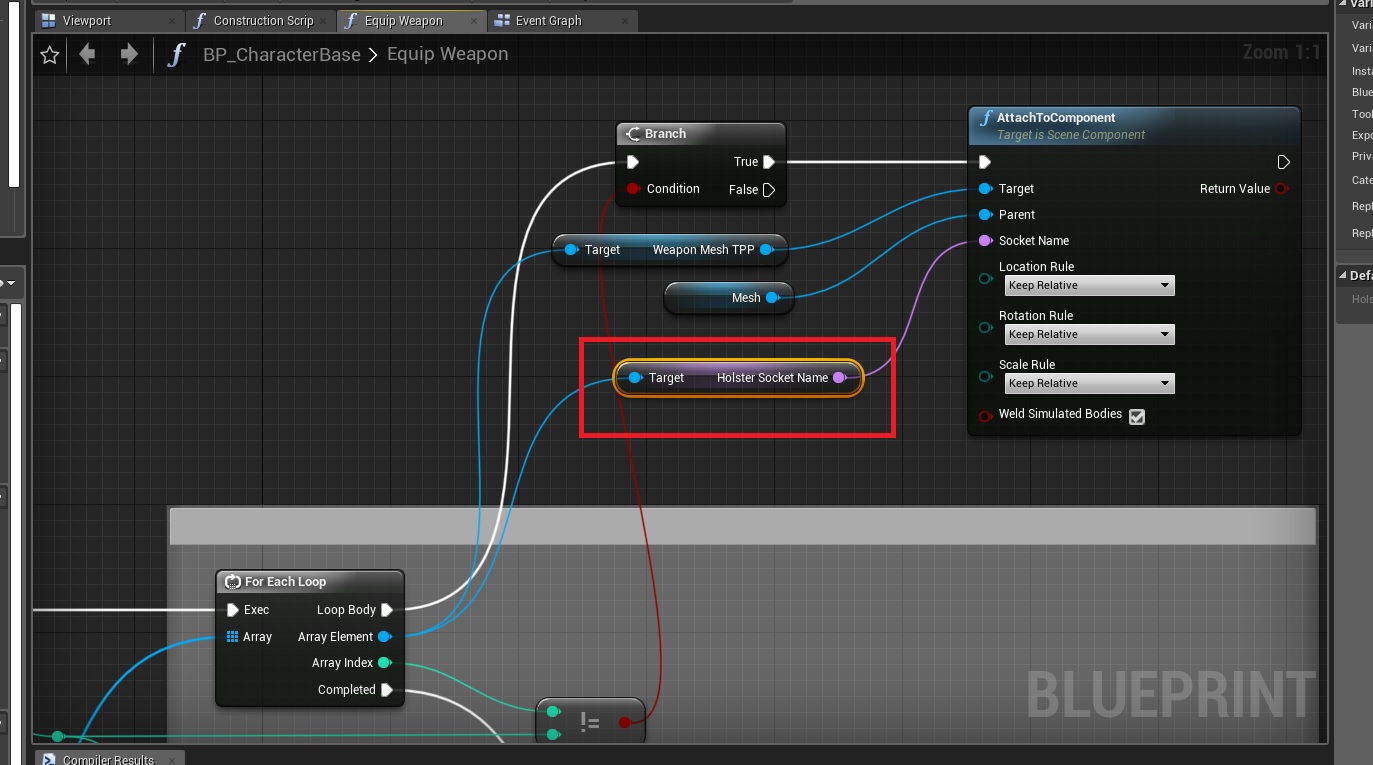
4. Inside the EquipWeapon function on the character, make the following changes.
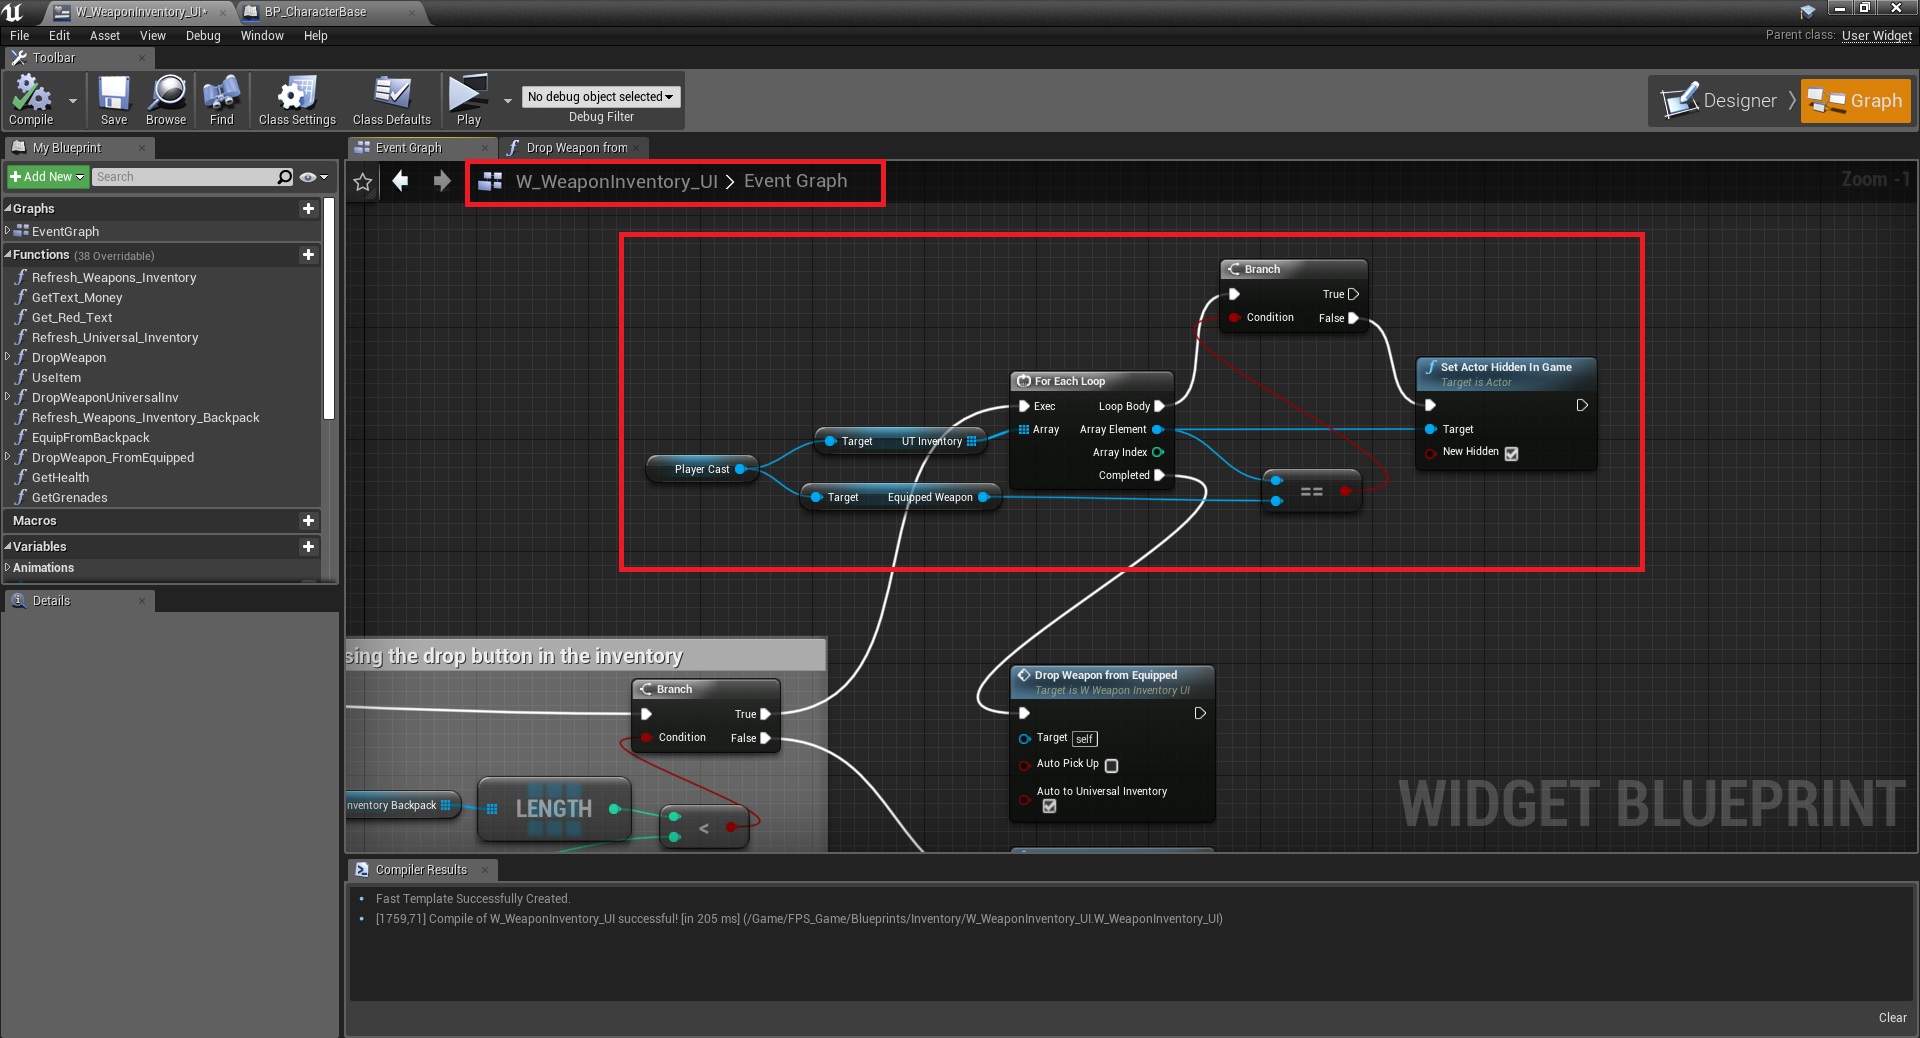
5. Open the inventory widget and at the “Unequip” button, at the end, add this:
(Optional)
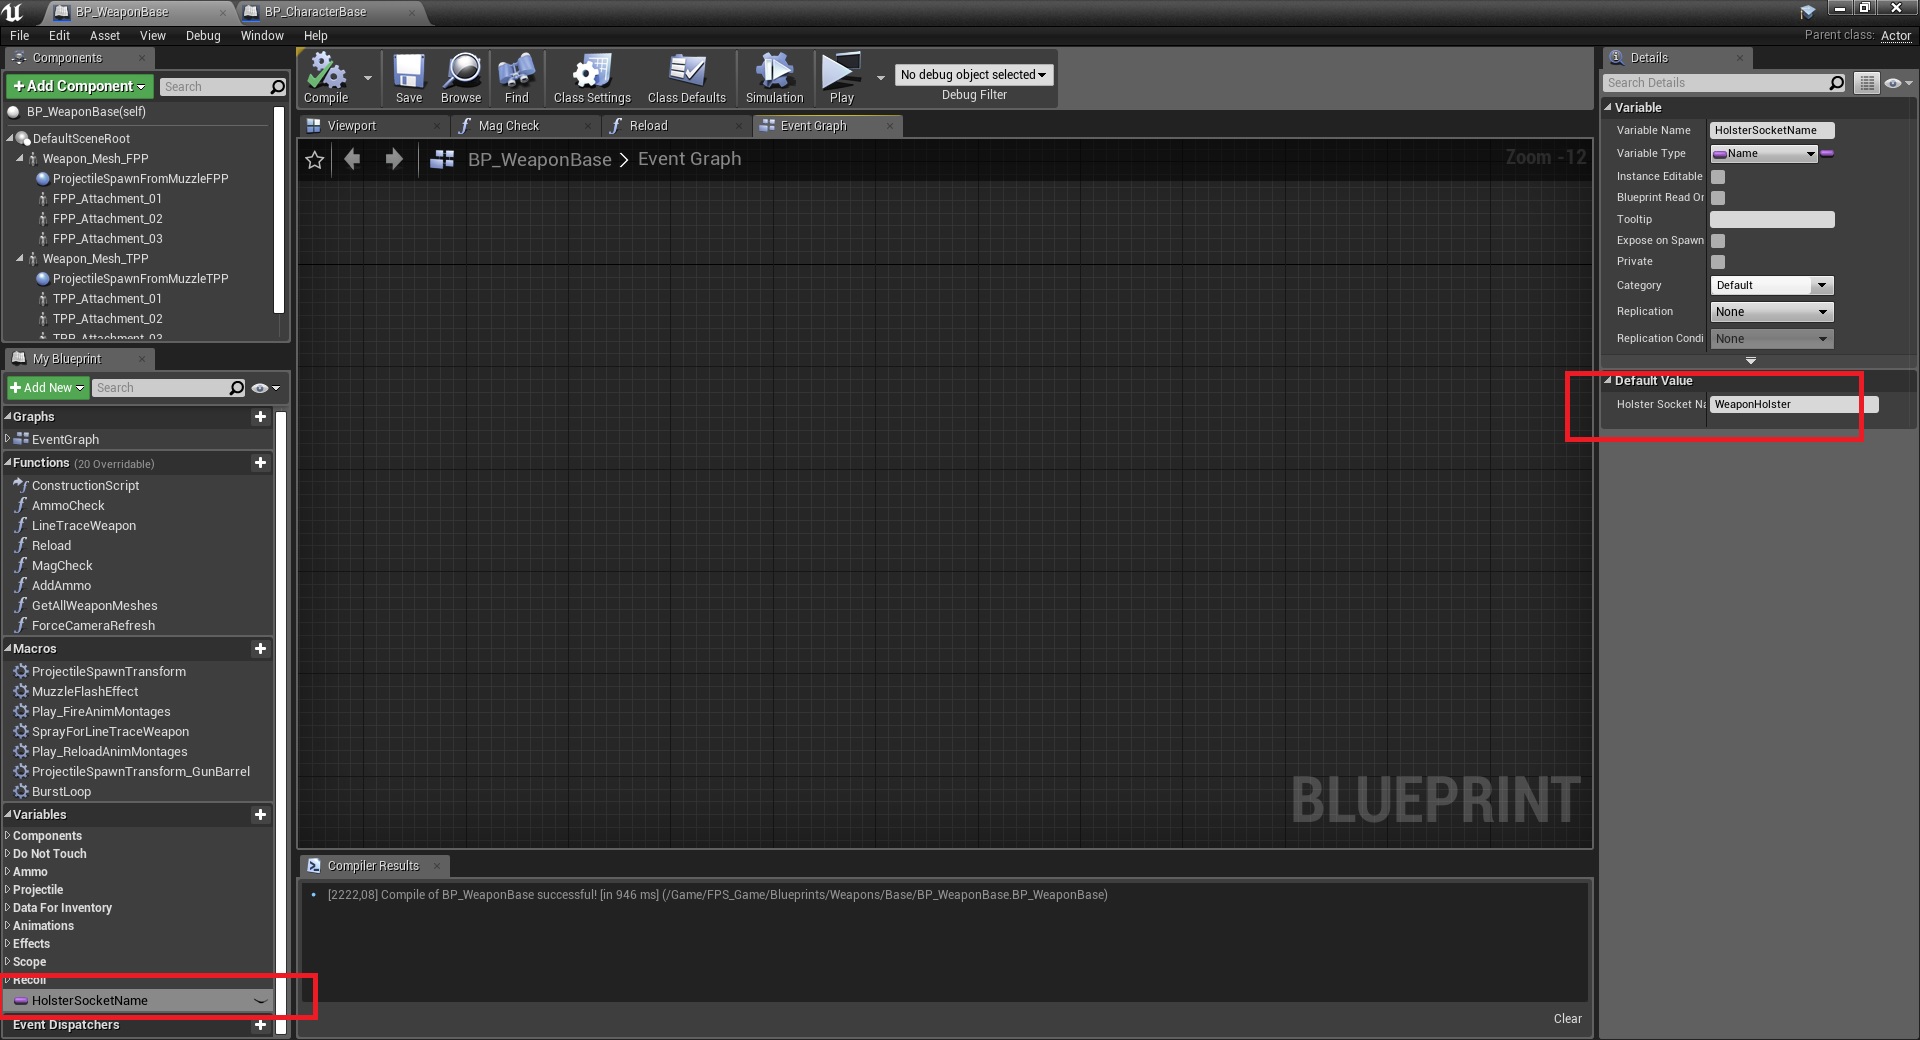
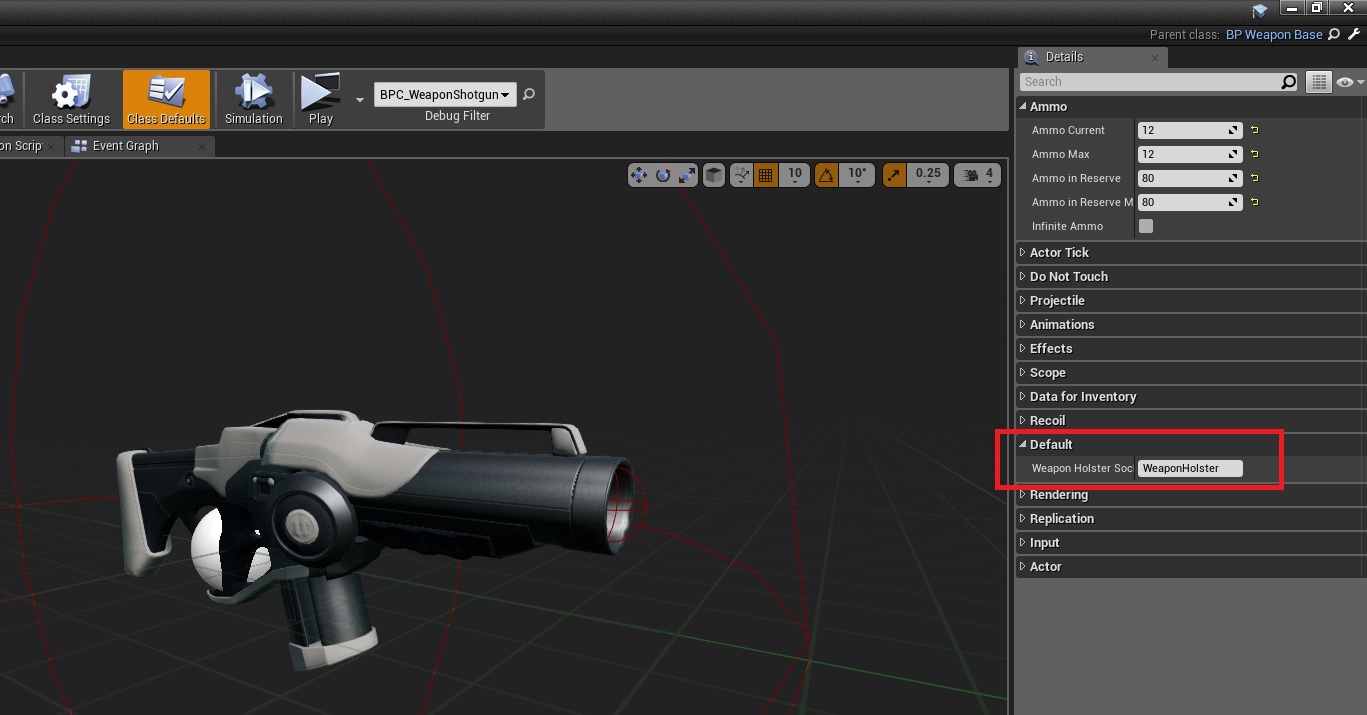
6. Open BP_WeaponBase (FPS_Game/Blueprints/Weapons/Base/) and create a new Name variable, this can be used as the holster socket name in the EquipWeapon function on the character, so each weapon will be able to have its own attach holster socket. Default value for the Name is irrelevant, but put WeaponHolster in there, for the sake of having a default name in all weapon child classes already set.
That’s it!
Welcome to TPS Game Starter Kit
