
I recently had the pleasure to do a simple check if a DLC is owned and installed. This took more effort than it should.
So I decided to write this page in universal form so that it works on any UE4 project.
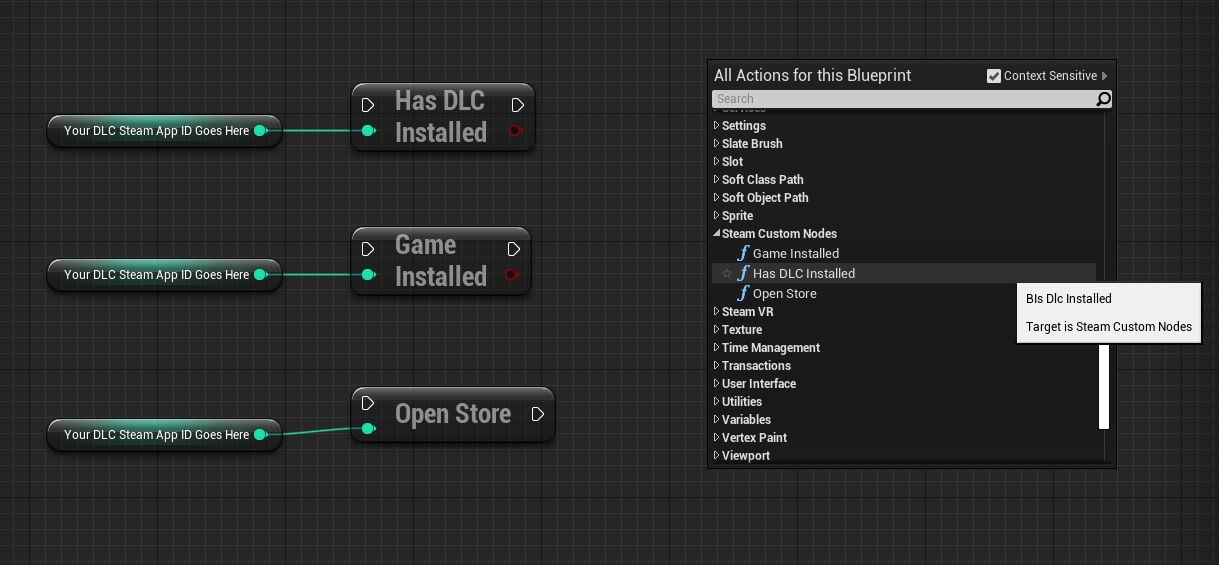
This will be a somewhat long tutorial, and it can only be done in C++, but by the end of it you should have this as the end result:
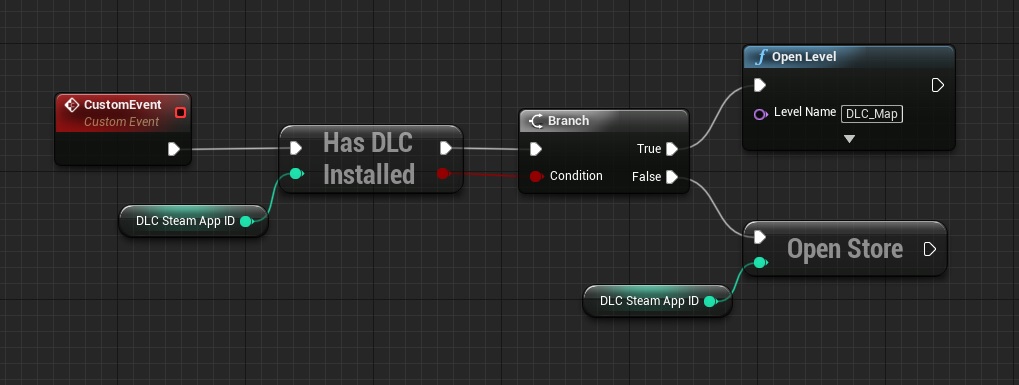
It uses:
bool BIsDlcInstalled( AppId_t appID );
bool BIsAppInstalled( AppId_t appID );
void ActivateGameOverlayToStore( AppId_t nAppID, EOverlayToStoreFlag eFlag );
Entire list of stuff that you can call can be found on the Valve Partner Documentation
https://partner.steamgames.com/doc/api/ISteamApps
What I used:
Unreal Engine version 4.22.3
Visual Studio 2017 Community Edition
SteamSDK v1.39
Preparation
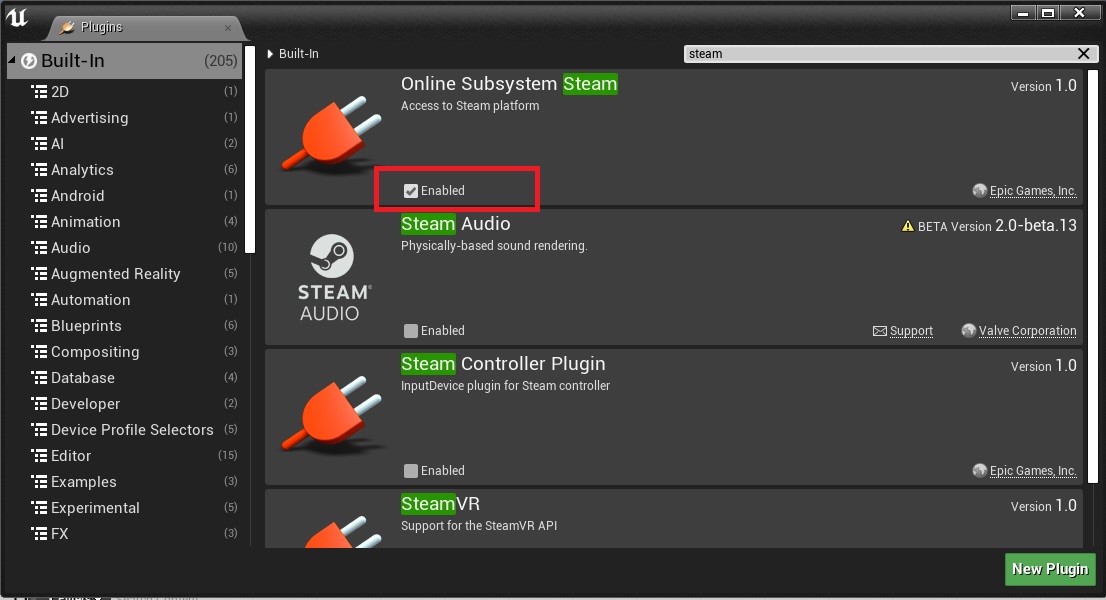
1. Check if the Steam Plugin is enabled
2. Open your DefaultEngine.ini file and see if it has steam there too (480 is the testing AppID, so put your actual one from the game here, not the DLC one)
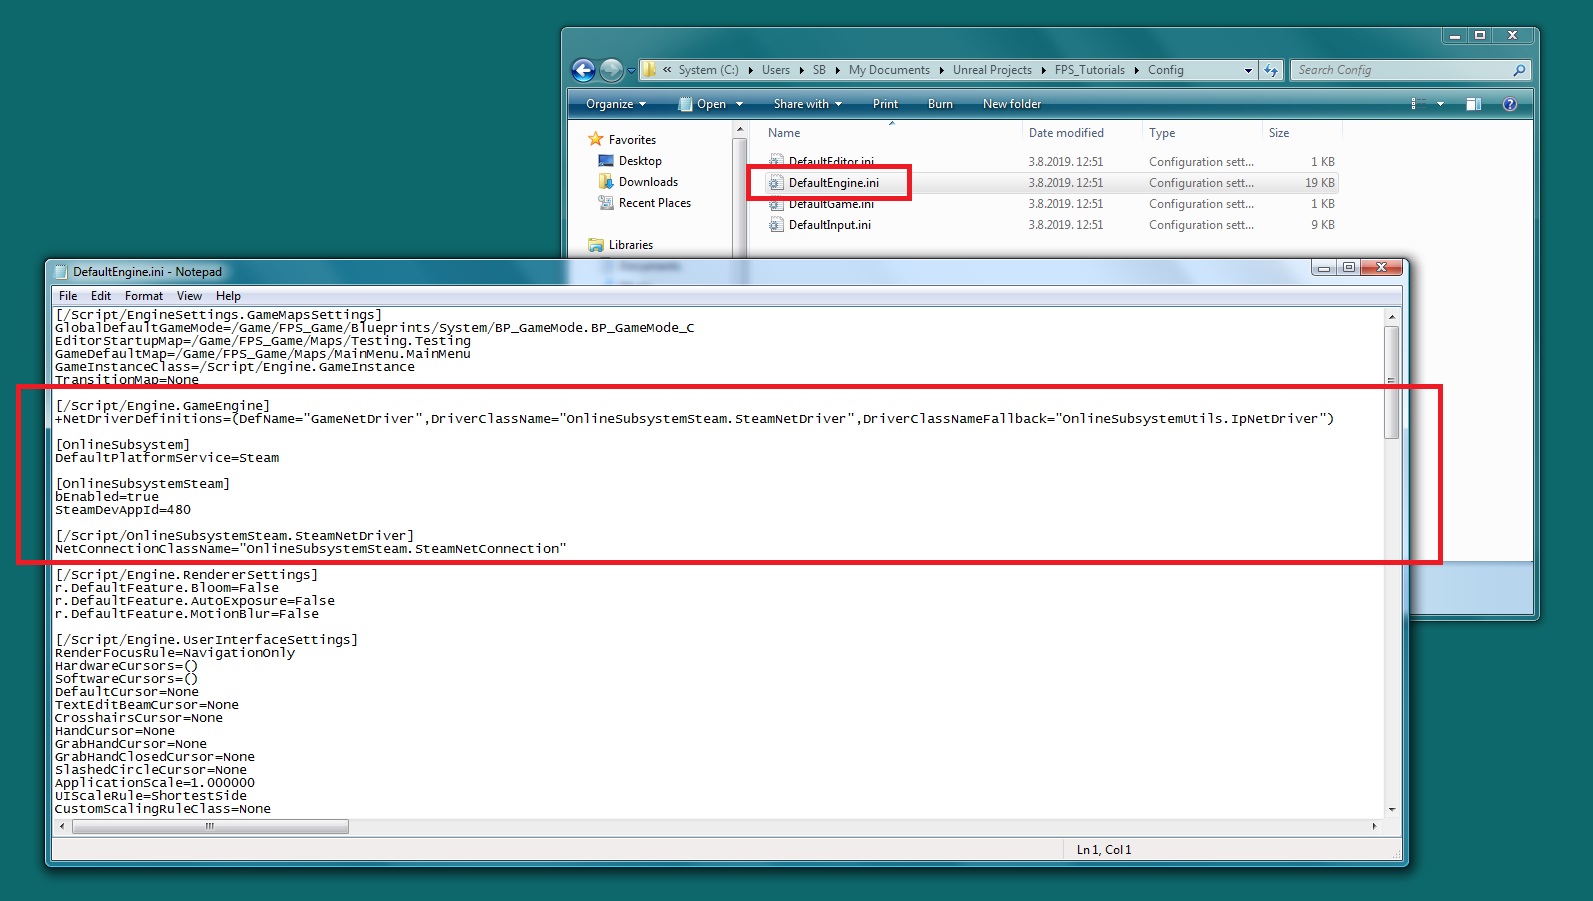
[/Script/Engine.GameEngine]
+NetDriverDefinitions=(DefName="GameNetDriver",DriverClassName="OnlineSubsystemSteam.SteamNetDriver",DriverClassNameFallback="OnlineSubsystemUtils.IpNetDriver")

[OnlineSubsystem]
DefaultPlatformService=Steam

[OnlineSubsystemSteam]
bEnabled=true
SteamDevAppId=480

[/Script/OnlineSubsystemSteam.SteamNetDriver]
NetConnectionClassName="OnlineSubsystemSteam.SteamNetConnection"
3. Add a C++ class to your project (this step cannot be reversed, so make a backup of your project first!)
4. From the list pick Blueprint Function Library
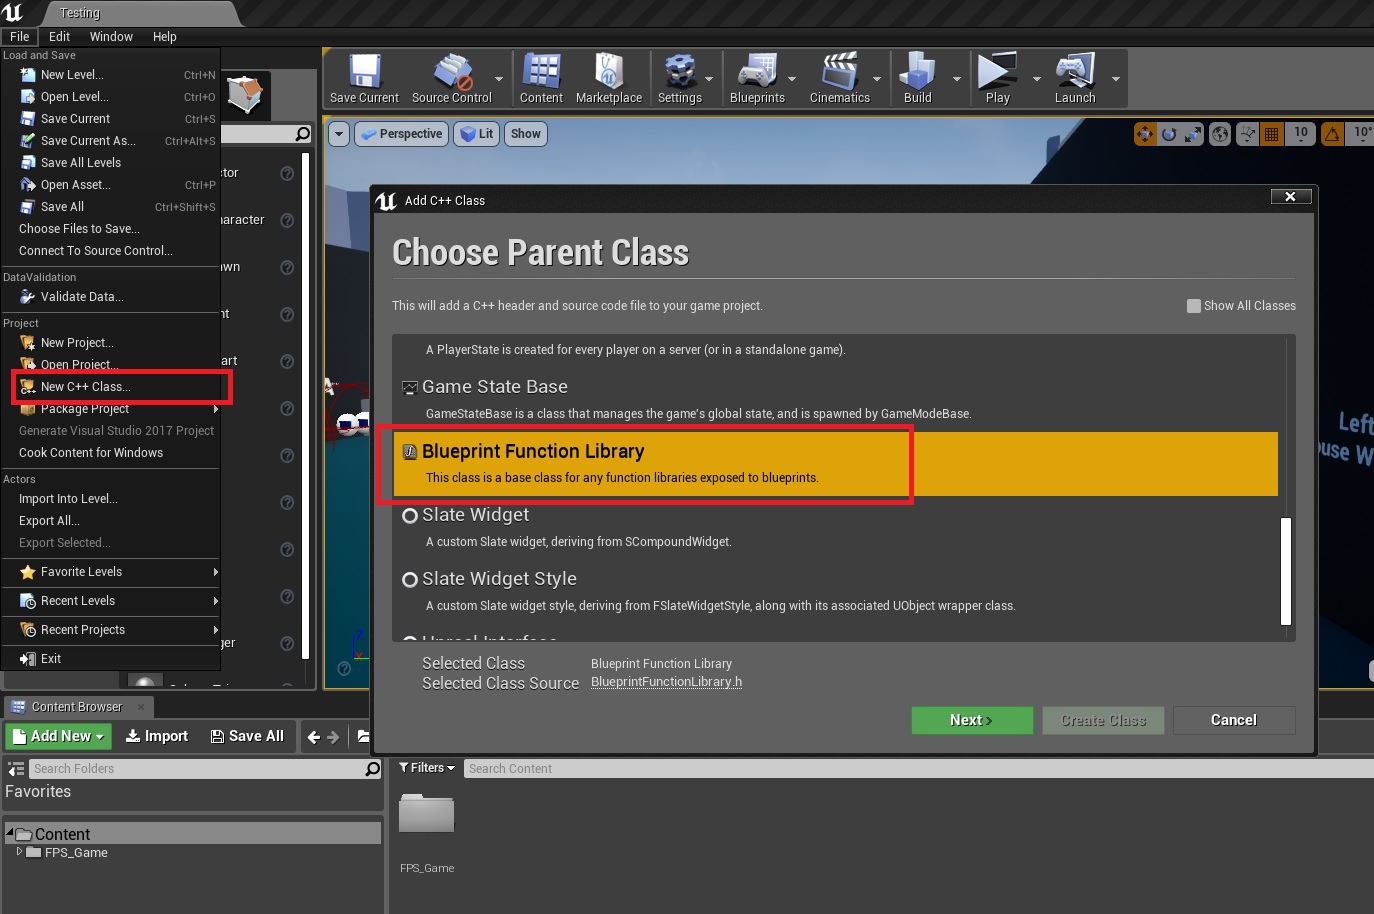
5. Name is up to you, but in this tutorial I called it SteamCustomNodes, press also the Public button so that it adds them to the correct path.
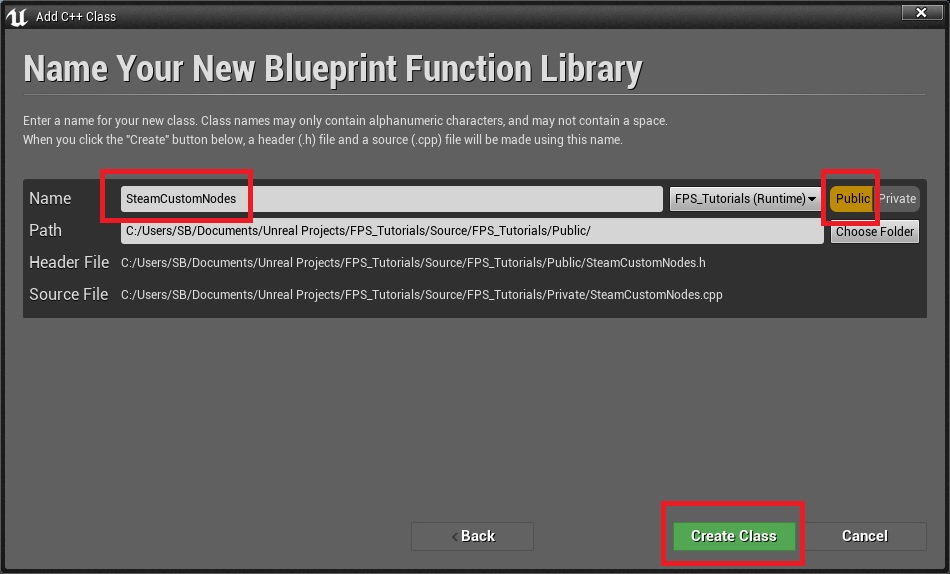
6. Wait for UE4 to create the classes and add the code and Visual Studio to finish parsing, this can take few minutes if it’s the first time.
Visual Studio C++ Code
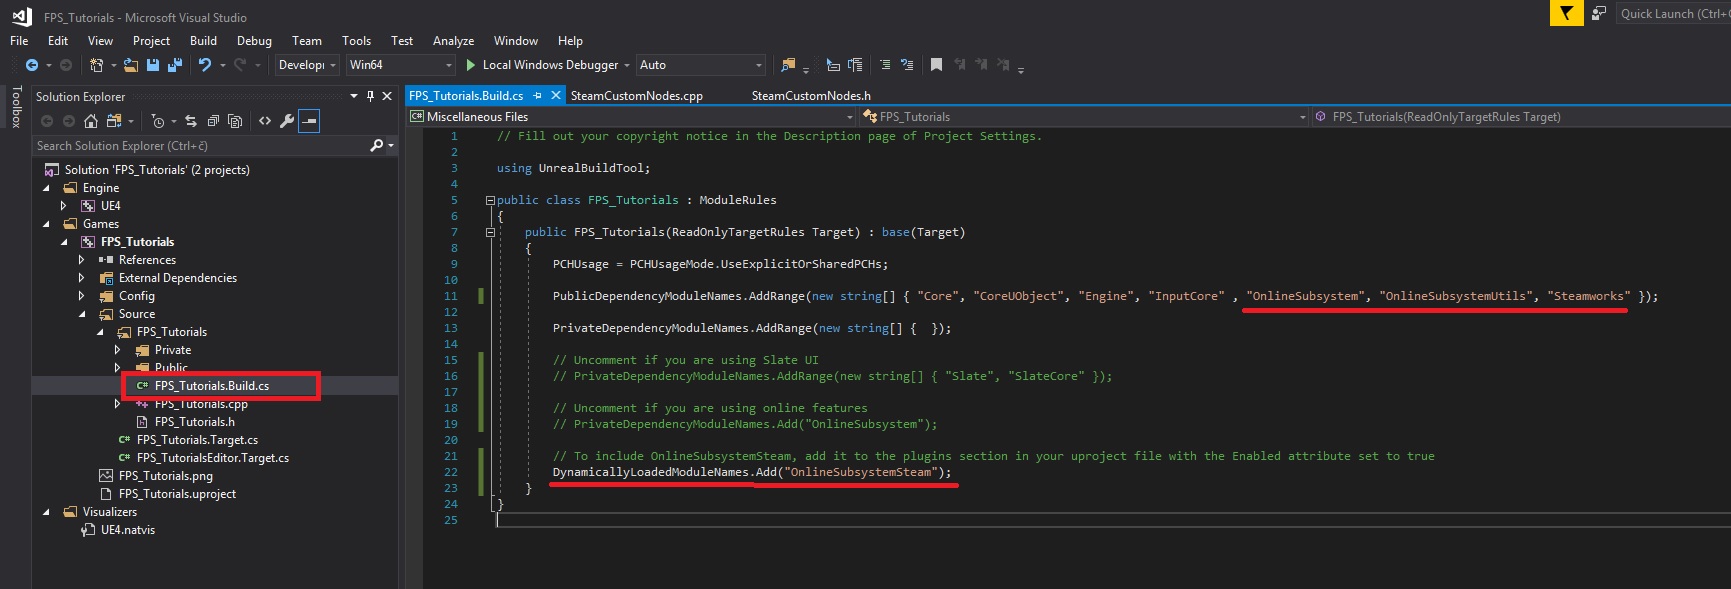
7. None of this will work if you don’t add some stuff to your Build.cs file, keep an eye on FPS_Tutorials, this should be the name of your project, so if you copy paste the code make sure you fix that part.
// Fill out your copyright notice in the Description page of Project Settings.

using UnrealBuildTool;

public class FPS_Tutorials : ModuleRules
{
public FPS_Tutorials(ReadOnlyTargetRules Target) : base(Target)
{
PCHUsage = PCHUsageMode.UseExplicitOrSharedPCHs;

PublicDependencyModuleNames.AddRange(new string[] { "Core", "CoreUObject", "Engine", "InputCore" , "OnlineSubsystem", "OnlineSubsystemUtils", "Steamworks" });

PrivateDependencyModuleNames.AddRange(new string[] { });

// Uncomment if you are using Slate UI
// PrivateDependencyModuleNames.AddRange(new string[] { "Slate", "SlateCore" });

// Uncomment if you are using online features
// PrivateDependencyModuleNames.Add("OnlineSubsystem");

// To include OnlineSubsystemSteam, add it to the plugins section in your uproject file with the Enabled attribute set to true
DynamicallyLoadedModuleNames.Add("OnlineSubsystemSteam");
}
}
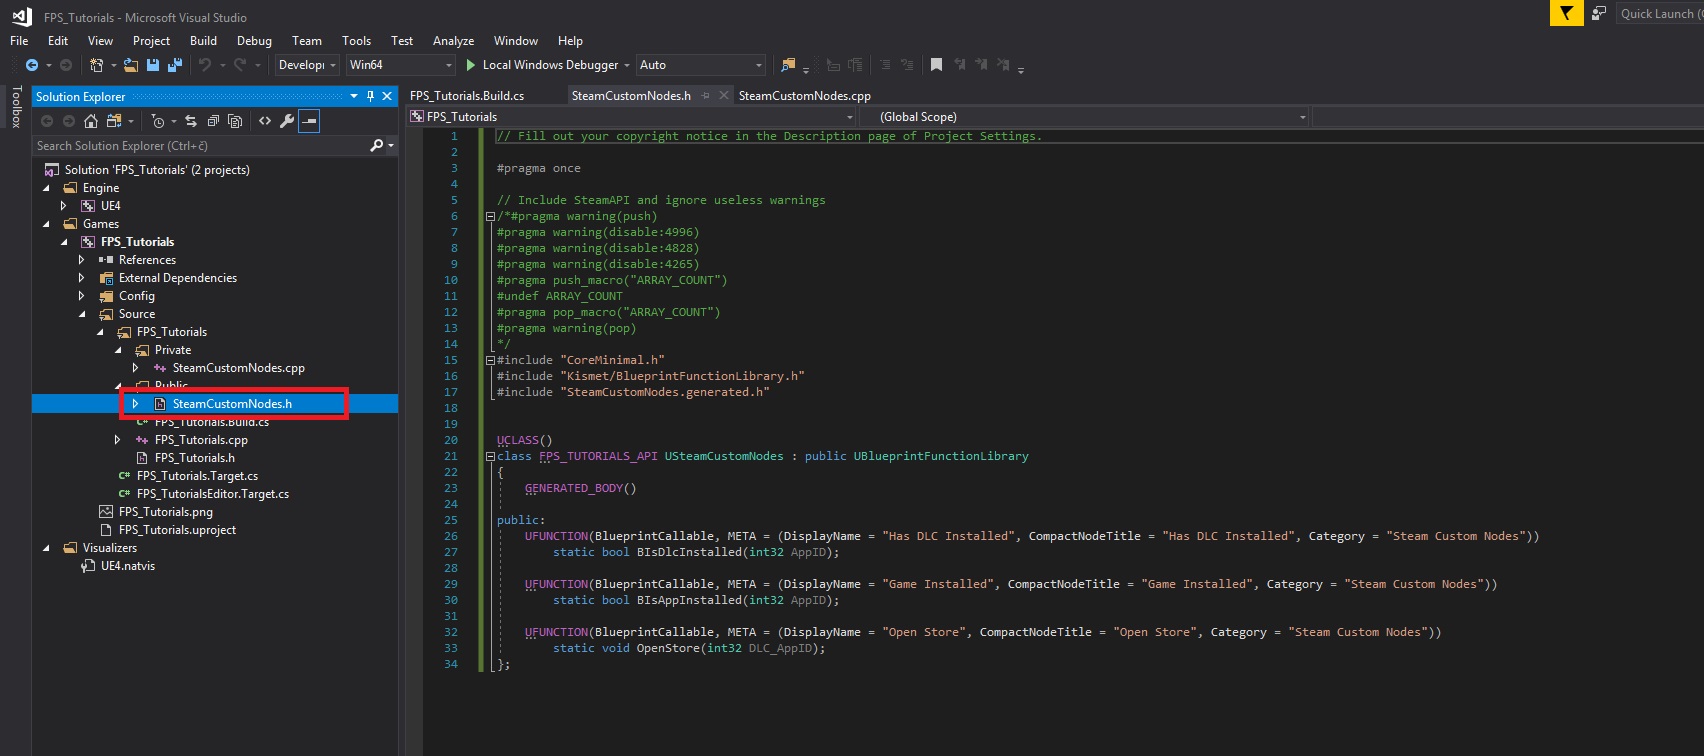
8. Now on to the header file of your library, add this to it, again note the FPS_TUTORIALS_API, replace that with YOURPROJECTNAME_API
// Fill out your copyright notice in the Description page of Project Settings.

#pragma once

// Include SteamAPI and ignore useless warnings
/*#pragma warning(push)
#pragma warning(disable:4996)
#pragma warning(disable:4828)
#pragma warning(disable:4265)
#pragma push_macro("ARRAY_COUNT")
#undef ARRAY_COUNT
#pragma pop_macro("ARRAY_COUNT")
#pragma warning(pop)
*/
#include "CoreMinimal.h"
#include "Kismet/BlueprintFunctionLibrary.h"
#include "SteamCustomNodes.generated.h"


UCLASS()
class FPS_TUTORIALS_API USteamCustomNodes : public UBlueprintFunctionLibrary
{
GENERATED_BODY()

public:
UFUNCTION(BlueprintCallable, META = (DisplayName = "Has DLC Installed", CompactNodeTitle = "Has DLC Installed", Category = "Steam Custom Nodes"))
static bool BIsDlcInstalled(int32 AppID);

UFUNCTION(BlueprintCallable, META = (DisplayName = "Game Installed", CompactNodeTitle = "Game Installed", Category = "Steam Custom Nodes"))
static bool BIsAppInstalled(int32 AppID);

UFUNCTION(BlueprintCallable, META = (DisplayName = "Open Store", CompactNodeTitle = "Open Store", Category = "Steam Custom Nodes"))
static void OpenStore(int32 DLC_AppID);
};
9. This is the cpp file, here it’s important to note that Steamv139 may be different, depends on what version you have installed in Program Files where UE4 is.

// Fill out your copyright notice in the Description page of Project Settings.

#include "SteamCustomNodes.h"

// Include SteamAPI and ignore useless warnings
#if USING_CODE_ANALYSIS
MSVC_PRAGMA(warning(push))
MSVC_PRAGMA(warning(disable : ALL_CODE_ANALYSIS_WARNINGS))
#endif // USING_CODE_ANALYSIS
#pragma warning(push)
#pragma warning(disable:4996)
#pragma push_macro("ARRAY_COUNT")
#undef ARRAY_COUNT
#include "ThirdParty/Steamworks/Steamv139/sdk/public/steam/steam_api.h"
#pragma pop_macro("ARRAY_COUNT")
#pragma warning(pop)

// Takes AppID of DLC and checks if the user owns the DLC & if the DLC is installed
bool USteamCustomNodes::BIsDlcInstalled(int32 AppID)
{
if (SteamUser() != nullptr)
{
bool Out = SteamApps()->BIsDlcInstalled(AppID);
return Out;
}
return false;
}

// Returns true if that app is installed (not necessarily owned)
bool USteamCustomNodes::BIsAppInstalled(int32 AppID)
{
if (SteamUser() != nullptr)
{
bool Out = SteamApps()->BIsAppInstalled(AppID);
return Out;
}
return false;
}

void USteamCustomNodes::OpenStore(int32 DLC_AppID)
{
if (SteamUser() != nullptr)
{
// SteamFriends()->ActivateGameOverlayToWebPage("https://store.steampowered.com/");
SteamFriends()->ActivateGameOverlayToStore(DLC_AppID, k_EOverlayToStoreFlag_None);
}
}
10. With all that done, Save All and Rebuild the project, first from Visual Studio
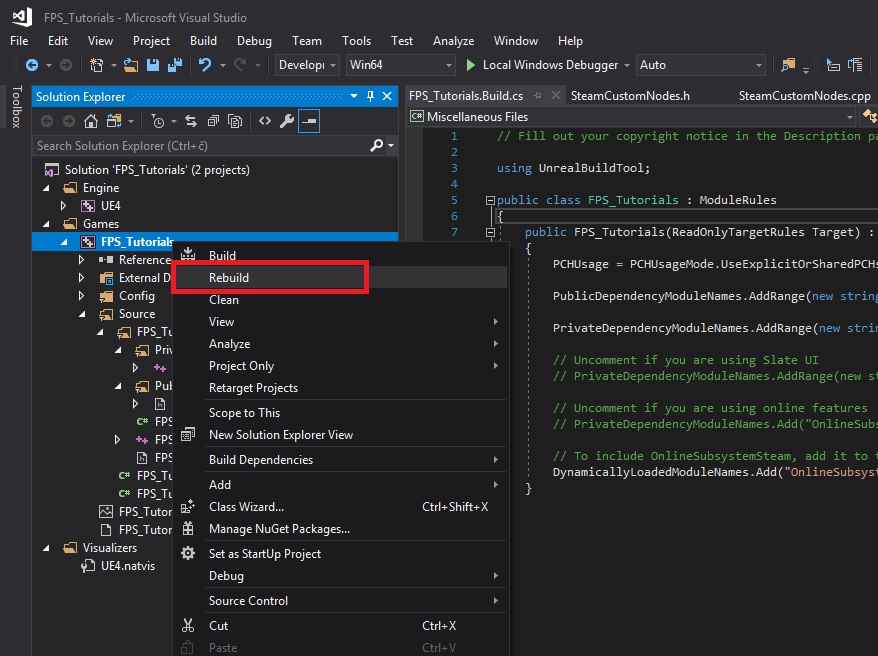
Then from Unreal Editor as well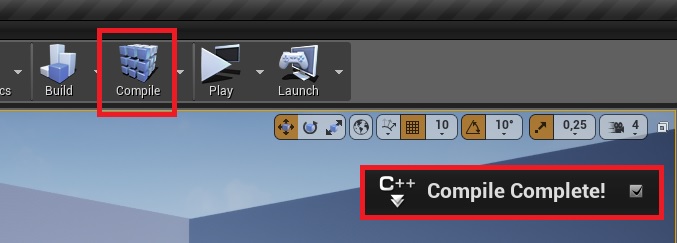
11. Once everything is save and compiled, you can close Visual Studio and UE4 Editor (it needs a restart). You don’t need Visual Studio from this point on, the code has been added to your project, you can use UE4 as before.
12. Finally, you have the new nodes that you can use either from a UMG widget by pressing a button, or making some event (fast travel for example) that can call the check to see if the DLC is owned and installed.
That’s it!
