
This isn’t really a tutorial, it’s more like a compilation of frequently asked questions about the AI in the template.
First let’s get one thing out of the way:
The included AI is meant to be used for prototyping while your actual AI is still in development so that you have something to shoot at. I recommend this playlist from epic if you require more advanced artificial intelligence.
Another fantastic playlist can be found here:
If you create custom AI, the only thing you need in order to integrate it is to make your capsule and mesh collisions look exactly like they are on the included free prototyping enemies, also keep an eye on max health and damage values.
Now the most common questions:
Q: I added the enemy into my level but it doesn’t move at all, why?
A: You didn’t add a NavMeshVolume for it to walk on:

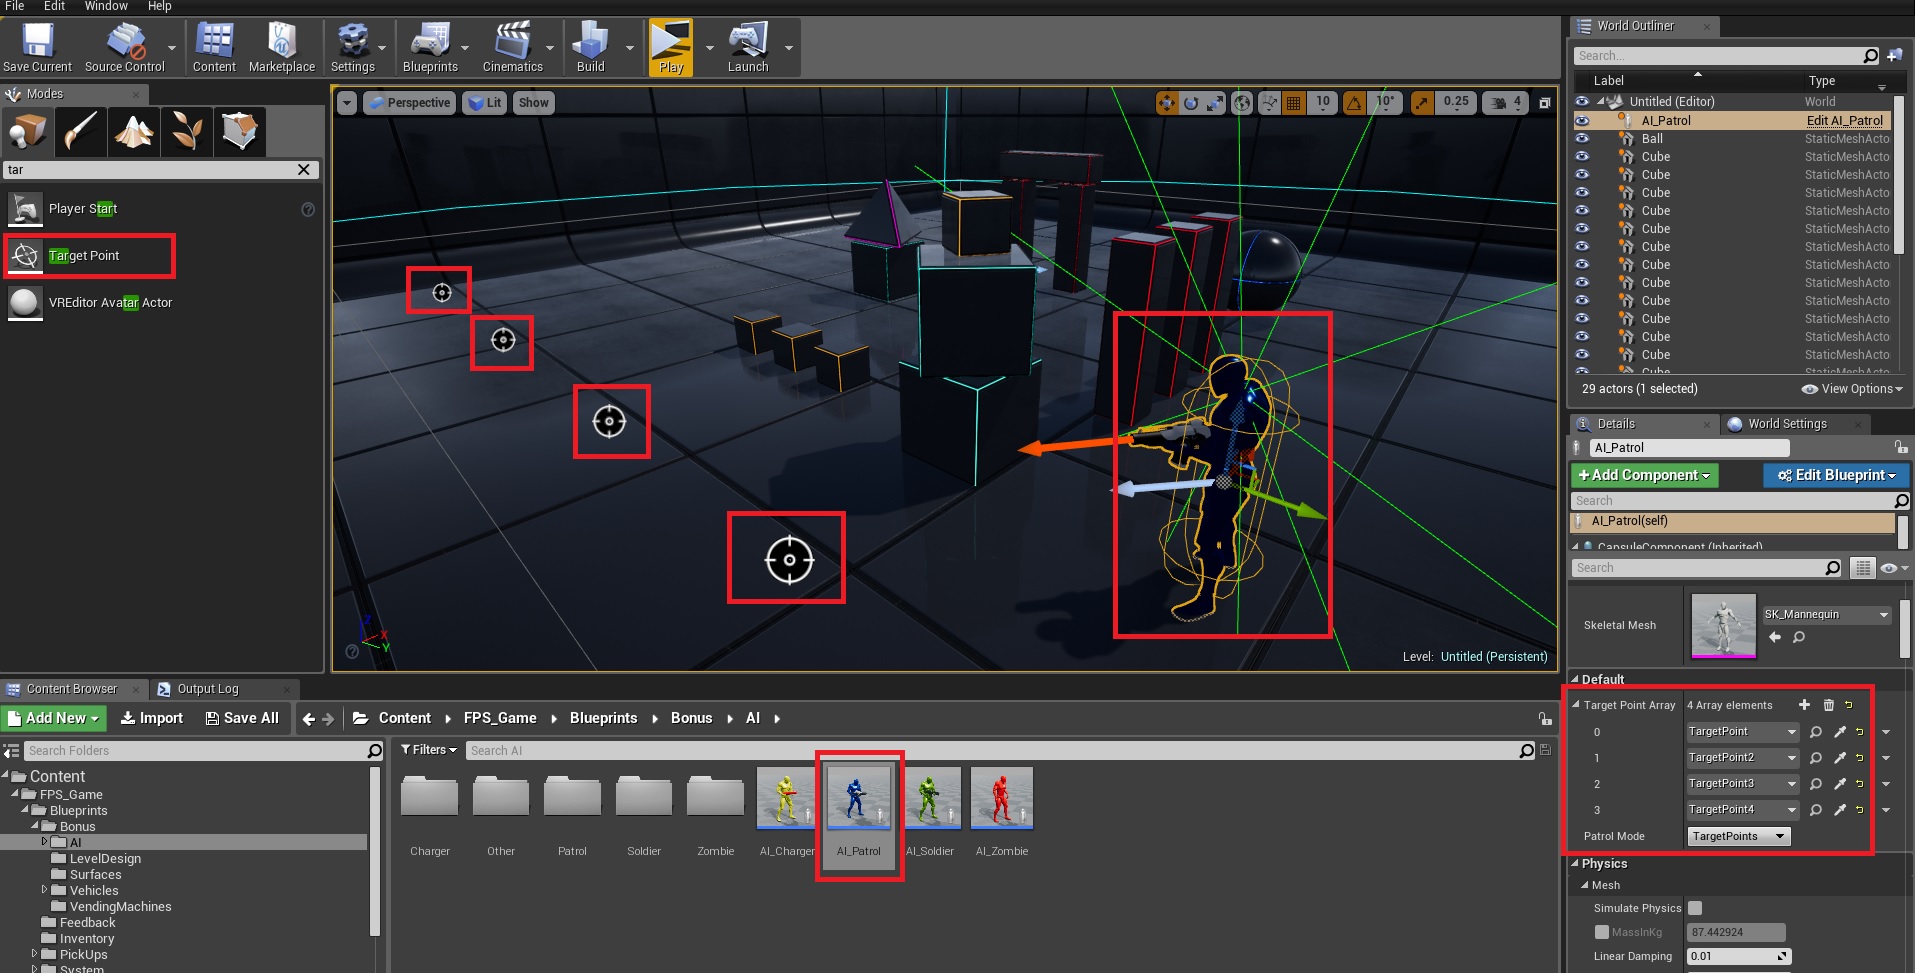
Q: How do I make the patrol example go where I want?
A: Add target points to the level and tell its array what they are:
Q: How do I change the enemy damage?
A: For the soldier and patrol go to their projectile blueprint and change the amount.

A: For the zombie example open its base class blueprint and find the Attack Player event:

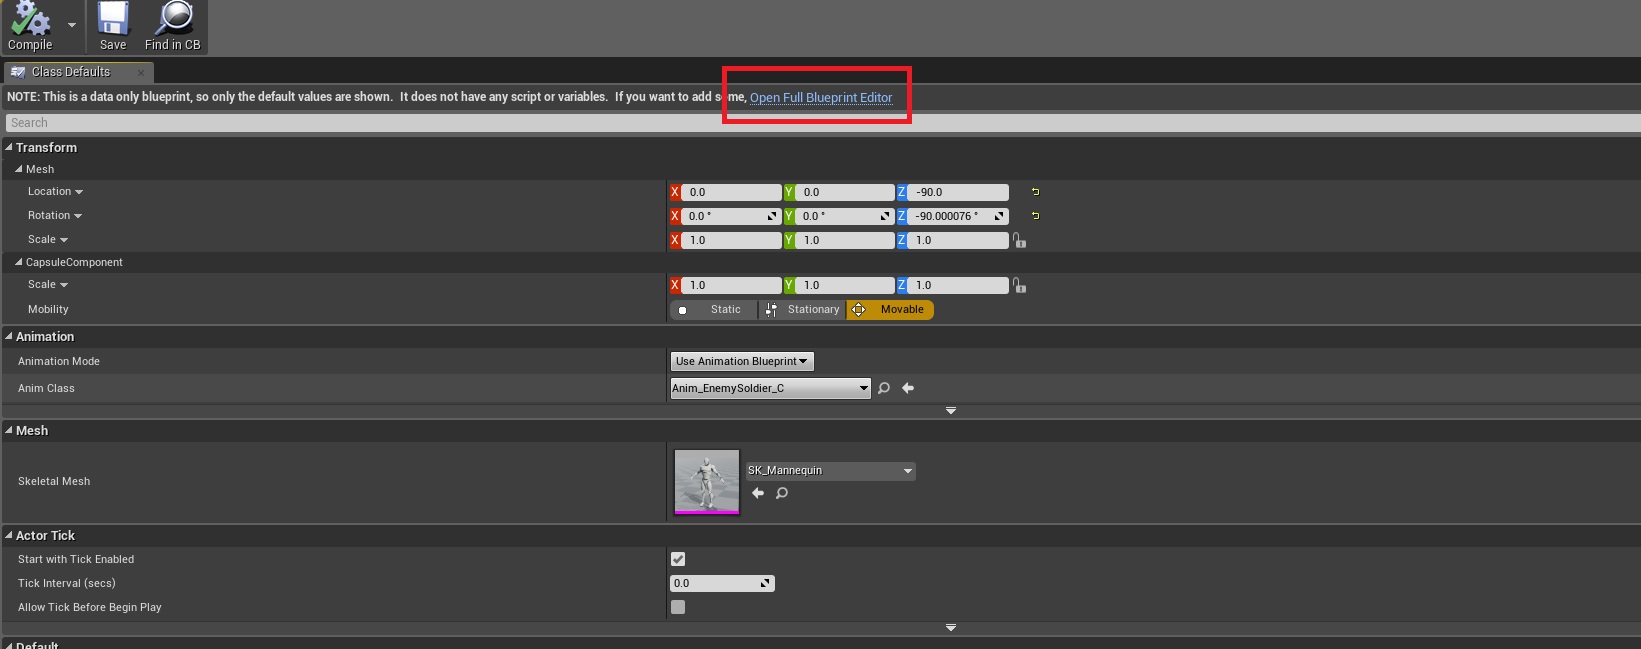
Q: How do I change the enemy weapon?
A: Open the enemy and change the mesh:

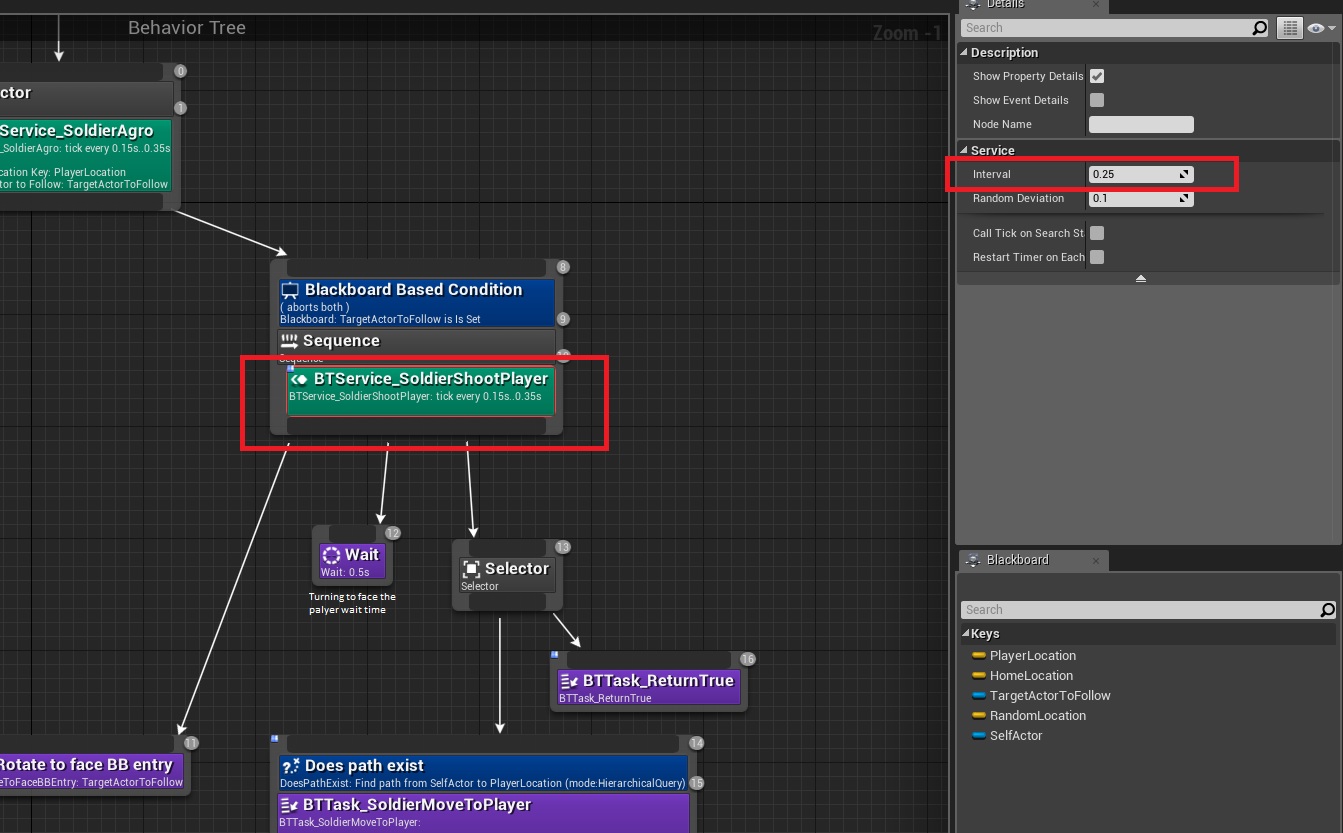
Q: How do I change the firerate?
A: Open the behavior tree and change the interval.
Q: How do I change the zombie speed?
A: In its movement component, set max walk speed (on this same screenshot you can see where the attack animation is placed)

Q: How do I change the enemy mesh?
A: Same as player mesh:
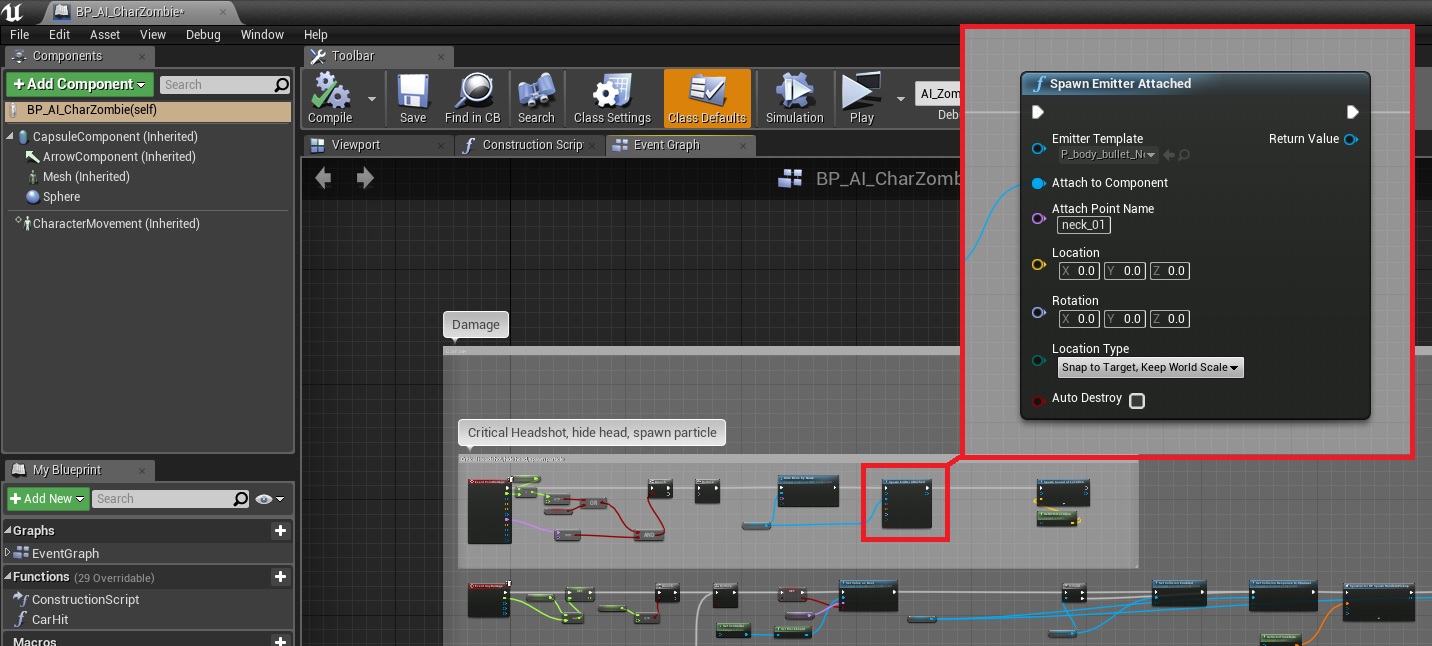
Q: How do I change the blood, increase the blood, decrease the blood, remove the blood?
A: It’s just a particle effect that gets spawned, you can change it inside the enemy blueprint where it says Event Point Damage:
Related tutorial:
How to integrate AI behavior toolkit
