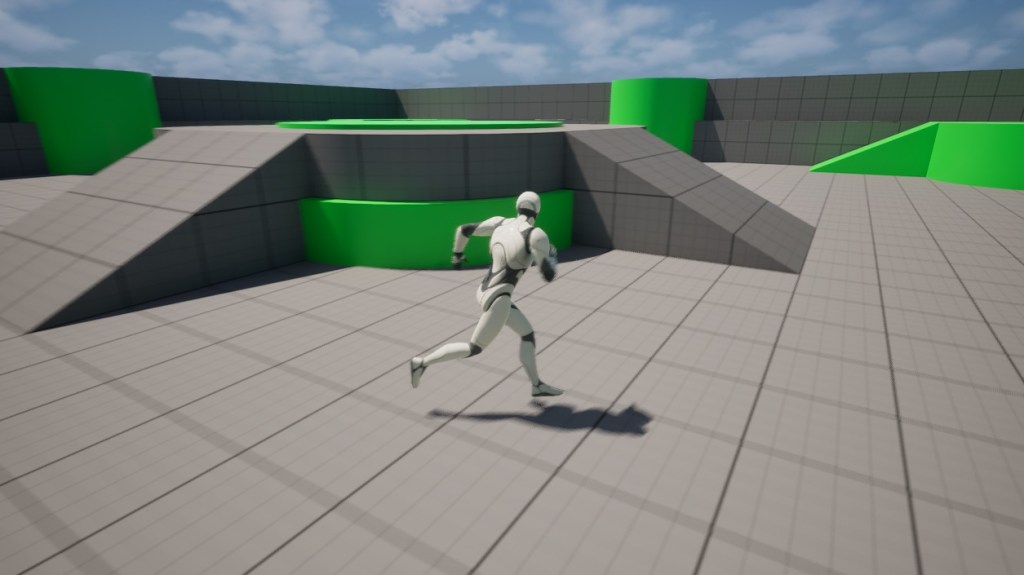
Today we will take a look at UE5 Motion Matching, it’s a new feature that picks an animation based on current character trajectory and other cases. In this tutorial we will use the default 5.7 third person example project.
We’ll also use as little animations as possible, so it will be a basic locomotion explained with 5 animations, instead of a complex one with 900 animations. With that said, you should still check out the sample project from Epic, as it shows other things too, like climbing, warping, etc., this tutorial is just to explain it in a simple manner.
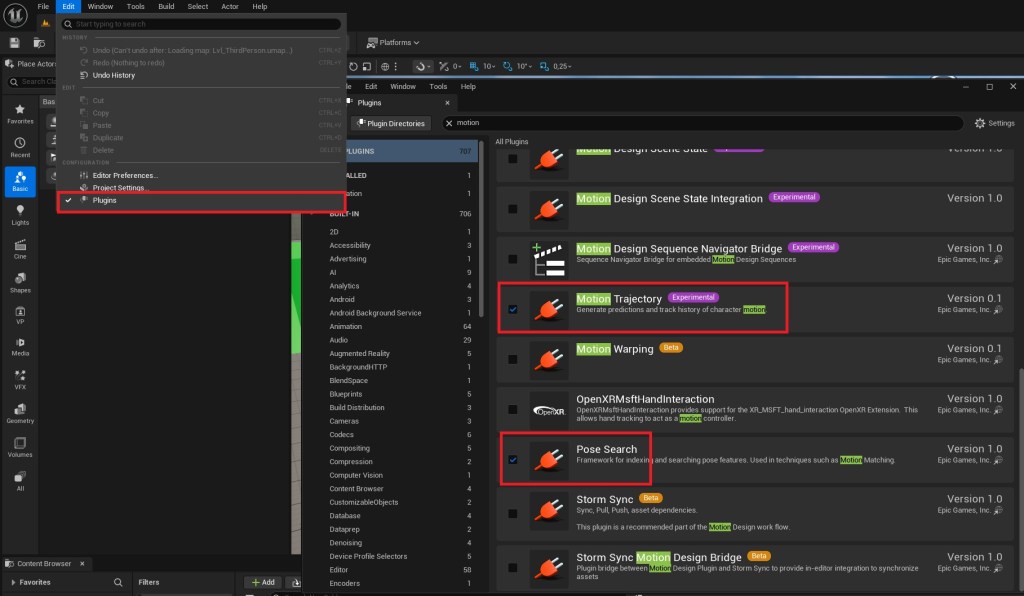
Plugins
1. Once the project is created, go to plugins and enable Motion Trajectory and Pose Search and restart the editor
Motion Matching assets
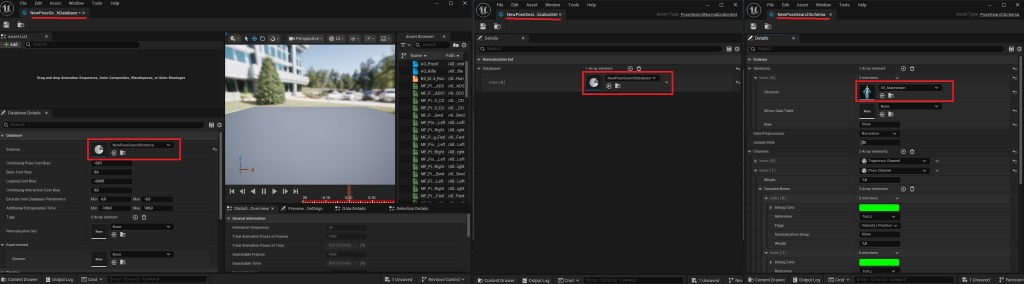
2. Right click in a new folder and create the Schema, Normalization and Database assets in the new animations category
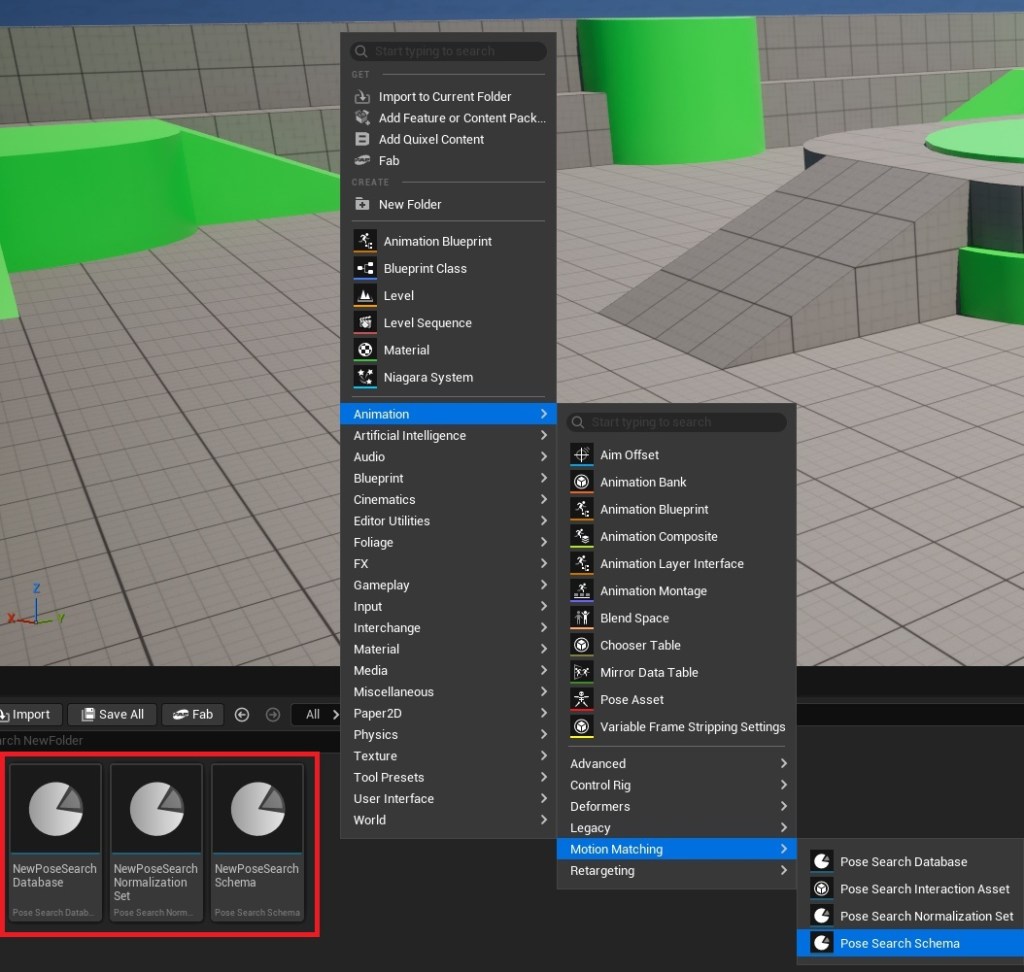
3. Make sure they all use the same skeleton and reference each other
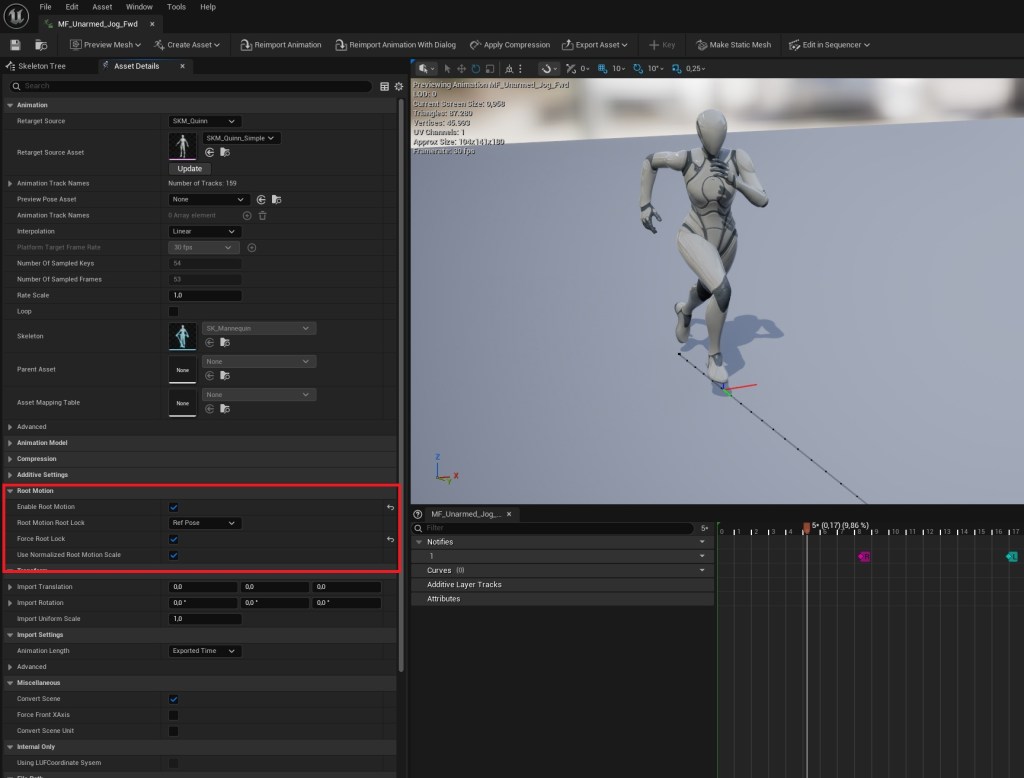
4. In the database asset, add animations for walk forward, backward, left, right and idle

5. If you use different animation packs, make sure they have root motion enabled
Preparing the character blueprint
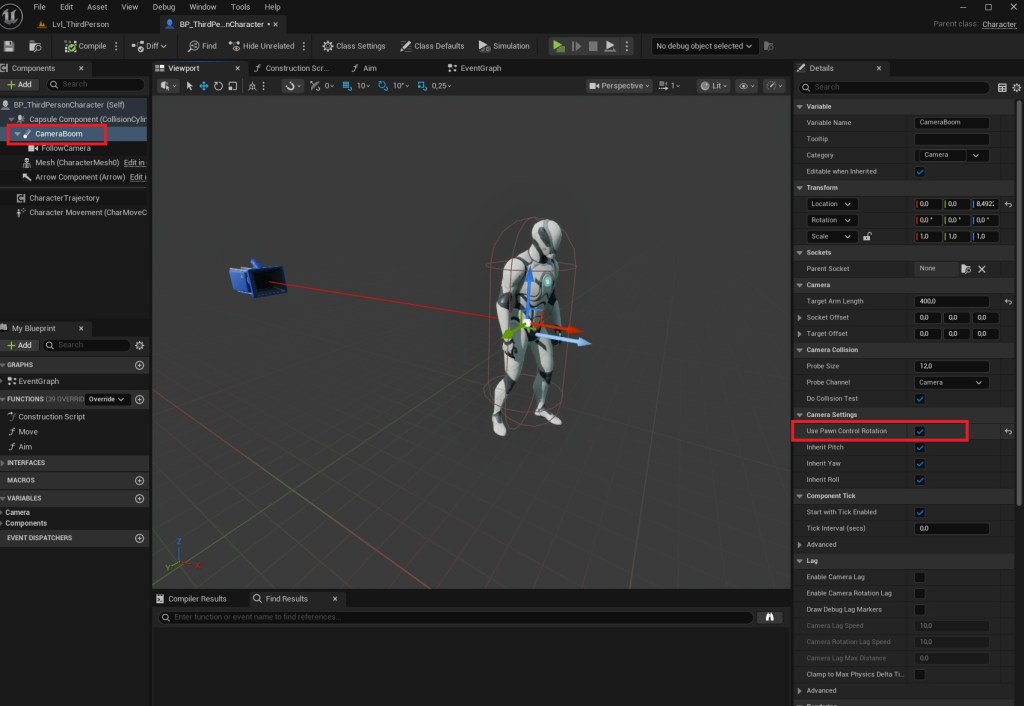
6. Open the character blueprint and add a Trajectory component into it
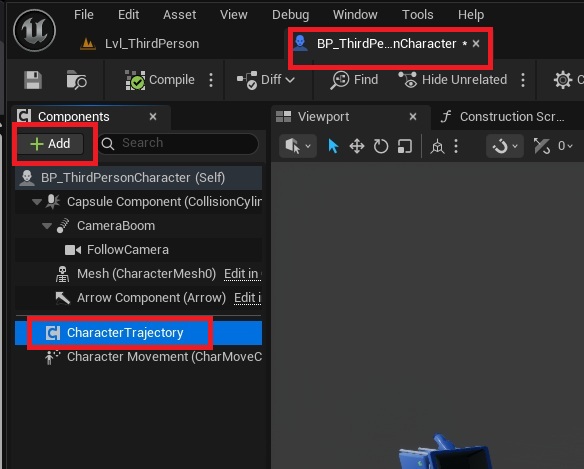
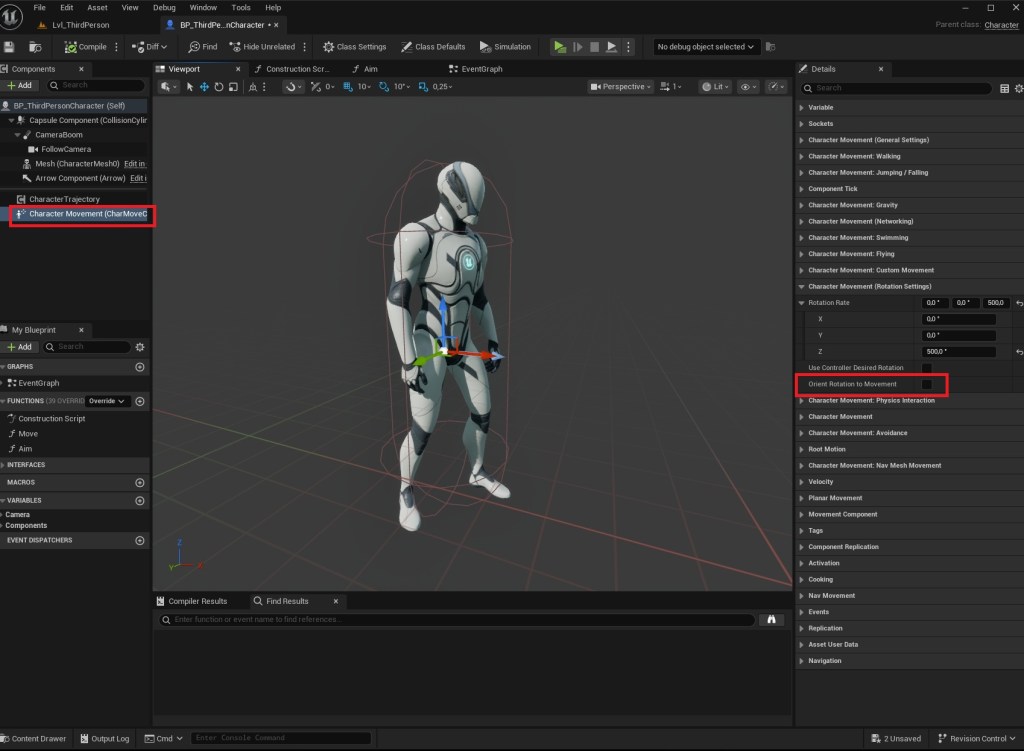
7. Because we used the default third person template project, we need to make few modifications.
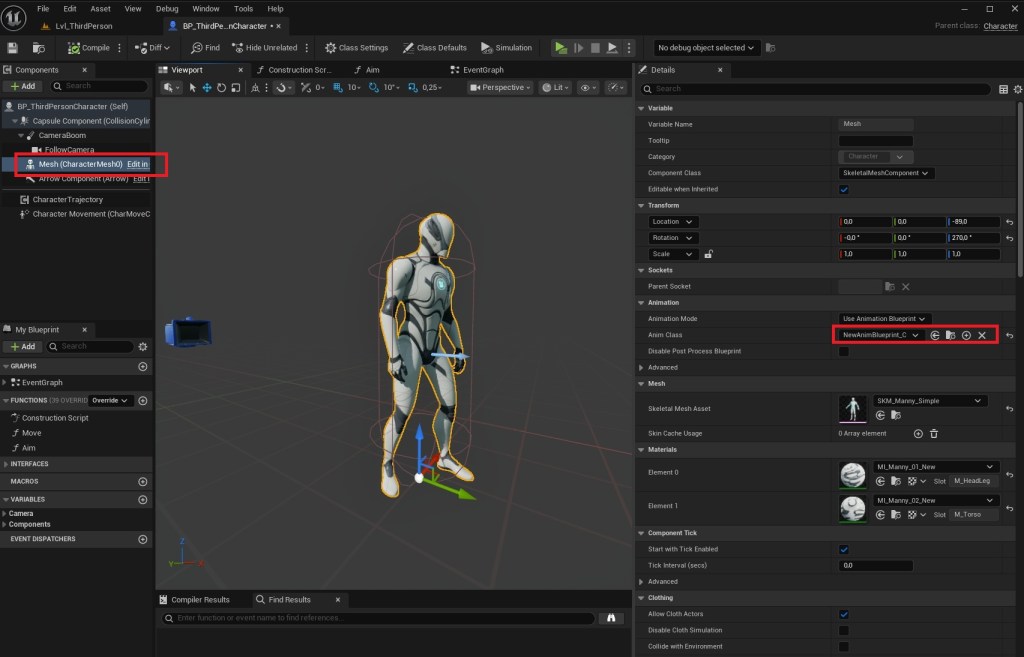

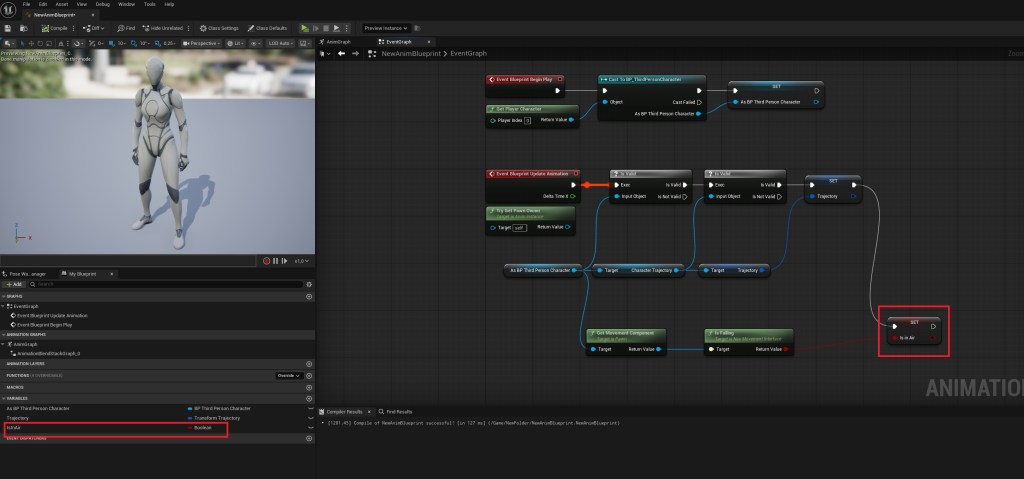
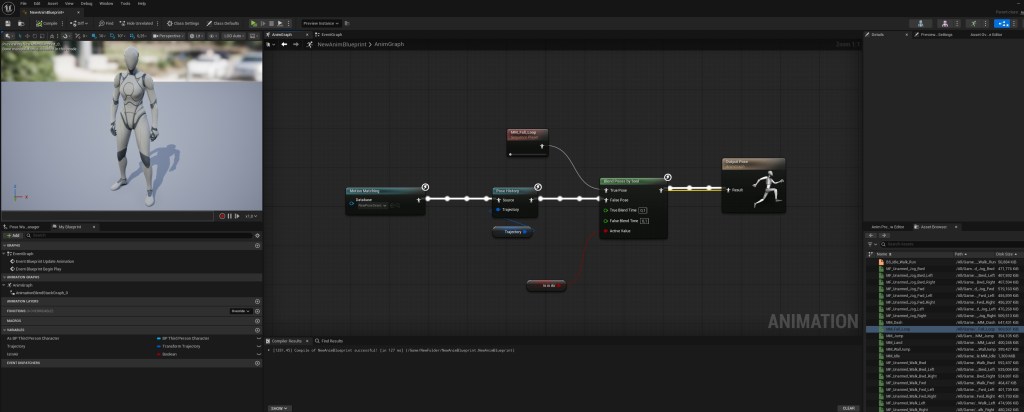
Animation Blueprint
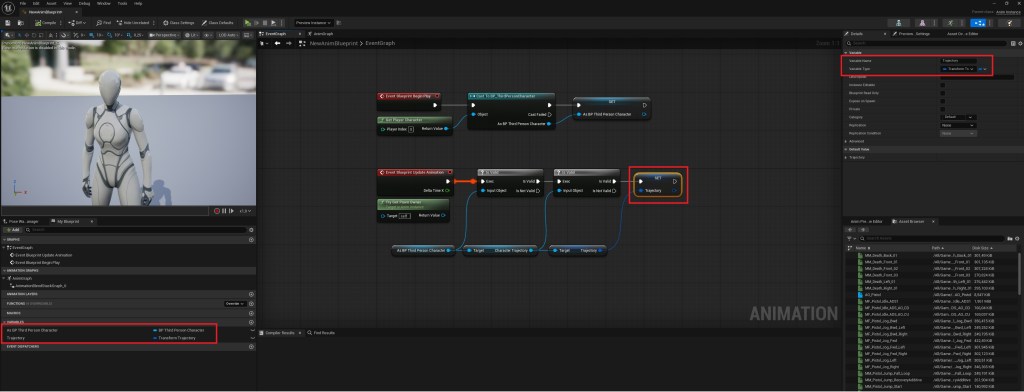
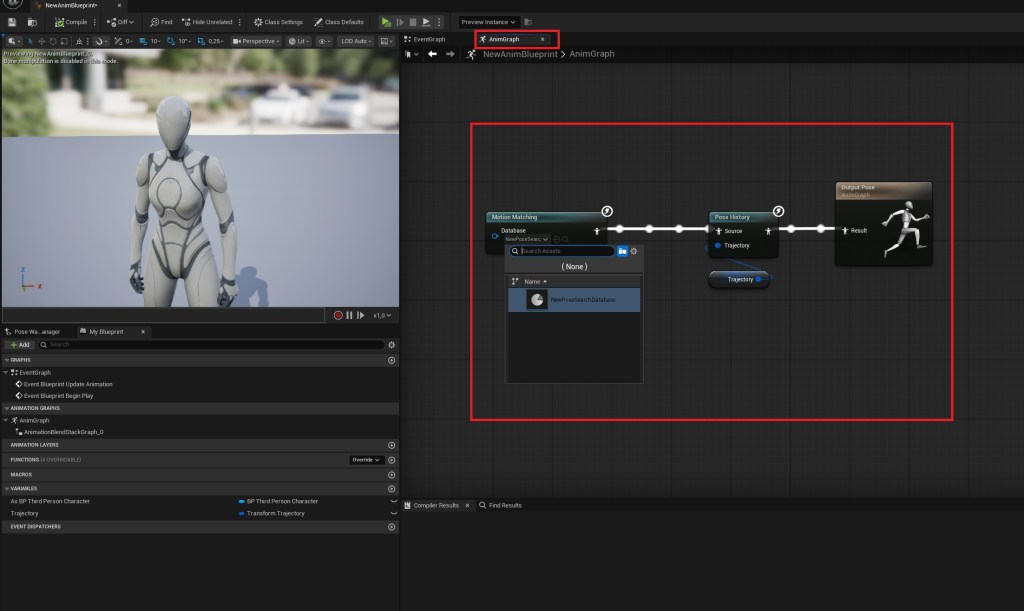
8. Create a new AnimBP and recreate this graph, note the Trajectory variable
That’s it!
..ok, but why does this work, and how?
Basically, the trajectory component that we added to the character is calculating our movement, then based on that, it will select an animation that has its root motion close to the trajectory.
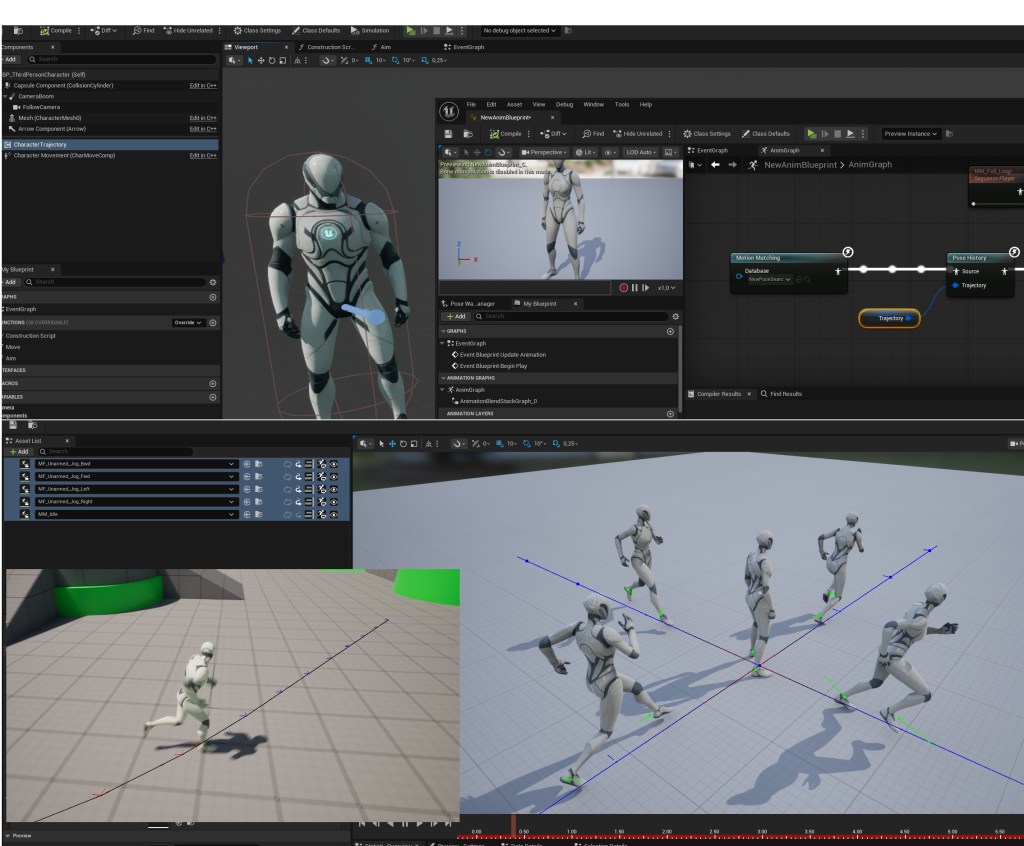
Works because they have root motion enabled, and if the trajectory goes in that direction, it will select that animation to play
Expanding with different situations
For the sake of simplicity, we will add a new bool in the AnimBP and make it play a different animation if the character is in the air, but this can bse used for other switches too (crouch, rifle, pistol, swimming, upper body montages, etc.)